This tutorial will show you a simple way to remove wrinkles in Photoshop which can be a great way to enhance a portrait photograph.
Step # 1 – Zooming in and Selecting the Right Tool
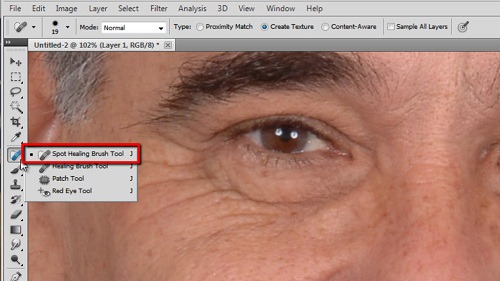
Start Photoshop and open the photo with the subject that you want to remove wrinkles from. This tutorial will focus on the wrinkles around the eyes so zoom in on that area. From the menu on the left select the “Spot Healing Brush Tool”.

Step # 2 – Customizing the Brush
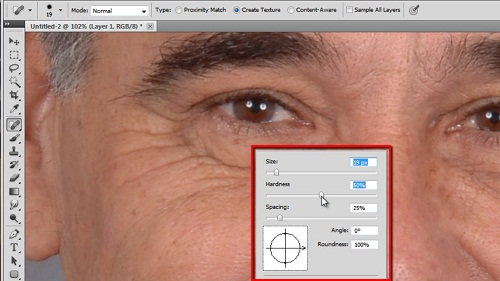
Right click anywhere on the image and select the size of the brush. The size you need will vary depending on the resolution of your image – here a size of 19 pixels works. The brush should be large enough to fit over the wrinkle with a bit of space each side. Drop the hardness of the brush to around 50%.

Step # 3 – Removing the Wrinkles
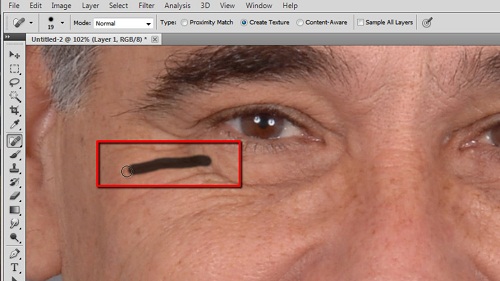
Now, click and hold the brush at the end of a wrinkle and move it over the entire line. Once you release the click at the end of the line the computer will patch over the wrinkle, effectively removing it. Repeat this procedure for all of the lines around the eyes.

Step # 4 – Touching up the Image
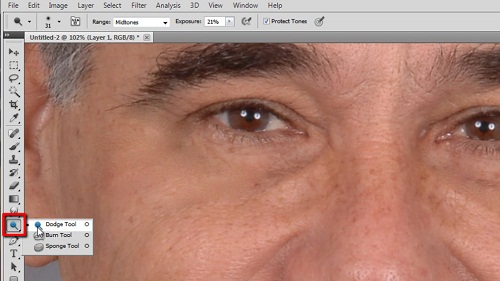
While this does remove the wrinkles you will still be left with some imperfections that look strange without the wrinkles present. To remove these darker patches select the dodge tool from the tools and adjust its size to something around the size of the imperfections. Lower the exposure to around 20%. Zoom out slightly then click and drag over the dark areas to remove them – do this until the picture looks just right. That is essentially how to remove wrinkles in Photoshop.

 Home
Home