Adobe After Effects gives you a long chain of formats to save your output in. This is important so that you get the most compatible extension that really fits well with your media. Since it is a compositing tool, it also produces frame to frame animation formats such as PNG, PSD, TIFF sequences which are applicable for storyboarding. But before you get to choose a format for your output, it’s important to know how to render in After Effects.
In this tutorial, we will guide you on how to render in After Effects CS6.
Step # 1 – Add to Render Queue Option
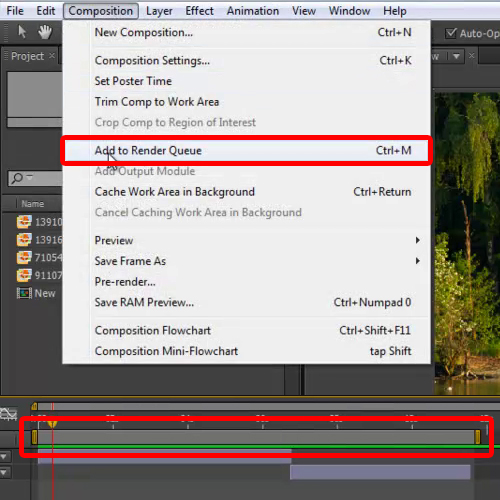
In order to render in after effects, start with trimming the working area till the end of the composition. Now, you can see the total duration of composition. Once done, go to the composition tab and select the “add to render queue” option.
Step # 2 – Best Settings Option
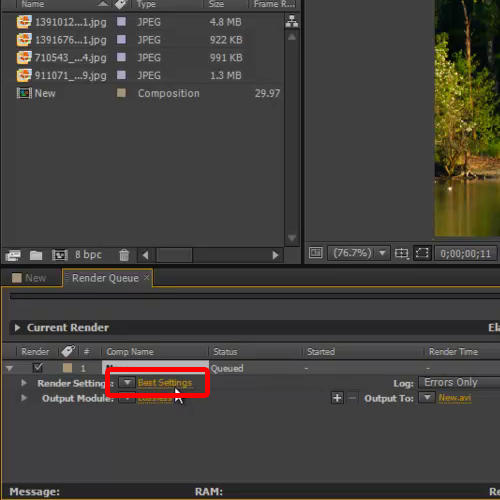
A new tab will be added next to the “new” composition tab. In order to have the best compatible formats, click at the “best settings” option next to the render settings menu.
Step # 3 – Adjust the Render Settings
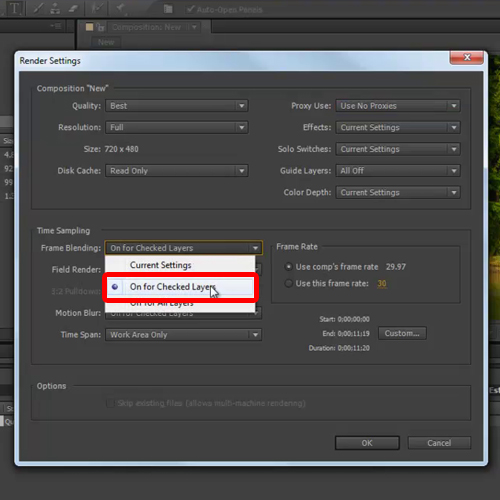
Once the render settings window appears, set the quality to best, resolution to full and disk cache to read. Change these settings to proceed further with our render procedure in After Effects.
Select “on for checked layers” from the frame blending menu and leave the rest of the options as they are.
Step # 4 – Adjust Output Module Settings
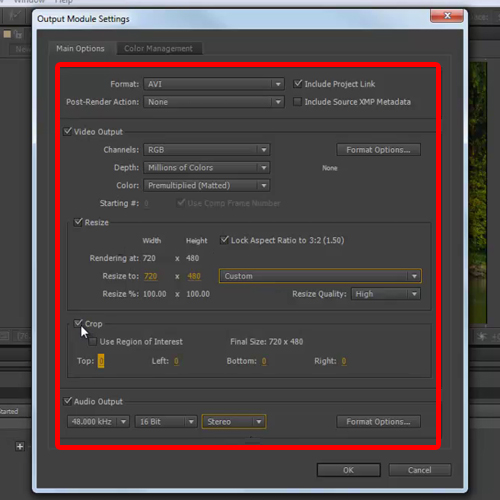
With that done, click on Ok. Move to the output module and click on lossless next to it.
Expand the format menu and select the format which is compatible with your playback device.
Now move to the format option where you can select the video codec in order to compress the video. For this tutorial, we won’t be selecting any video codec as we don’t want to compromise on the quality of the output.
You can also resize the dimensions of the video by manually arranging them or using the given presets.
The crop option can help you to remove unwanted area from the frame while the audio output settings give you the opportunity to customize its frequency.
Step # 5– Change settings for Color Management
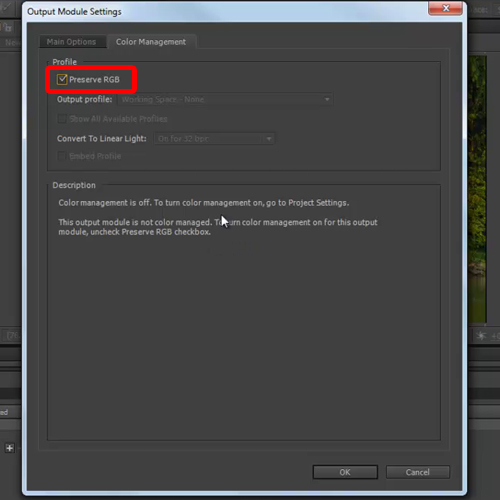
Move to the color management tab and tick on the checkbox titled “Preserve RGB”. This is if you want your video to be seen as de-saturated. Uncheck the option f you want the output in color. Review the settings again and click on ok.
Step # 6 – Render Composition
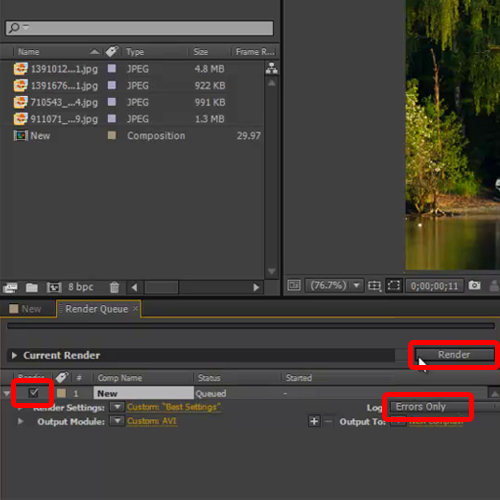
Click to the new.avi option next to the output to option and select the path where you want your output to be saved.
Select the errors only from the logs menu. This will give you an idea if the rendering was unsuccessful.
Tick on the checkbox next to the new comp option from the render queue tab and then click on the “render” button towards the right hand side of the screen. You will see that the composition has started to render.
 Home
Home