In this tutorial we will guide you how to replace sky on video in Adobe After Effects.
The free stock footage we will be working on for this tutorial can be downloaded from the following link.
• http://www.cutestockfootage.com/stock-video/boat-at-the-beach-7924.html
You can see that the footage has a clear blue sky. Now what if we wanted to add some clouds to this shot?
For that, we will basically combine the shot with an image of clouds. You can download the free stock image from the following link.
• http://www.sxc.hu/photo/801677
So let’s get started with replacing the sky in the footage.
Step 1 – Masking out the Sky
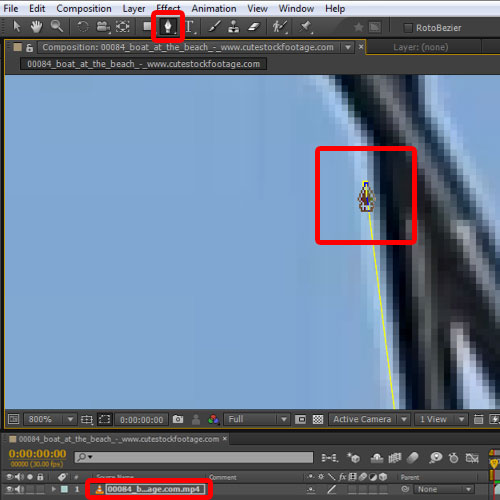
First of all, you will need to move to the toolbar on top and select the pen tool. Basically you need this tool to mask out the sky from the footage.
Make sure that the video layer is selected, and now you can draw a path of the sky using the pen tool. Be careful while drawing a path around the boat. You would want to exclude each and every part of the boat since you only need to replace the sky on video.
Step 2 – Working with multiple masks
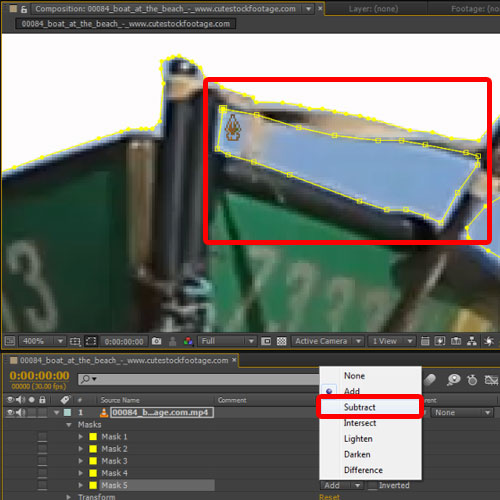
You can even work with multiple masks. For example, in the image below notice that a bit of the background sky is showing. The pen tool automatically adds a mask to the layer so all you have to do is draw over the footage, and it will add a mask on the layer following that exact path.
Make sure that all the mask properties are set to subtract. You can do that from the layer menu. By choosing the subtract option, you are now able to make the layer behind the video layer visible in the path drawn. Right now it will show a blank white color for the path that you have created. That’s because there’s nothing in the background.
Step 3 – Bringing the image in the composition
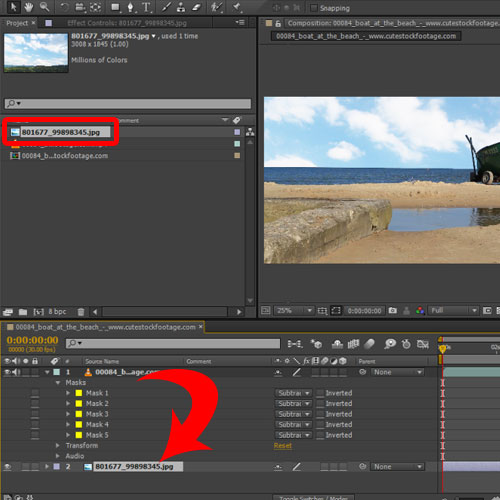
Over here we will add the image of the clouds. So let’s move to the library and drag the clouds image and move it below the video layer. And now you can see that the clouds image is only showing in the path that we have drawn.
Step 4 – Configuring the Image layer
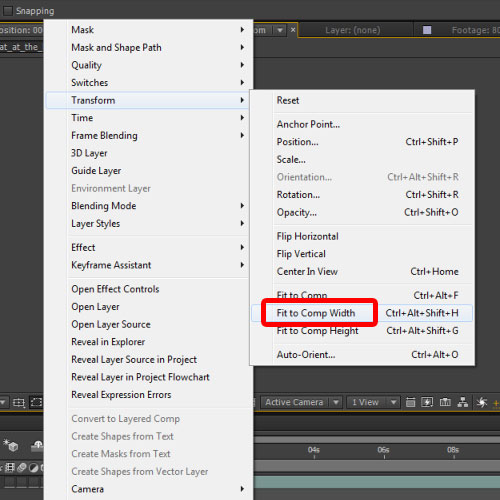
Let’s configure the image a bit to better suit the footage. Here, we will right click on the image, move over to Transform and choose the “Fit to composition width” option. This will resize the image automatically according to the width of the composition.
Step 5 – Changing the position of the image
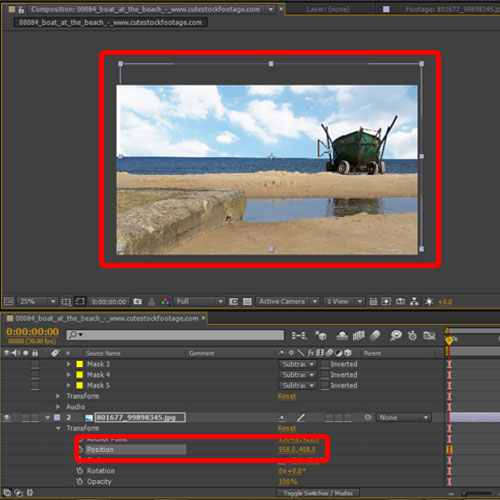
You can even change the position of the image by simply dragging it on the canvas, like so. Or you can even expand the layer menu, open up the transform options and change the position using these values over here. As you change the values, you can check out the output in real time. Play around with the position of the image and see what looks better.
Now you can render the sequence and check out the output. And that’s basically how you can replace sky on video in Adobe After Effects.
 Home
Home