This Photoshop tutorial will be focusing on the workspace in this software. It will teach you how to work with customize it and what tools it consists of. This panel is shown in the top right hand side of the application bar. It is the easiest and the quickest way to change the layout of the tools and panels in Photoshop according to the task you are performing.
What Adobe Photoshop has done is that they have made a few workspace presets for its users to work on. Each preset adjusts the panel layouts so you have quicker and easier access to the tools used for that particular task.
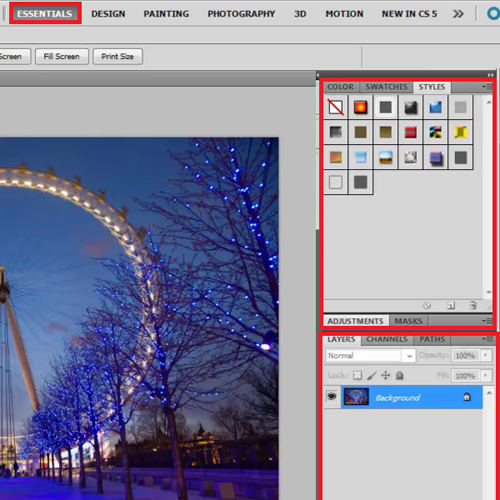
Step # 1 – Select the “Essentials” tab
This preset shows the most widely used tools and panels in Photoshop including the navigation, swatches and layer panels.
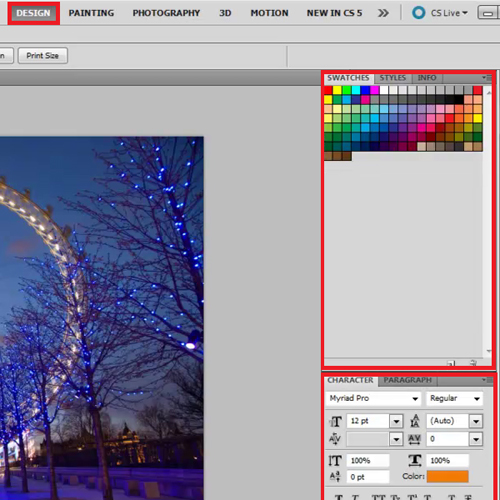
Step # 2 – Go to the “Design” tab
The “Design” preset gives you the tools and panels most commonly used by designers. For example the character, paragraph panel for formatting text and the swatches panel.
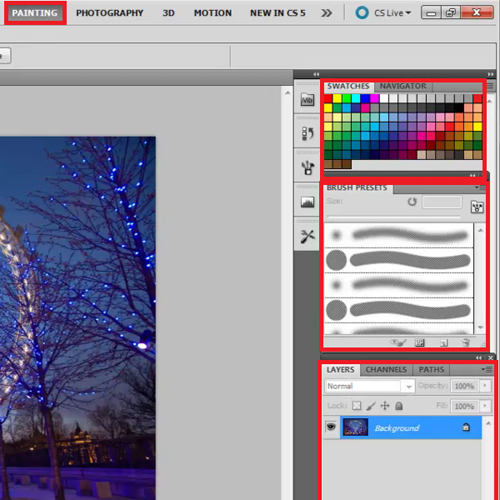
Step # 3 – Open the “Painting” preset
Once the”Paint” tab is selected, it brings out the painting tools and panels like the paint brush, swatches, navigator and the brush panels.
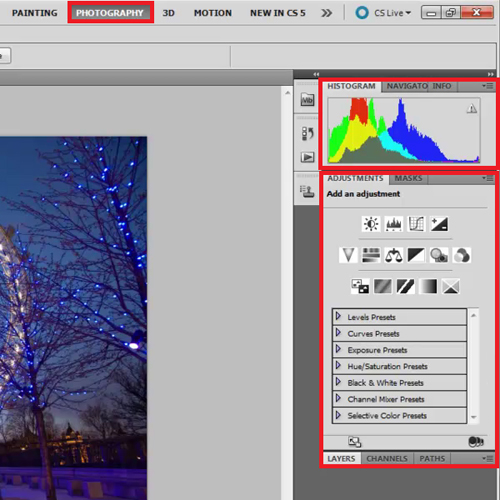
Step # 4 – Select “Photography”
This preset displays the typical photography tools and panels which are required while editing photographs. These include histogram and the adjustments panels which are needed for the easier application of changes to photographs.
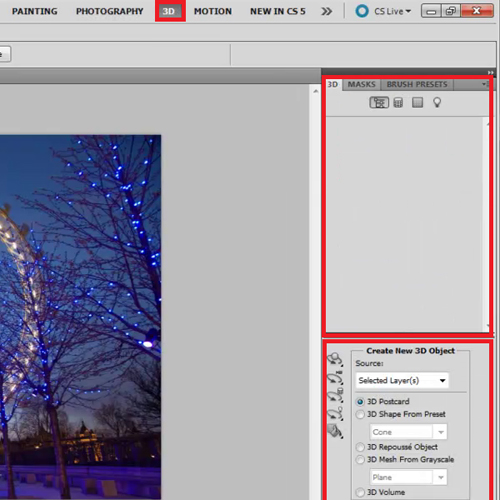
Step # 5 – Select the “3D” tab
This tab shows the 3D layers and mask panels that are used extensively while working on 3-dimensional artwork. This preset will only show in the extended version of Photoshop.
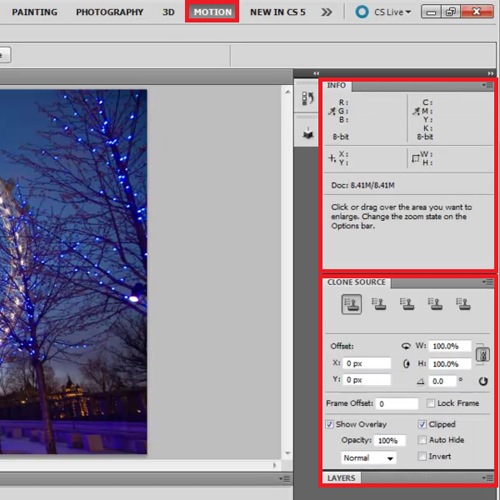
Step # 6 – Open the “Motion” preset
This particular preset displays the clone source panel and the animation panel which is commonly used in animation.
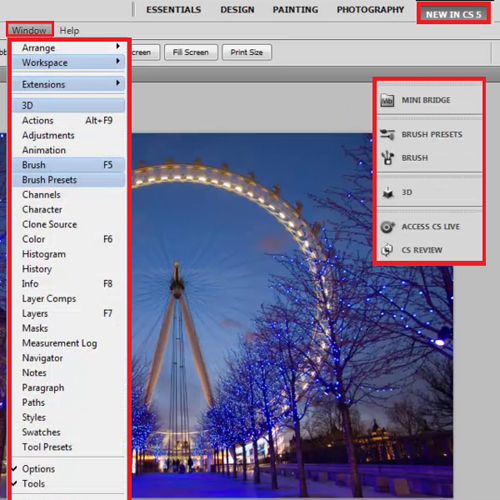
Step # 7 – Open the “New In CS5” options
This is the most important panel as it shows the new features present in CS5 which are the paragraph and character panels, the Mini Bridge panel, paint brush and the new 3D tools.
Step # 8 – Save your workspace
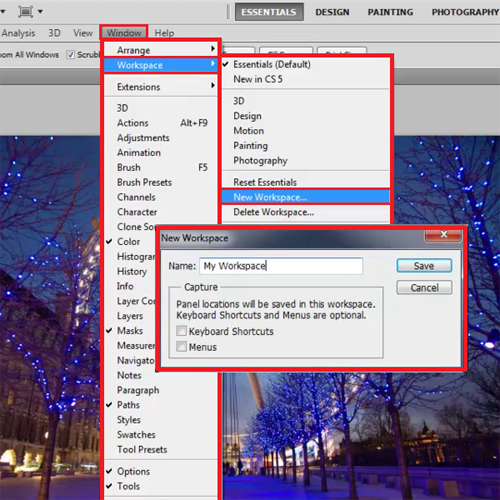
This Photoshop tutorial will also explain how to save and delete the workspaces you customize. While working on a workspace you may move around the tools and panels, Photoshop remembers this and shows the exact arrangement every time you open that workspace.
If you are comfortable with the workspace you created then you can save it. For that go to the “Window menu”, drop down to “Workspace” and click on “New Workspace”. Name it and press “Save”. You can even reset the essentials from here as well by pressing the “Reset Essentials” option.
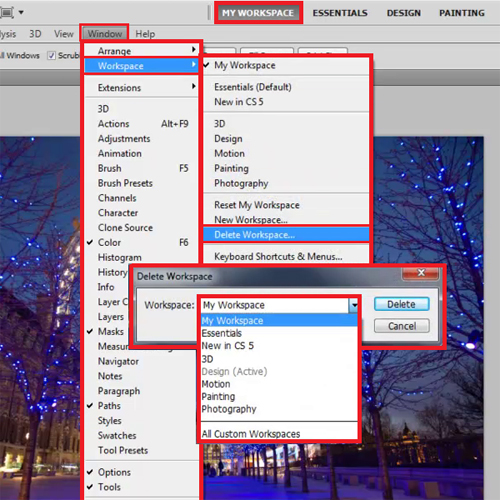
Step # 9 – Delete a workspace
Creating multiple workspaces gives you the ease to work on something efficiently as it saves up your time moving around those particular tools and panels according to your needs. You can keep on creating and deleting different workspaces as your need be.
To delete any workspace, go on the “Window” menu again, drop down to “Workspace” and click on the “Delete Workspace” option. A dialogue box appears asking you which workspace needs to be deleted. Choose the workspace you want to remove and press “Delete”.
 Home
Home