In this tutorial you are going to learn how to scan picture directly to Photoshop. Doing so can allow to fix any imperfections in our image such as a water spot, or tear on the original picture itself, or even to do some basic color correction.
Step # 1 – Insert Picture into Scanner & Open Photoshop
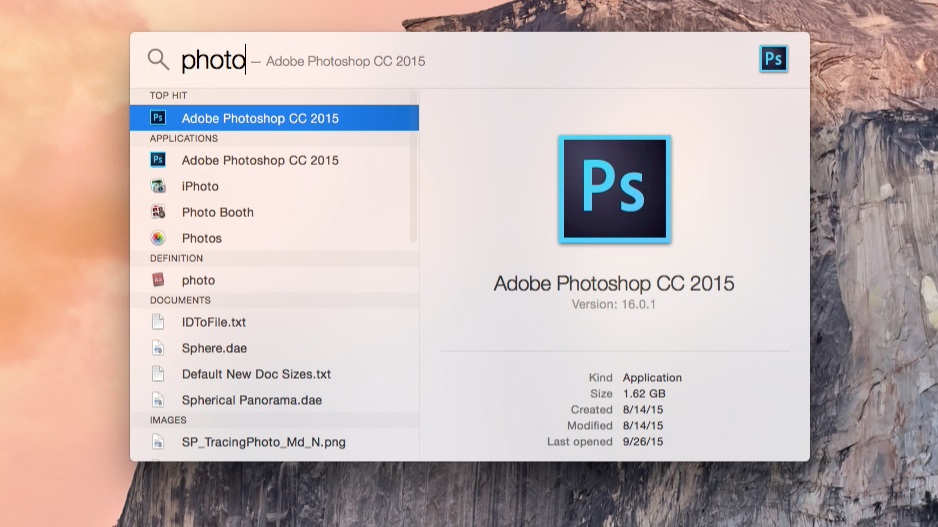
Make sure your picture is in the scanner and ready for Photoshop to identify it. Then open Photoshop.

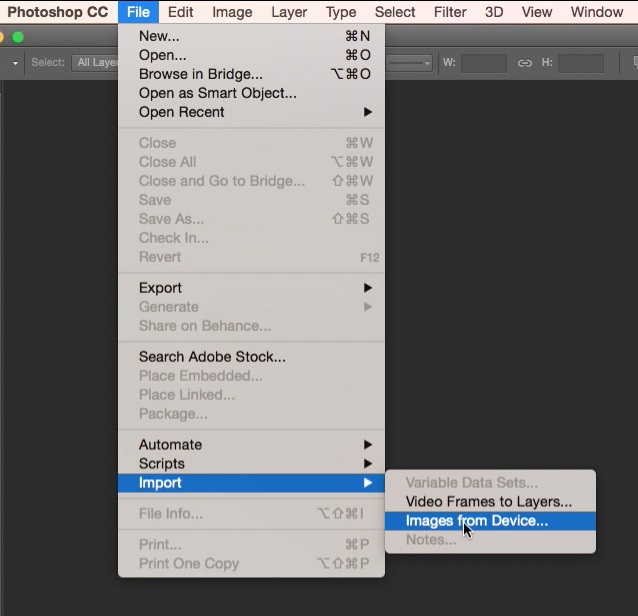
Step # 2 – File – Import – Images from Device
Next, we are going to tell Photoshop where to import our scanned image from. Go to file – import – images from device. If you are working with Windows, your option will show as “WIA Support”.

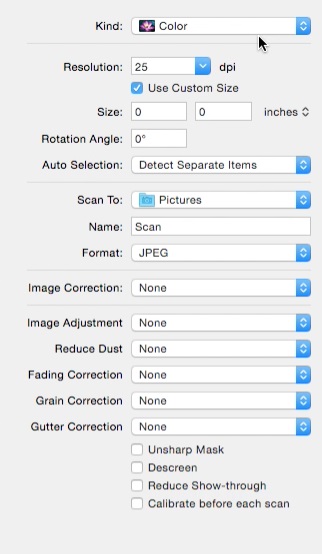
Step # 3 – Custom Import Settings
A screen will then appear showing your images. You have a variety of settings to tweak to best fit your situation. You can change the kind of image such as color or grayscale, alter the resolution, choose an output destination as well as choose the desired format.

For example, if you are looking to have some room to zoom in on the image and see the fine details more clearly, you will want to raise the import resolution to something higher such as 240. A lower resolution such as 50 would work just fine for uploading to Facebook.
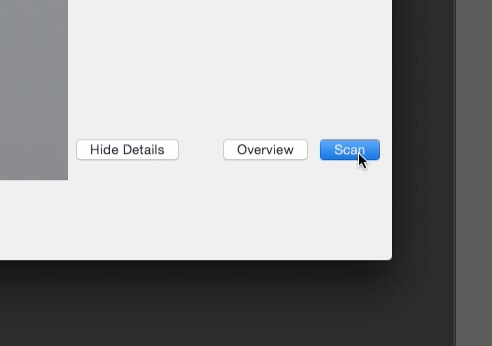
Step # 4 – Click “Scan”
Click Scan in the bottom right corner and Photoshop will begin scanning your photo. A new window will then pop up, with the photo as it’s own layer, ready to be edited.

You have now successfully learned how to scan a picture directly into Photoshop.

 Home
Home