Learning how to set 300 dpi in photoshop is a useful skill as this is a good resolution for sending to a standard ink jet printer.
Step # 1 – Creating a New Image
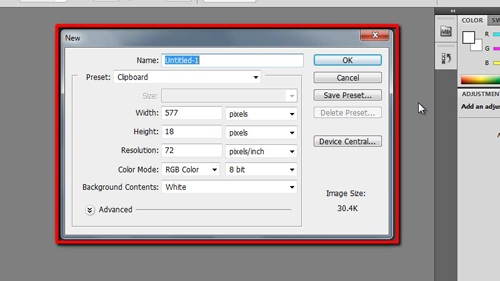
First, open Photoshop. In the menu click the “File” button and then click “New…”. This will open the window that allows you to enter the specifications for a new image.

Step # 2 – Creating a Blank 300 dpi Canvas
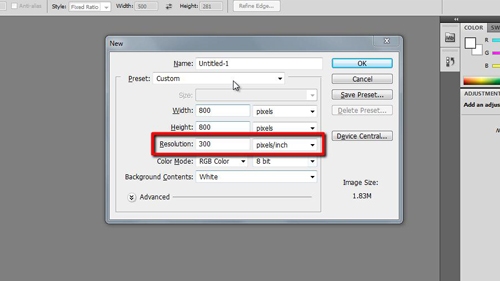
In this box you can choose the width and height of your image, but what we are interested in here is the “Resolution” window. There are two windows, one of the left which contains a numerical value, here “72” and a drop down box on the right which reads “pixels/inch”. “pixels/inch” means the same thing as dpi. Enter “300” into the box on the left and click “OK”. This is how to set 300 dpi in photoshop and a blank image will open to those specifications.

Step # 3 – Setting 300 dpi on an Existing Photograph
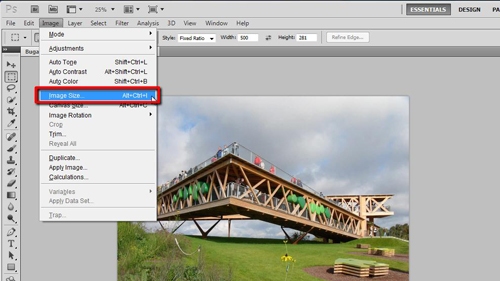
To set 300 dpi on a photograph, open the image in Photoshop. Click on the “Image” option in the main toolbar, in the menu that appears click on the “Image Size” option. This will open a window allowing you to adjust the settings of the image.

Step # 4 – Changing the DPI
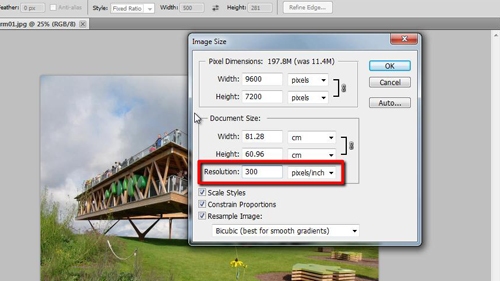
In this box go to the “Resolution” fields. In the left hand box type “300” and make sure the right box is set to “pixels/inch”. Click “OK”. The window will close and the image will now have been set successfully to 300 dpi.

 Home
Home