In this video tutorial we will show you how to use camera tool in After Effects.
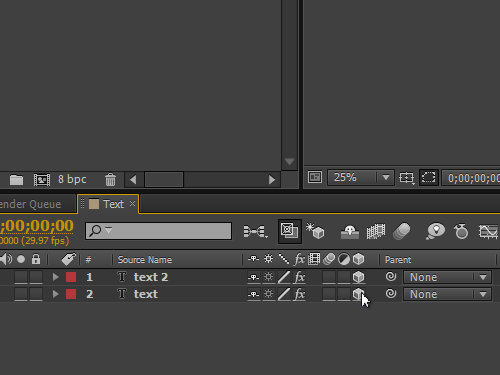
Open an After Effects project. Click on the empty boxes under the “3D layer” icon in the layers palette to enable 3D mode for the composition layers.
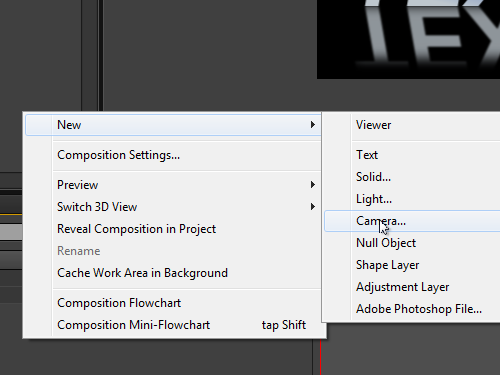
Right click on the empty space of the composition window and select the “New” option from the popup menu.
Click on the “Camera” option in the submenu.

In the appeared window, set the camera settings and click “OK”. Click on the triangle icon to open the camera options submenu and click on the triangle icon again to open the “Transform” menu. Click on the watch icon next to “Point of Interest” and “Position” menu items to set a keyframe of the camera motion on the timeline. Change the time indicator position and click on the “Camera Tool” icon from the toolbar.
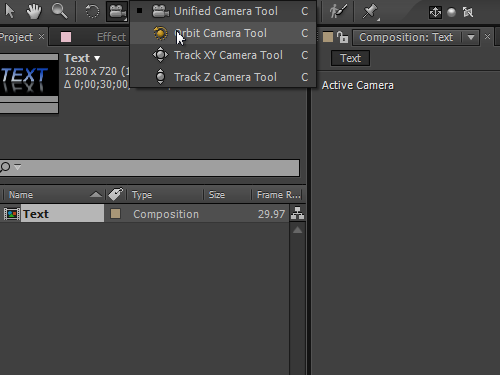
Select the “Orbit Camera Tool” from the drop-down menu.
Rotate the object in the composition preview window to set the position of another keyframe. Set the time indicator at the start of the composition and rotate the object again to create a final keyframe. Click on the “RAM preview” button in the “Preview” tab to check the composition in real time.
Choose the “Track Z Camera Tool” from the toolbar to change the position of the object along the Z axis.
Click on the “RAM preview” button in the “Preview” tab to track changes in real time. Open the “3D View Popup” menu and select “Top” to change the display mode of the camera.

Switch to the “Selection Tool” and adjust the trajectory of the camera in the frame. Set the time indicator at the start of the composition and switch to the “Active Camera” mode. Click on the “RAM preview” button in the “Prewiew” tab to check the composition in real time. Now you are familiar with the camera tool in After Effects.
 Home
Home