In this video tutorial we will show you how to create a wiggle effect in After Effects.
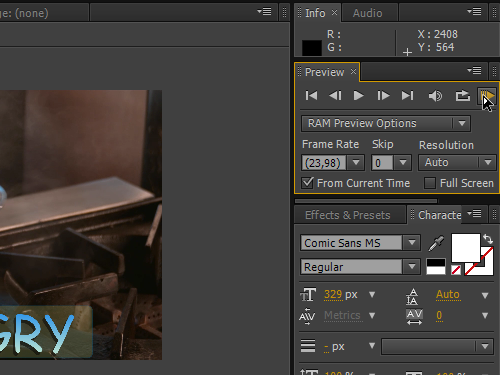
Create a composition. Then click “RAM Preview” in the “Preview” tab to check the project. Go to the track options window and select the “Transform” tab. Click on the “Position” tab while holding the “Alt” key on the keyboard. This will open a field on the timeline. Type the effect name and set the effect values in the brackets.
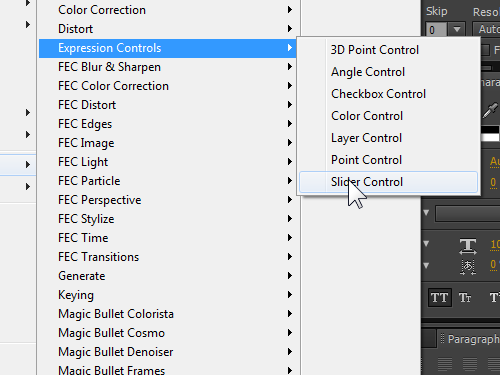
The first value is a number of effect recurrences per second. The second value indicates the movement rate in pixels. Then go to the “Preview” tab, click on “RAM Preview” and check the result. As you can see, the wiggle effect was applied to the whole composition. If you need to apply this effect only to selected frames, you need to use “Slider Control” option. Go to the timeline, right click on the track and select the “Effect” option from the popup menu. Then choose the “Expression Controls” and select the “Slider Control” option.

Set the effect value in the field on the timeline. Press the “Expression pick whip” in the track options and move the “Slider” in the composition window while holding the left mouse button.
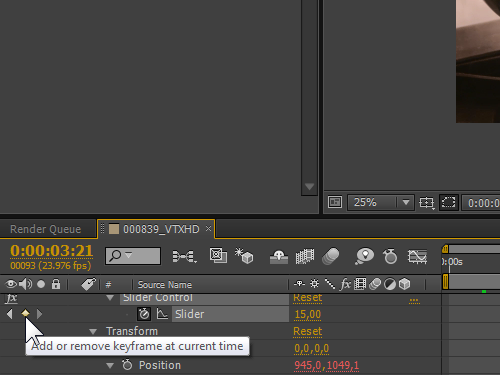
Go to the “Preview” tab and click on “RAM Preview” to see the result. You can’t see the results because the value is set to zero. Go to the “Slider Control” in the track options window and press the “Watch” icon near the “Slider” to create a first keyframe. Move the time indicator and type the value of the wiggle effect in the track options to create a second keyframe.
Then move the time indicator again and duplicate the keyframe with the same value.

Finally, create a fourth keyframe and set the value back to zero. Go to the “Preview” tab and click on the “RAM Preview” to check the result.

As you can see, wiggle effect has been successfully applied to the area between two keyframes.
 Home
Home