In this video tutorial we will show you how to use After Effects for stop motion animation.
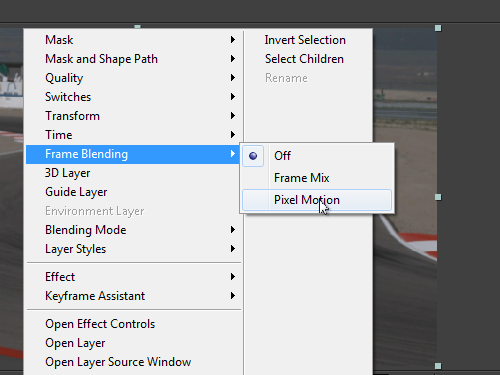
Launch the Adobe After Effects. Switch to the “Project” tab and double click in the “Project” window to import files into the project. In the appeared dialog box, select the file you want to edit and check the “PNG Sequence” box. In the “Project” window, move the selected file on the “New composition” icon to create a new composition. Right click on the time line and select the “Pixel Motion” option from the “Frame Blending” submenu.

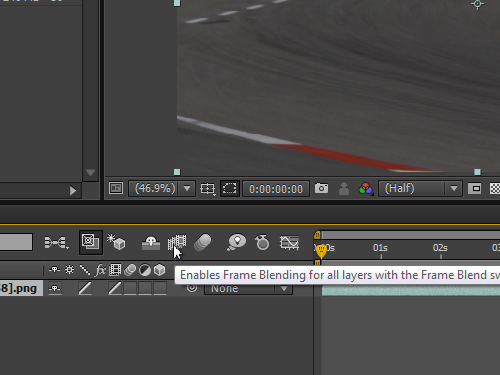
Click on the “Enable Frame Blending” icon, to activate the blending function in the composition.

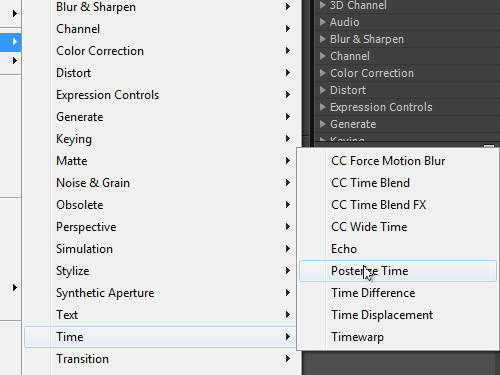
Right click on the timeline, choose “Effect” and select the “Posterize Time” option from the “Time” submenu.

Go to the “Effects Control” window and change the frame rate value. Click the “RAM Preview” button in the “Preview” tab to see the final result. Now the stop motion effect has been successfully applied to the composition.
 Home
Home