In this video tutorial we will show you how to use Photoshop quick mask.
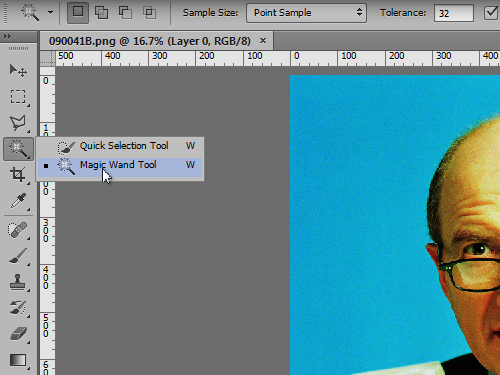
Launch the Adobe Photoshop. Go to the “File” menu and click “Open”. In the appeared dialog box select the image file you want to edit and press the “Open” button. Click on the “Magic Wand Tool” toolbar icon.

Then click on the image area to make a selection.
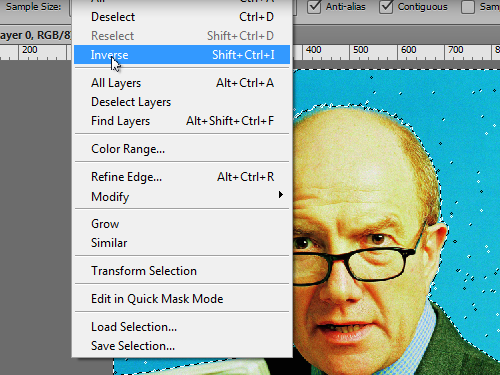
Go to the “Select” menu and click on “Inverse” option to invert the selection.

Click on the “Edit in Quick Mask Mode” toolbar icon to create a quick mask. Click on the “Brush Tool” icon.

Then set the brush size in the “Brush Tool” attributes panel and remove all of the artifacts with the help of the brush tool. When you are done, click on the “Edit in Quick Mask Mode” icon to apply the changes.
 Home
Home