How to use the Illustrator gradient color tool is Adobe Illustrator is fairly simple. This tool provides you with the option of adding a gradient fill in illustrator to your art work. Through this you can add a blend of colors to your drawing. It is also very simple to change the gradient fill of any object you seem to be working on. Illustrator gradient color can also be used to give a 3-D effect to your image with just varying colors inside it.
Step # 1 – Add color to the vector shape
To use these tools make sure you have a vector image, one that you made yourself or a template that you might have downloaded.
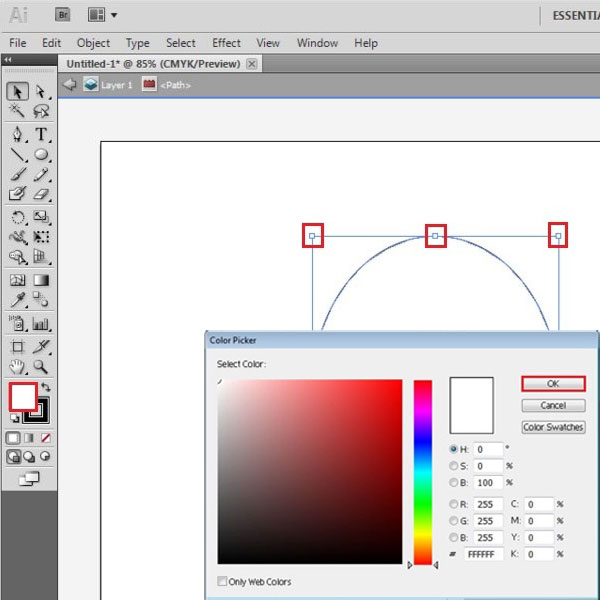
In this tutorial, there is a circle made using the “shape” tool. When you click on this image, you will see various anchor points. These show that this circle is a vector image, which allows you to use the “color” and the “gradient” tool.
Go to the color box available at the bottom of your tool bar which is present on the left hand side of the page. To select the color option, double click the color box which gives you various options to choose from. Select the one you like. Click the “ok” button to apply the color. Since the circle is one object, it will get filled entirely with your selected color.
Step # 2 – Add gradient to the shape
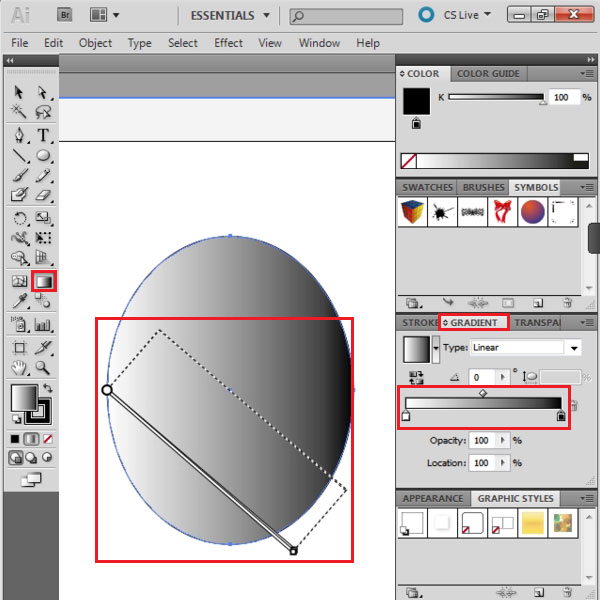
You can now add gradient to the circle as well. First of all, let us add gradient in grayscale and then you can change it to color. To add gradient to the illustration, select the “Gradient Tool” and click with it on the panel you wish to gradient fill. You will see that a scale emerges. You can use it to vary and adjust your gradient settings. These settings can also be adjusted from the gradient settings panel available on the right hand side. Press the gradient tab and you can adjust the settings from the bar by moving the sliders.
You can play with the tone of the illustration according to your requirement. Move around the gradient slider to see where in the image you want to put which tone.
You can even rotate the gradient bar to rotate the gradient itself.
Step # 3 – Change the tone of the gradient
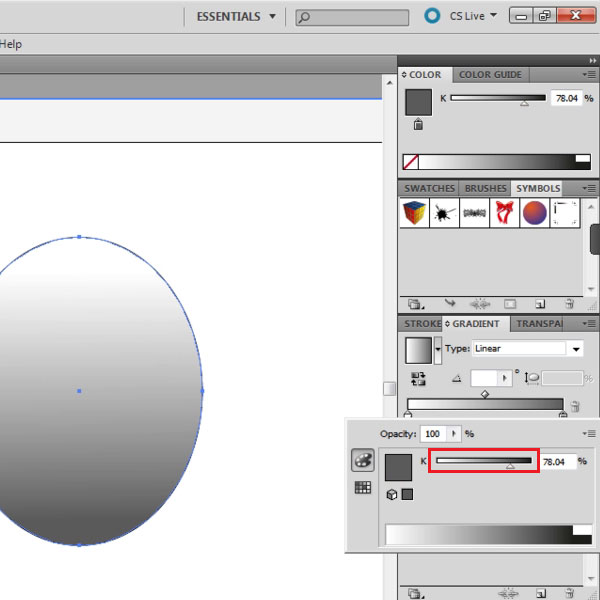
To give the image a 3D effect, you can make the darker tone a little lighter. In order to do this, make these tones merge together. This can be done by double clicking on the slider and choosing a lighter tone.
Step # 4 – Select the different gradient styles
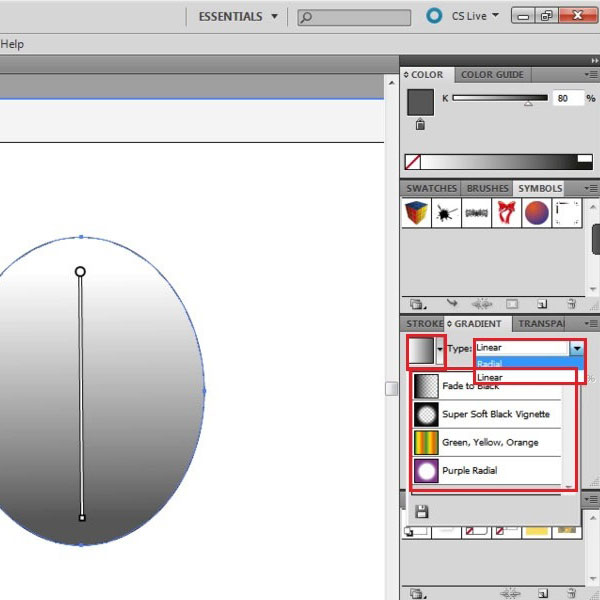
In the gradient panel available on the right hand side, you can even choose the type of gradients you want. There are four options you can choose from. You can choose any one of them to give your image various effects. There are further options in the other drop down menu. You can select if you want a linear or a radial gradient.
You can always undo if you wish to bring the gradient back to its original state.
Step # 5 – Choose the gradient color
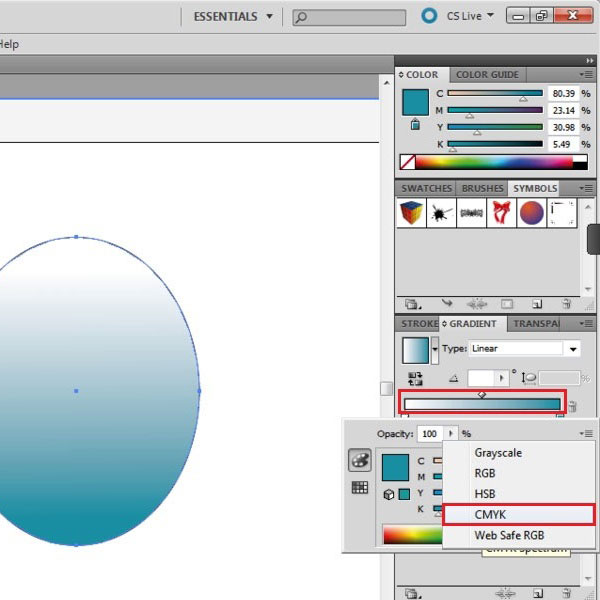
To change this panel from grayscale to color, click on the gradient slider as shown. Press the drop down arrows and select the color scale that you want. In this tutorial, we will work with “CMYK”. Now choose the color that you want. A 3D effect can also be given in the color to make the circle appear like a sphere. In order to do this, double click the gradient slider on the extreme right and choose a darker shade for its color. Then add another slider by clicking on the bar. Choose a lighter tint for this slider in the same color. Keep the color white on the left slider. You can add as many sliders with different colors as you want.
 Home
Home