In this tutorial, we will be showing you how to use the ‘Liquify’ filter to edit an image in Photoshop. We will be working on two different images to show what the ‘Forward Warp Tool’ in the ‘Liquify’ filter is capable of doing.
This is one way of how an image in Photoshop can be edited in CS6.
Step # 1-Analyzie the problem
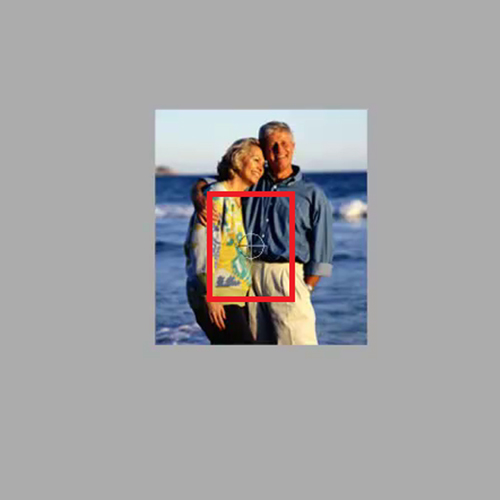
The first image is of a middle-aged couple. What we will be doing in this image is that we will try to flatten the woman’s stomach a bit.

Step # 2-Select “Liquify” option
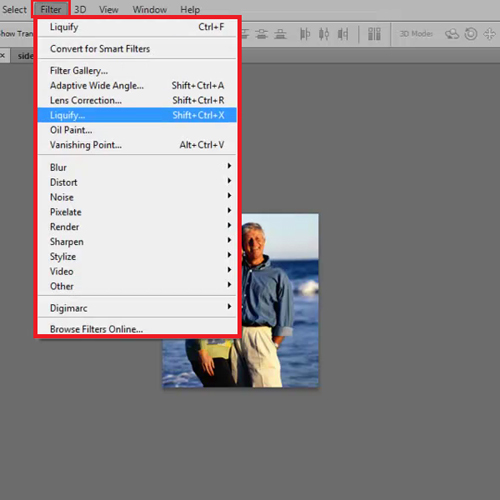
To perform this action, go to the ‘Filter’ menu present at the top and then select the ‘Liquify Filter’.
Step # 3-Use the ‘Forward Warp Tool’
Now make the brush size a little smaller by pressing the ‘[‘ key and drag the edges of the brush inside the woman’s stomach. Through this way, flatten the whole stomach.
Step # 4-Analyzie the problem
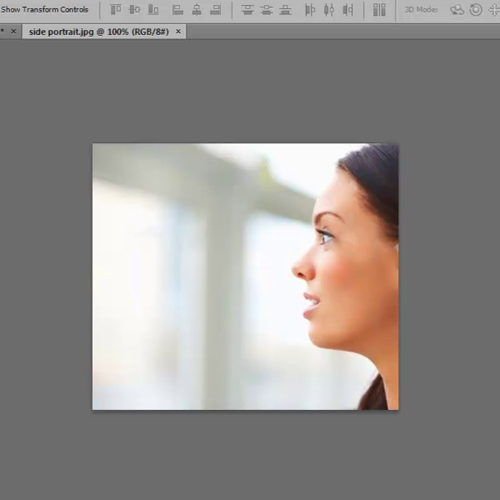
The other image we will work on is a woman’s side portrait. What we want to achieve is to fix her forehead, chin and neck.
Step # 5-Duplicate the layer
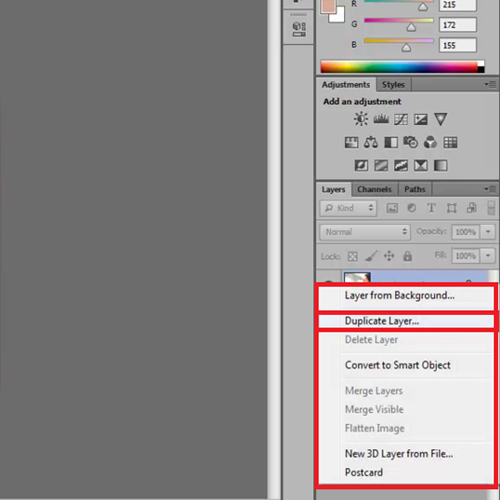
Copy the background layer of your image in Photoshop by right clicking on it and pressing the “Duplicate Layer” option.
Step # 6-Use the Liquify filter
Then select the ‘Liquify filter’ and repeat the same procedure here that is drag the edges of the brush towards the inside on the neck and jaw.
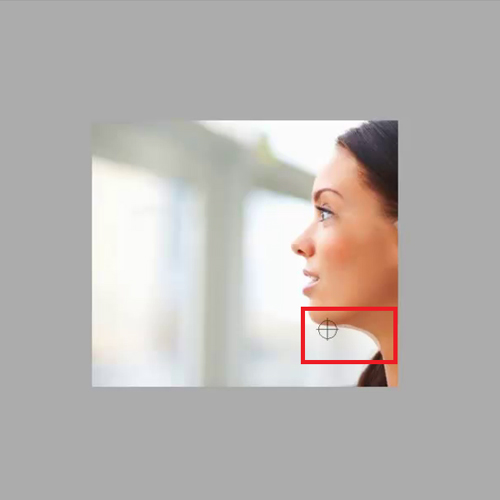
Step # 7-Edit the forehead
Once you are done with that, go towards the forehead and this time drag the edge towards the outside. This adds forehead to that area.
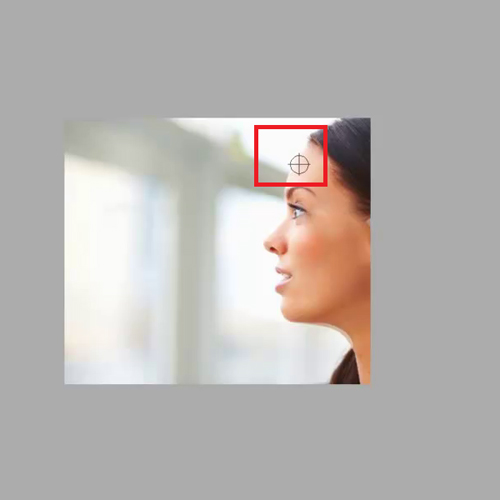
Step # 8-Comape the pictures
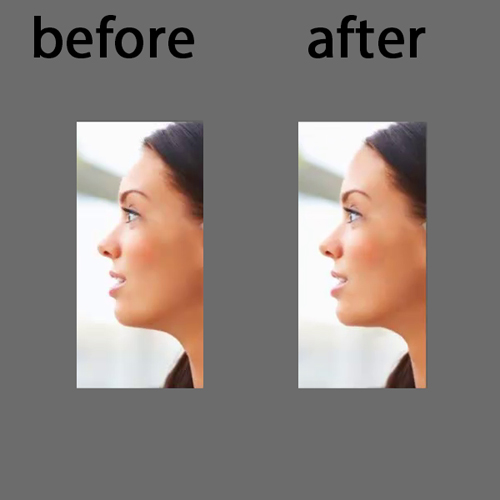
Press ‘Ok’ once you are done editing. Now turn on the visibility of the background layer to see the difference between the original image and the edited one. This way, after you edit an image you can compare your before and after pictures.
 Home
Home