This tutorial will show you how to whiten teeth in Photoshop which can be a really effective way to enhance a photo of someone.
Step # 1 – Selecting the Teeth
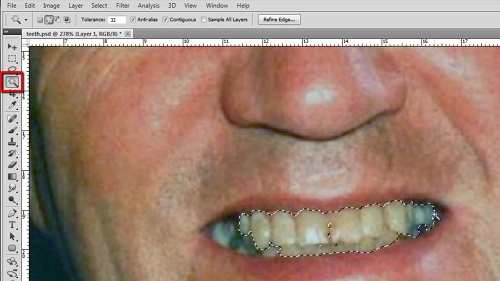
Load the photograph which you want to whiten the teeth in and zoom right in on the teeth. In the panel on the left select the “Magic Wand Tool” and use this to select the teeth. Holding down shift will allow you to expand the selection with multiple clicks – keep doing this until you have the teeth pretty well selected. Now click “Select” in the main toolbar, navigate to “Modify” and click “Feather”. The feather radius will make the selection look more natural, you’ll need to experiment with this as an effective size depends on the resolution of your photograph. Here 3 pixels works well, click “OK”.

Step # 2 – Adjusting the Hue/Saturation
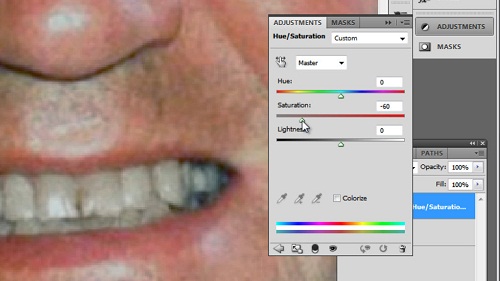
Click “Layer” in the main menu, navigate to “New Adjustment Layer” and click “Hue/Saturation”. Click “OK” in the window that appears. On the right you will see some adjustment options, drop the “Saturation” slider a touch as this will remove some of the yellow that can be seen in the image. You will also want to raise the “Lightness” just a little.

Step # 3 – Tweaking the Levels
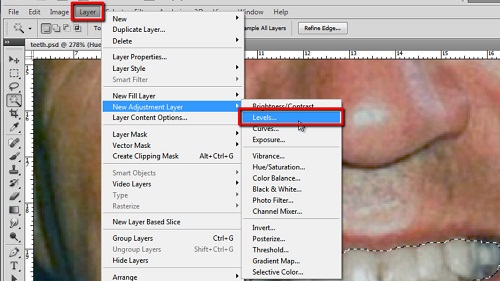
Go back to the layers panel and hold down control and click on the “Hue/Saturation” layer to use the same selection as before. Now click “Layer”, go to “New Adjustment Layer” and click on “Levels”, click “OK” in the window. In the “Levels” adjustment window on the right try dragging the white pivot to the left a touch, you can also use the other two to tweak the image until it looks just right. This process will vary depending on your photograph. Zoom out to see the result and as you can see here it looks rather effective and that is how to whiten teeth in Photoshop.

 Home
Home