In this tutorial we will teach you the use of polygonal lasso tool and play with the Hue and Saturation options to whiten teeth in a photo in Photoshop. Before editing an image, it is recommended to use the crop tool and separate the particular area of the image which needs to be edited. This would help you to edit the image easily, as you are just handling a specific area of the entire image. We will be teaching you the use of polygonal lasso tool to whiten the teeth, using a sample image which has been already cropped. You can crop an image using the crop tool which is located on the toolbar at the right.
Learn the process of whitening teeth in Photoshop by following the steps in this tutorial.
Step # 1 – Create a selection around the area
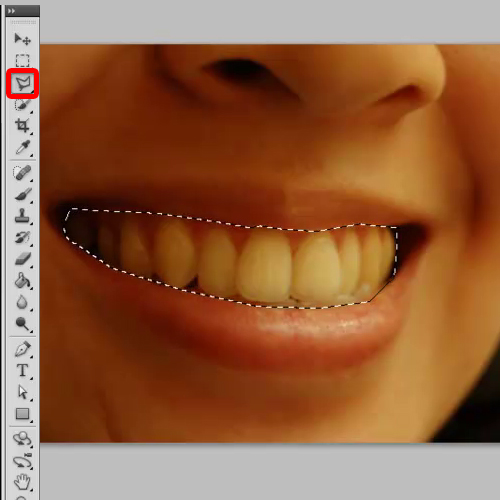
First select or highlight the teeth section from this cropped image using the “polygonal lasso tool”. Try to select the teeth section accurately.
Step # 2 – Select Hue/Saturation Layer
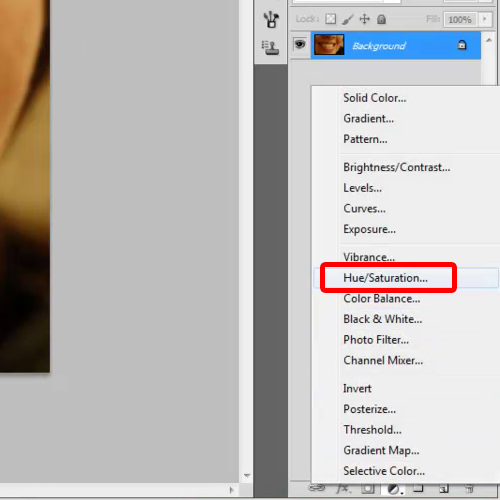
After selecting the teeth section,move onto the new adjustment layer icon at the bottom of the layer palette. Click on it and select the “Hue/Saturation” option from the menu.
Step # 3 – Adjust the levels
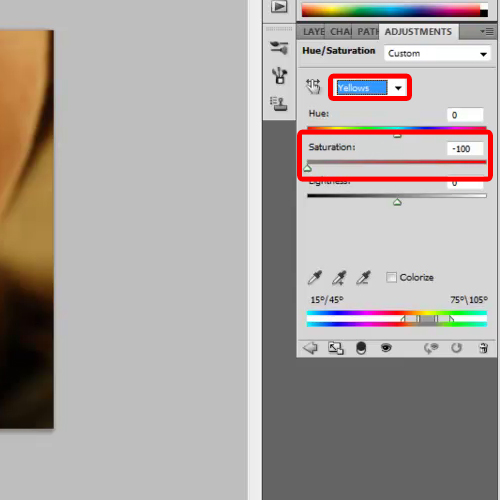
Select yellow from the edit dropdown menu. TheHue/Saturation option allows you to make changes to the color of the image. Decrease the saturation value to “-100”.
Step # 4 – Select the Master option
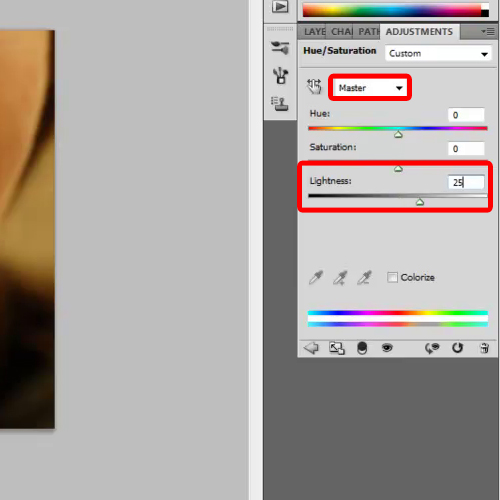
From the edit dropdown menu, select “Master” and increase the lightness of the image to “+25”. The edit dropdown menu allows you to select the color range you wish to work with. There are 7 choices. The Master option is for all the colors, followed by the primary colors red, blue, and green. Then come the complementary colors cyan, magenta and yellow.
Step # 5 – Go to the fill options
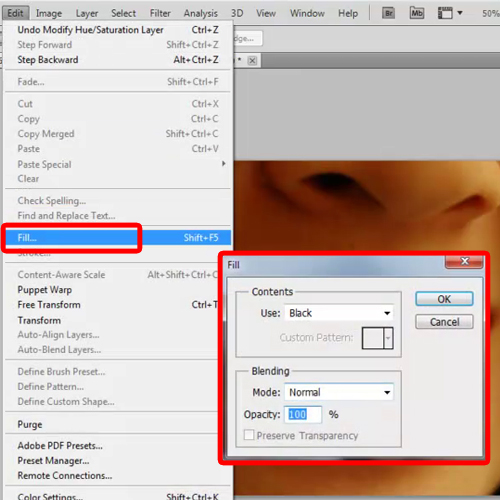
When you are done with the above steps, fill the Hue/Saturation layer mask with a black color. For that, double click on the mask layer, go to the “edit” menu and select the “fill” option. Choose black as your fill color and click “ok”.
Step # 6 – Applying the white color
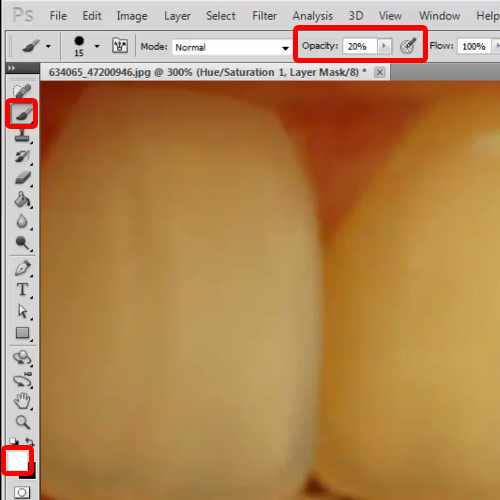
To whiten the teeth in the photo pick the “brush tool” and choose white as the fill color with the opacity at “20%”. Then start applying the brush over the teeth. You can also zoom in to the image so that you get a clearer view. When you zoom out you can clearly see the difference. Try to fill the entire area with white color at once, because if you apply the brush multiple times in the single area, the color would get stronger than desired and the output would look uneven.
Step # 7 – Remove the extra brush mark
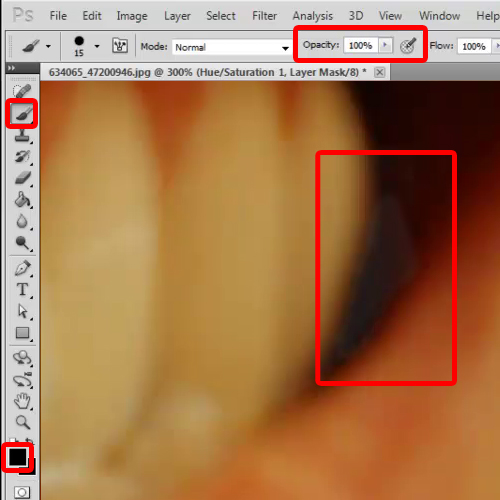
No need to worry if you accidentally have applied the brush multiple times on the same place, it happens when you do it for the first time. You can remove that by selecting the “brush tool”, choosing black color for the fill and increasing the opacity to “100%” this time. Be careful while applying the brush on the part which you want to remove.
Step # 8 – Decrease the opacity of the layer
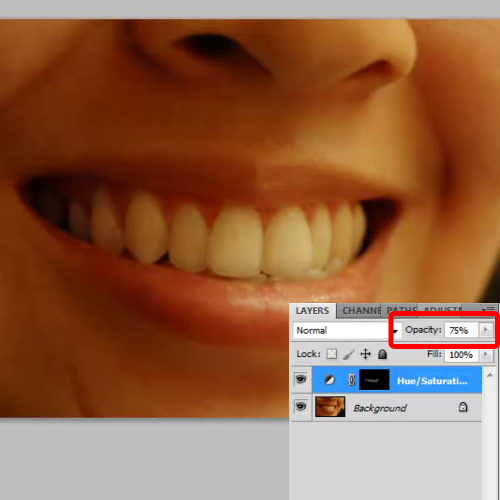
Once you are done, you can reduce the opacity of the adjustment layer to “75%”. Now hide the adjustment layer and you can clearly see the difference.
The process of whitening teeth in Photoshop is now complete.
 Home
Home