In this tutorial for Photoshop CS5 we will be showing you how to work with different documents as layers. Working with more than one or two images on one document at a time is a norm for designers. This tutorial will help you a great deal to get the hang of how to work with layers containing different images on Photoshop.
Step # 1 – Open a file
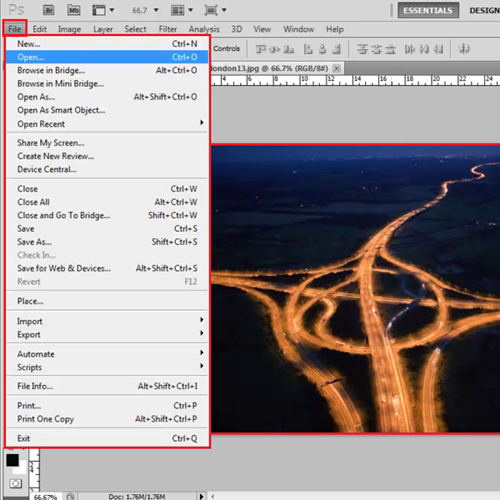
Three documents are already opened here on a plain black background. To open the fourth one, go to the ‘file’ menu and click on ‘open’. Select the image you want.
Step # 2 – Unlock and drag the layer
If you try to move this image you will notice that it cannot be dragged, this is because the layer is locked.
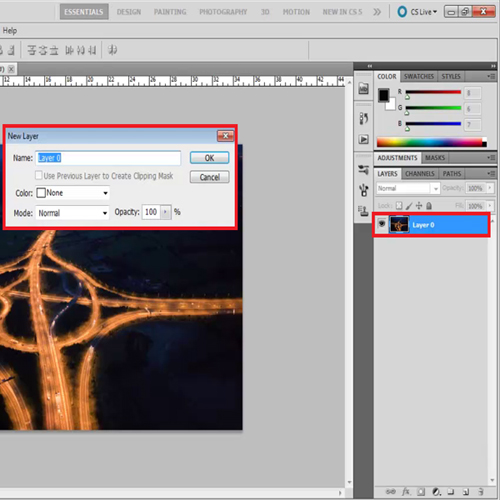
To unlock it, double click on it, specify its name and press ‘OK’. You can now easily drag this image to the other document you were working on.
Photoshop will add this image to a separate layer in the document you dragged it to.
Step # 3 – Alter the image size
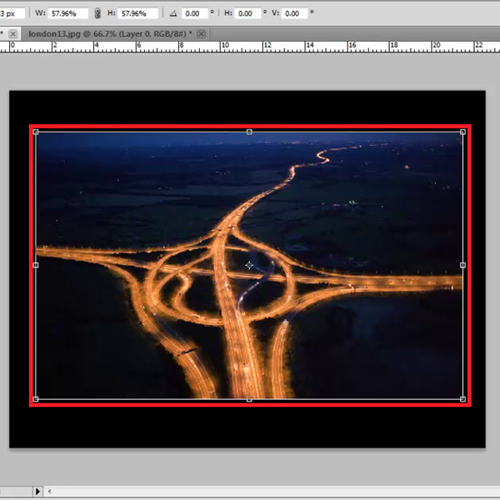
You can see now that the image is too large in size so you will have to transform it. To select the ‘transform tool’, press “ctrl + t” and then by holding the shift button drag the image and make it smaller.
The purpose of pressing shift is that it alters the image size proportionately.
Step # 4 – Show rulers and guides
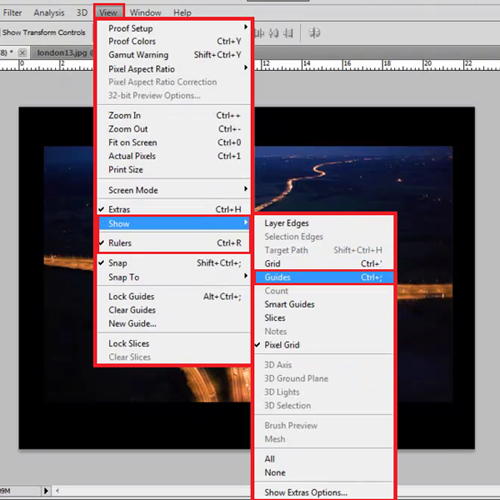
Once all the images are opened switch on the rulers and the guides by going to the ‘view’ menu dropping down to ‘show’ and then pressing ‘guides’. For rulers go on the same menu and then click on ‘rulers’.
Step # 5 – Make guides
To make a guide you need to click on the horizontal or the vertical ruler and drag the mouse on to the document. As soon as you release it the guide fixes in its place.
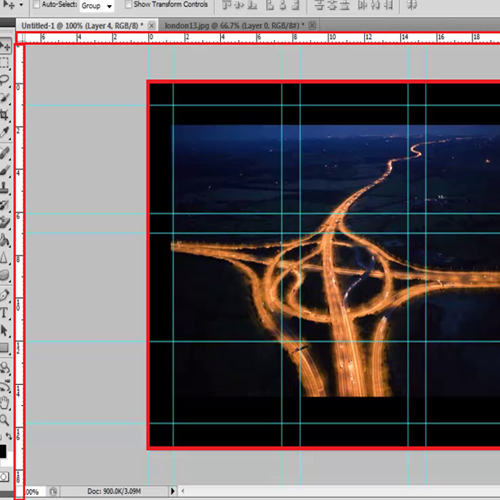
Step # 6 – Make the layers visible
Now to place all the images in every layer into these 4 boxes first turn on their visibility. To make the images visible, click on the small box next to the layer. In the same way make ‘Layer 4‘ visible as well. When you do, the image that you had opened earlier appears in front of you.
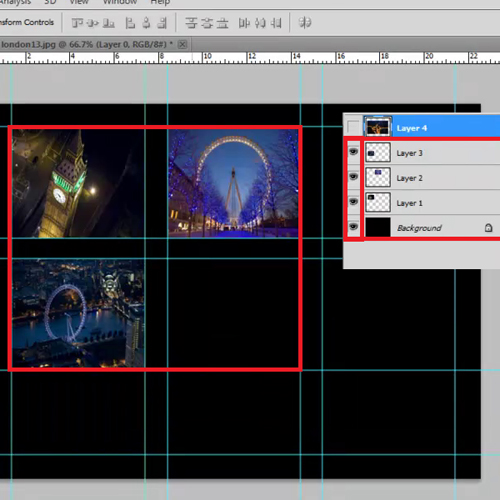
Step # 7 – Transform the image
The image on ‘Layer 4’ is greater in size than the box you have to fit it into. Therefore, press ‘ctrl + t’ to bring up the transport frame. As mentioned earlier you can vary the size of your image proportionately in Photoshop by pressing the ‘shift’ key while you are transforming the image. So while holding the ‘shift’ key drag the image down to a smaller size and place it in the 4th box.
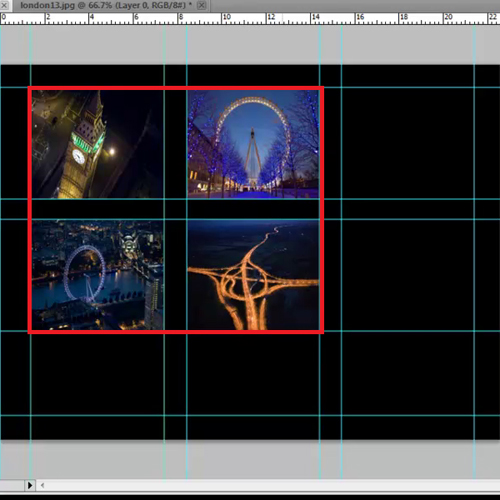
Step # 8 – Insert text
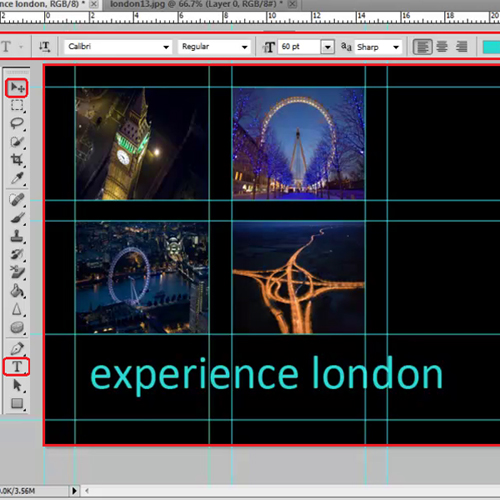
If you want you can also put text in your documents such as the one shown here. Do this by selecting the ‘text tool’ from the toolbar, selecting an area on the document, clicking there and entering the text. If you want to move the text then go to the ‘select tool’ and place the text where ever you want.
After you are done, you can hide the rulers and the guides by following the same procedure as the one you followed while opening them.
 Home
Home