An object or a complete design that you created in AutoCAD can be further enhanced by the addition of Hatches. By applying the Hatch tool in AutoCAD, you can along with enhancement also signify the type of material that, those objects in your drawing are made of in real life. Suppose you are designing an architectural piece and in it your front walls are to be made of bricks when that drawing is replicated in real life. To show this in your design on your workspace in AutoCAD, you can Hatch the outer wall with a brick pattern. Anyone reading this design will immediately know that the outer wall is to be made from bricks. To understand the workings of this tool further, follow the steps given below.
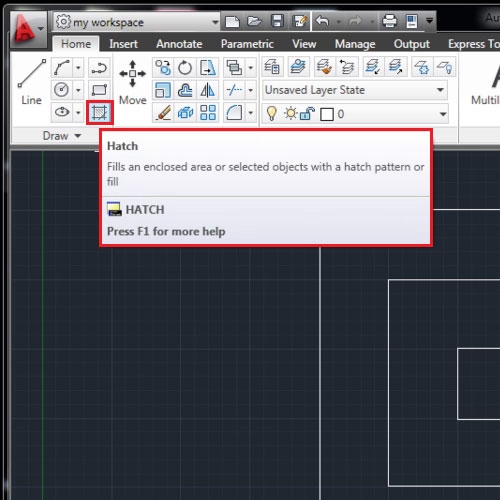
Step # 1 – Select the “Hatch” tool
The “Hatch” tool in AutoCAD can be used to render your architectural drawings. To select this tool go to the “Draw” panel and click on it.
Step # 2 – Access the “Hatch” tool ribbon
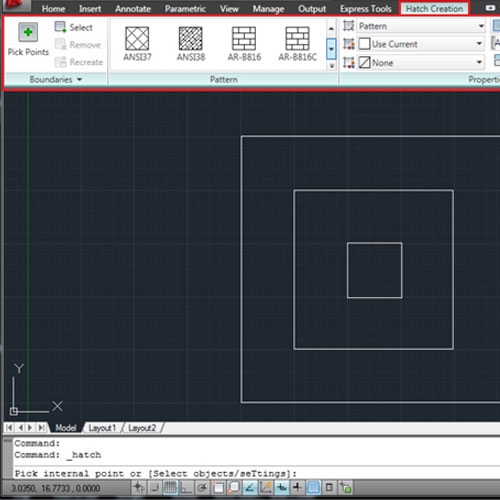
To understand the Hatch tool in AutoCAD completely you need to be familiar with its options in the settings panel.
These can be changed according to your own preference. As you select the “Hatch” tool you can see that different options appear on the ribbon on the top.
Step # 3 – Choose the swatch
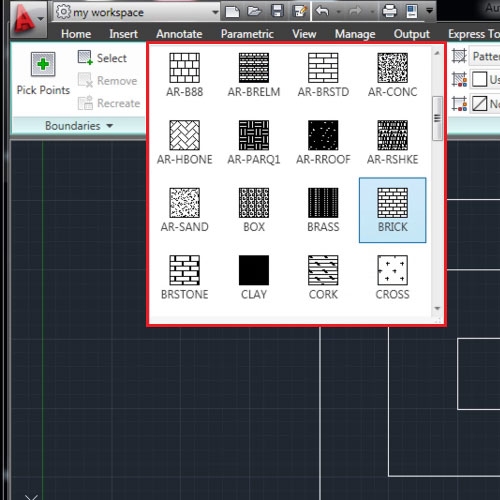
From there you can alter the different settings including the pattern of your swatch. You can even choose architectural patterns for example as mentioned previously, that of bricks.
Step # 4 – State Origin point
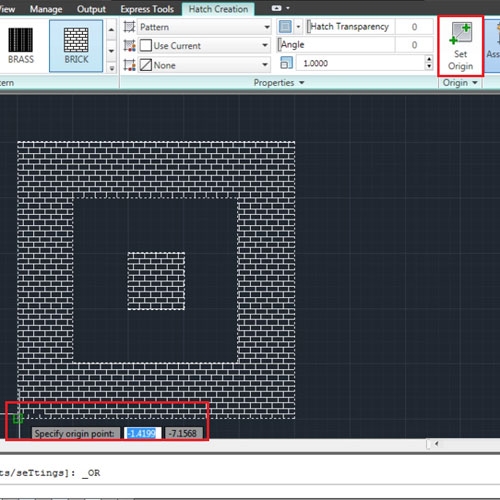
Once you apply this Hatch, you can set the origin from where the pattern starts. Simply go to the Origin panel in the Hatch ribbon above and click on the “Set origin” option. Now choose your point of origin on the shape.
Step # 5 – Open the options panel
After rendering these shapes you can see that a swatch pattern appears on alternate objects. To change the alternate renderings go and open the separate “options” menu from the ribbon above.
Click on the “more options” button present below.
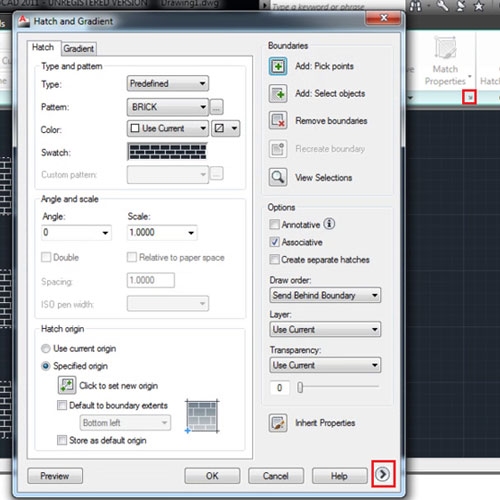
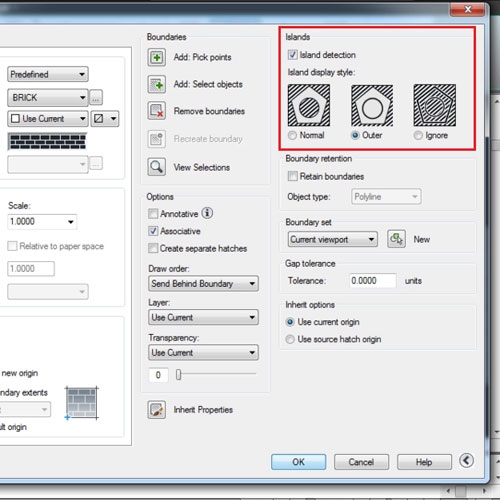
Step # 6 – Alter the “Island detection” option
From there change the “Island detection” option as per your preference. Select the “Outer” option to only render the outmost shape.
Right click and select the “Enter” option to finalize your Hatches in AutoCAD.
You can even click on separate shapes in AutoCAD to render them with the same type of pattern. For that make separate shapes and render them together.
Step # 7 – Apply a “Hatch” to an open boundary
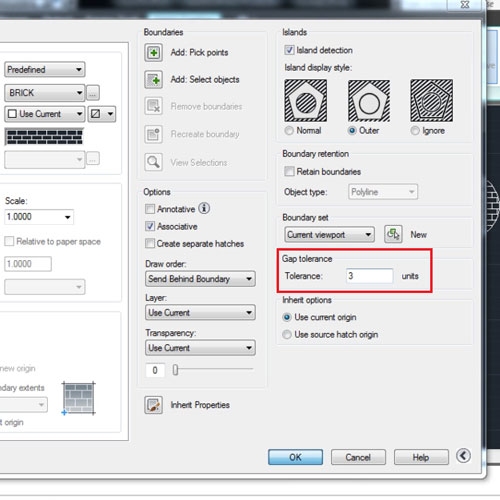
For the Hatch tool to work you need to apply it to a closed boundary. If it isn’t closed then you need to set a tolerance value where the distance of the gap in the shape falls under that value.
To do this open the “options” menu again and set a tolerance value. Now you can render a shape with an open boundary.
By applying a Hatches in AutoCAD, the textures of different materials can be applied to your architectural drawings to give them a better effect.
 Home
Home