In this tutorial for Photoshop CS5 you will be learning how to work with layers in Photoshop CS5. Knowing how to work with layers while using Photoshop is one of the most essential things to learn in this software. Layers represent different parts of the picture and its number increases as we keep on modifying the image. They are piled up on top of each other and because they are transparent in nature they determine the appearance of the final picture with all those modifications depending on the order of the layers.
Step # 1 – Insert text in a separate layer
The layer in which every document opens up is the background layer. This doesn’t allow transparency. All the modifications are done on other layers and not on this one.
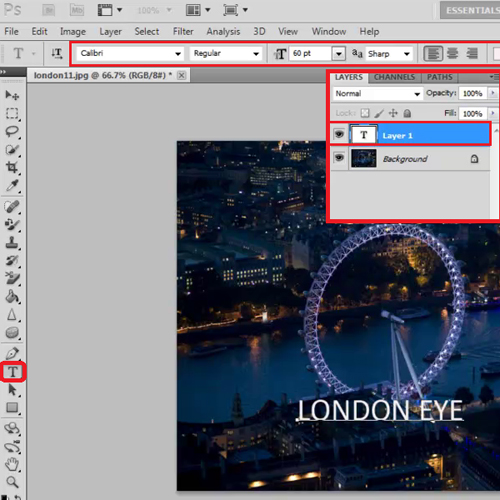
When you open an image you can see that this document has opens in the background layer. To write some text on it, get the ‘text tool’ from the toolbar. You can change the font, size and the color of the font from the bar on the top. To write text you need to click on the screen, wherever you want. You will see that the text entered is shows on a different layer. The “T” shows that text has been entered in this layer.
To change the position of the text you just entered, select its layer and use the ‘move tool’ to shift its position on the canvas.
Step # 2 – Create a new layer
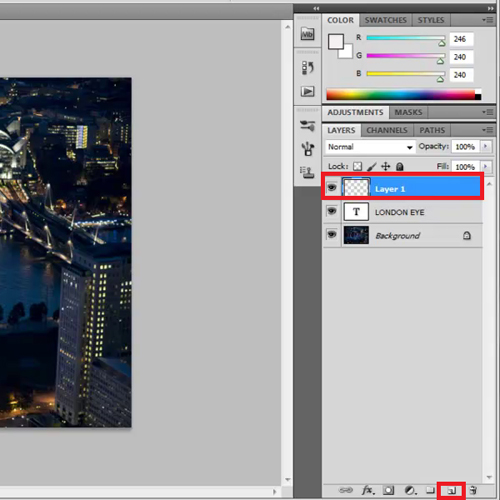
Make a new layer by going on the ‘create new layer’ button present at the bottom of the layer panel.
Step # 3 – Make a selection box
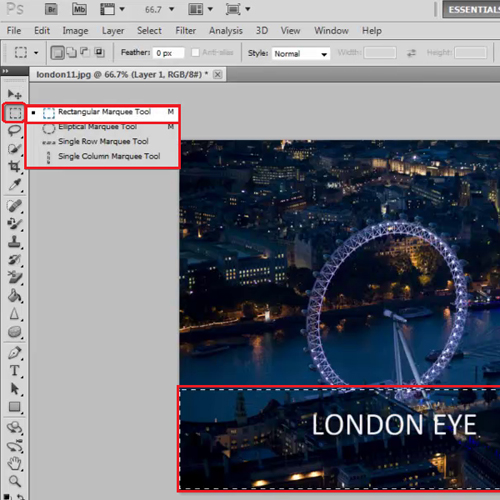
Grab the ‘rectangular marquee tool’ from the tools panel on the left and drag the mouse to make a selection box.
Step # 4 – Insert color
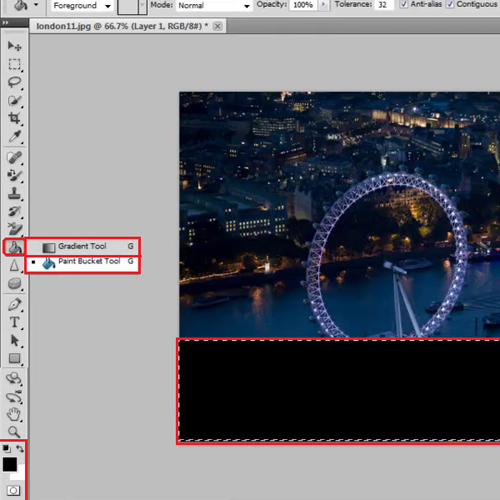
From the toolbar present at the left of the page, get the ‘paint bucket tool’ and fill in the box with a black color.
While using Photoshop you will see in the layers panel that the ‘background layer’ is locked. The text will be present on the 2nd layer and the selection box on the 3rd layer. The modifications you make add on additional layers.
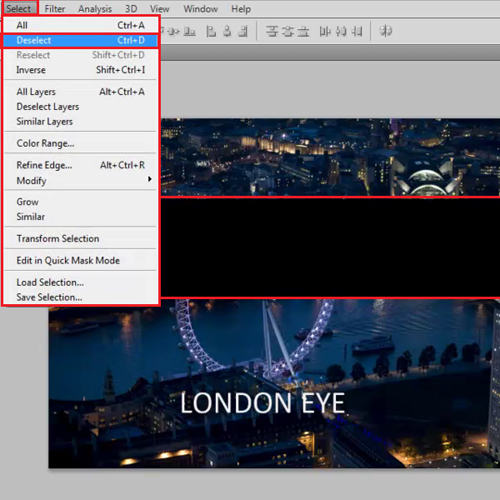
Step # 5 – Deselect the box
To deselect the box go on the ‘select’ menu and choose the ‘deselect’ option or press “ctrl + d”. Get the ‘selection tool’ and place the black box wherever you want.
Step # 6 – Shift layers
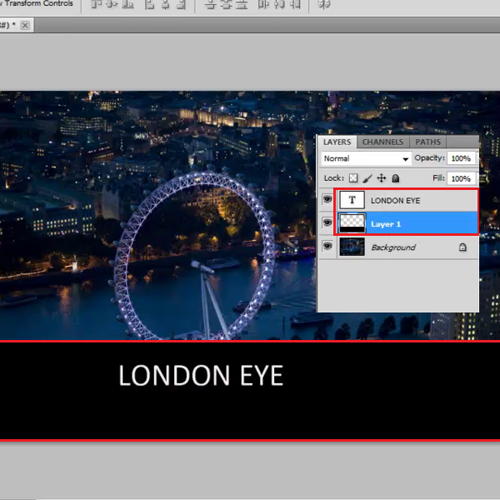
Right now the text will not show as its layer is below the layer containing the black box. For the text to show, change the order of the layers and bring ‘Layer 1’ below the text one. Hence your text now appears above the colored box. You can shift the order of your layers in Photoshop as per your need.
Step # 7 – Unlock the ‘background layer’
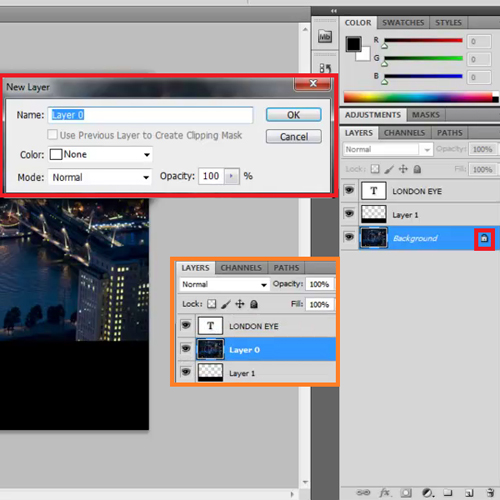
If for instance you want to move the background layer to the top you cannot because it is locked. You have to unlock it first by double clicking on it. This dialogue layer box appears in it press ‘OK’.
You can now easily move this first layer in your document up or down between the different layers.
Your document now contains the black colored box and text over it.
 Home
Home