Not every image you make in Illustrator is visible once you save it. Therefore, it is very essential to know how to work with paths and appearances in Adobe Illustrator. Once you create a path in Illustrator, it will not appear as the final image unless strokes are applied or color is filled in it. Hence, one needs to have the basic knowledge of strokes in Illustrator and Illustrator fills, be it color or gradient or any other, when creating a vector image in this software.
Step # 1 – Trace the image to create paths
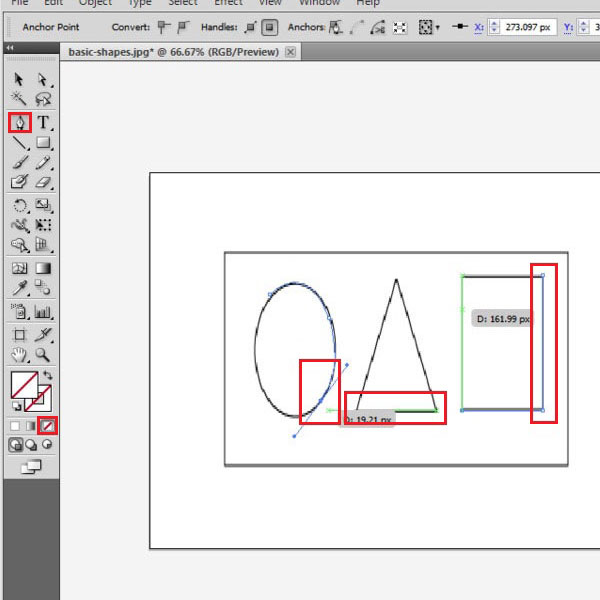
Select the pen tool and go to the bottom of the tool bar and over there, select no color that is labeled as “none”. This will allow you to see the paths you create while tracing the picture. You need to sketch on top of the image with the help of the anchor points. First of all, start off by using the pen tool over the rectangle. Here tracing is fairly simple. Just make lines the same size as the borders of the rectangle. Next trace the triangle. Here the lines are diagonal instead of straight. The process of tracing is pretty much the same as that of the rectangle.
Tracing the circle is a tricky one; you need to be sure that you add the correct curves. Once you make a curved line from an anchor point, the next one you add will automatically make the same type of curved path. To change the type of path, click again on the anchor point; one out of the two control handles of the anchor point will disappear. Now you can add whichever type of path you require. When you are tracing a curved image, do not keep the anchor points far away from one another, otherwise the exact shape of the image will not be re-produced.
The markers on the shapes show portions of the paths created.
Step # 2- Separate paths from the image
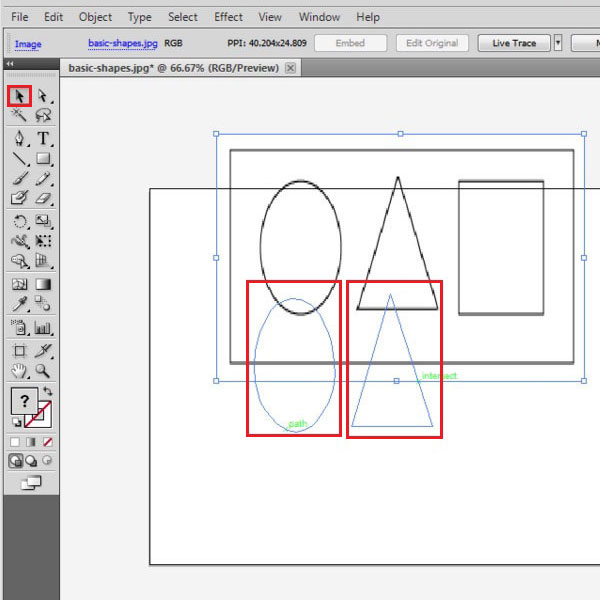
Once you are done sketching on the top of the image, move the original from underneath it. Do this by using the “selection tool”. You will see that the paths that you just made will disappear. This is how your created illustration will look if you print it. To make your path appear, you need to add strokes or fill color in it.
The paths that are visible in the picture below are because the cursor is on top of them. Otherwise, they will not be visible like in the case of the rectangle, the path is not visible.
Step # 3 – Add stroke to the rectangle
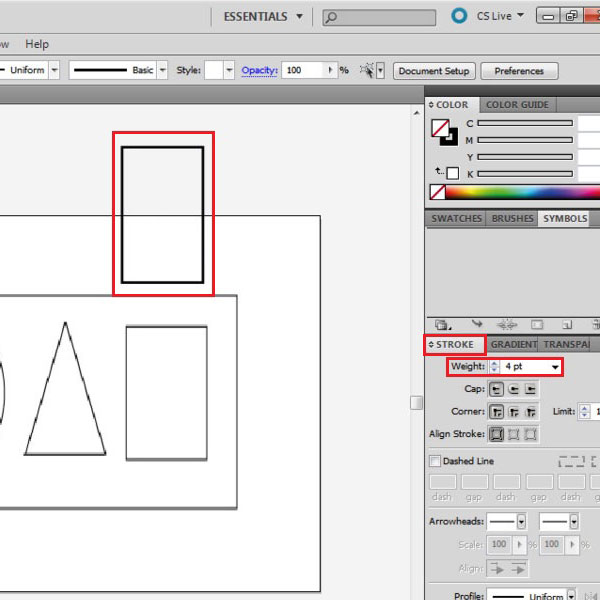
Add a stroke on the rectangle by selecting it by going to the stroke option on the right hand side and specifying the “weight” you want. Here, it is 4 pt. Now, you can see that the rectangle is visible once we shift it.
Step # 4 – Add color to the triangle
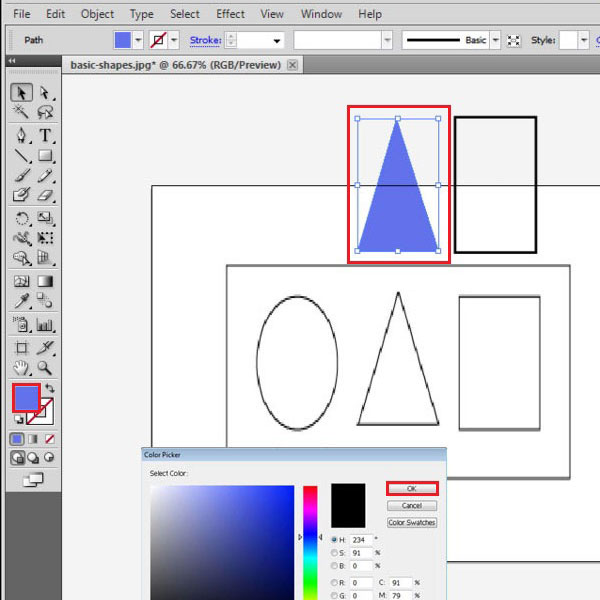
Next, you can fill color inside the triangle. Double click on the color box and it will give you various options to choose from. Choose any color and press the “ok” button to apply it. Adding color makes your path appear on print and on screen.
Step # 5 – Add stroke and color to the circle
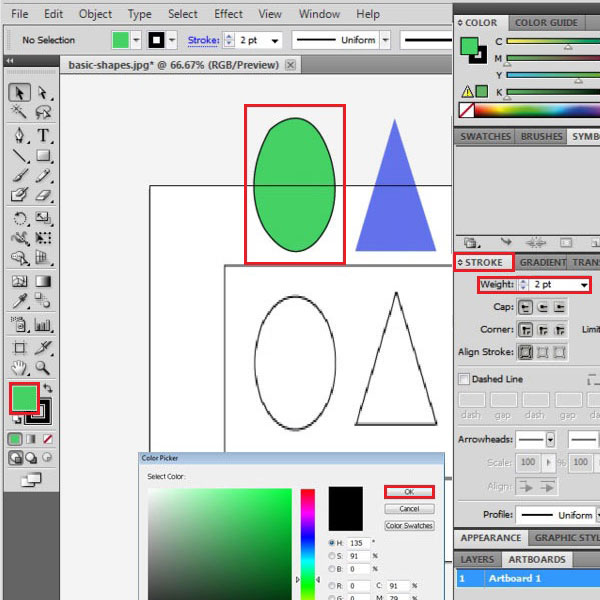
You can add both strokes and color to an object as shown in the circle. Here, the stroke width is 2pt.
 Home
Home