Working on artwork while using Illustrator now gives you the option of adding a whole new effect to your work. The tools in Illustrator like the Illustrator cs5 perspective grid helps to add a whole new perspective to your drawing. Therefore, learning how to work with perspectives in Adobe Illustrator can be very helpful especially in architectural drawings.
Step # 1 – Altering the perspective grid
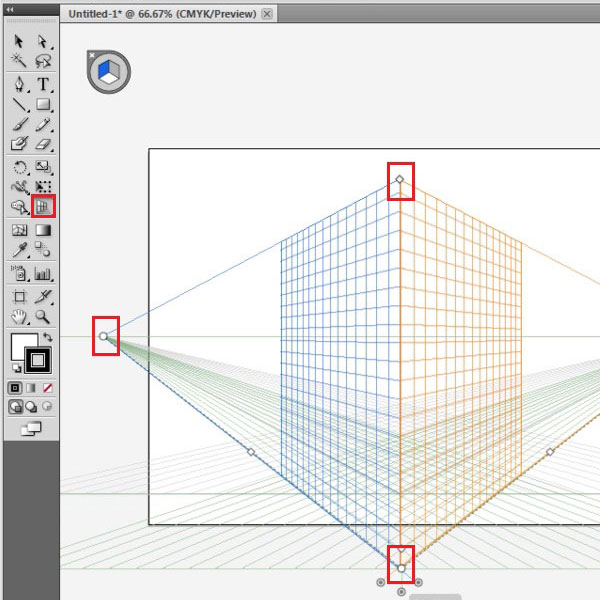
Illustrator cs5 gives you the option of making your art work 3D. To do that, first of all, open the perspective grid from your tool panel. This is the “perspective grid tool”.
After you do so a grid appears in perspective. You can alter the grid, as to how and where it lies on the page manually. Do this according to the illustration you intend to make.
Step # 2 – Choosing the grid from the widget
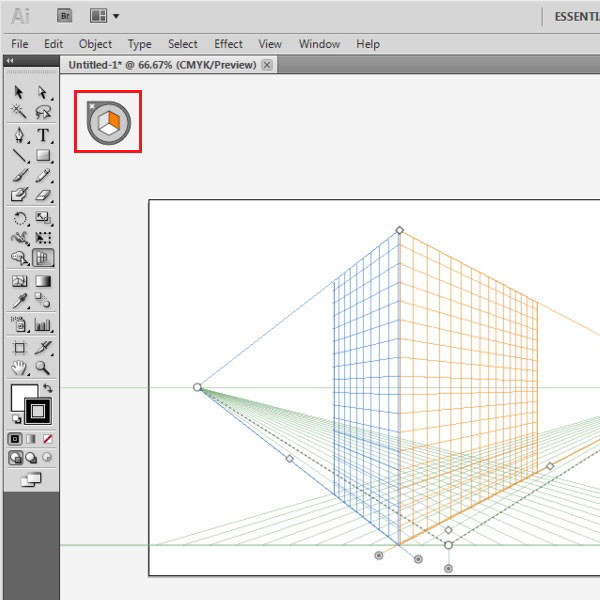
Before drawing on the perspective grid, you need to understand the “widget” that appears on the top left corner of the page. From this “widget”, you get to choose which grid you are working on.
If you want to work on the left grid, then either select it from the “widget” or press the keyboard shortcut that is “1”. You can do the same, to choose either the right grid or the horizontal one which is the ground. The keyboard shortcut for the horizontal grid is “2” and for the right grid is “3”.
Step # 3 – Reducing the opacity of the grid
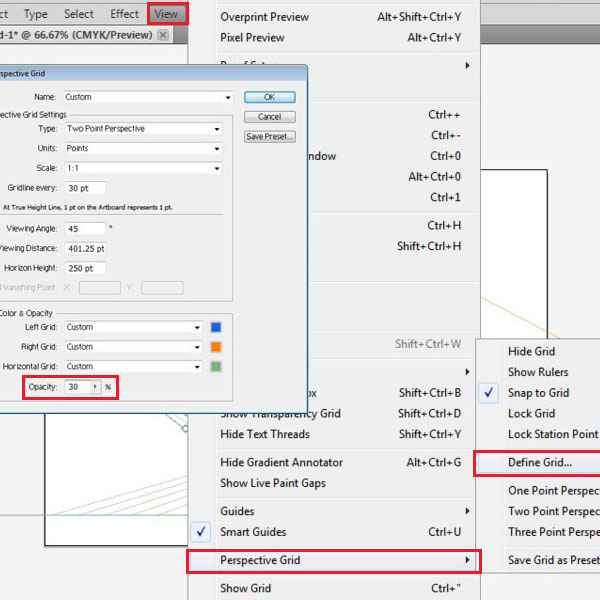
For the grid to not come in your way you can decrease its opacity, which will make the grid lighter and allow you to work on it easily. To do this, go to “view” on the menu panel, drop down to “perspective grid” and select “define grid”. From these given options reduce the opacity.
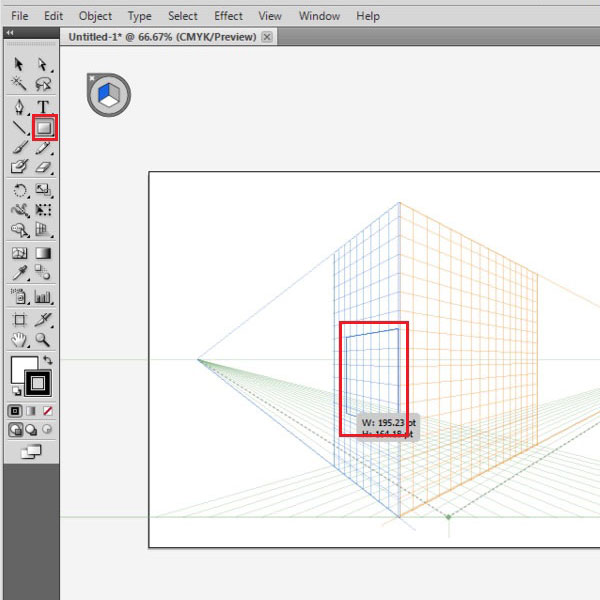
Step # 4 – Drawing a shape in perspective
If you select the shape tool and choose a particular grid, then when you draw the shape it will automatically attach itself to the grid. The size of the Illustration will vary according to the perspective.
Suppose you want to make different planes in perspective. You can make them with the shape tool or the pen tool. The stroke here is set at 5 so that shapes that you make are visible.
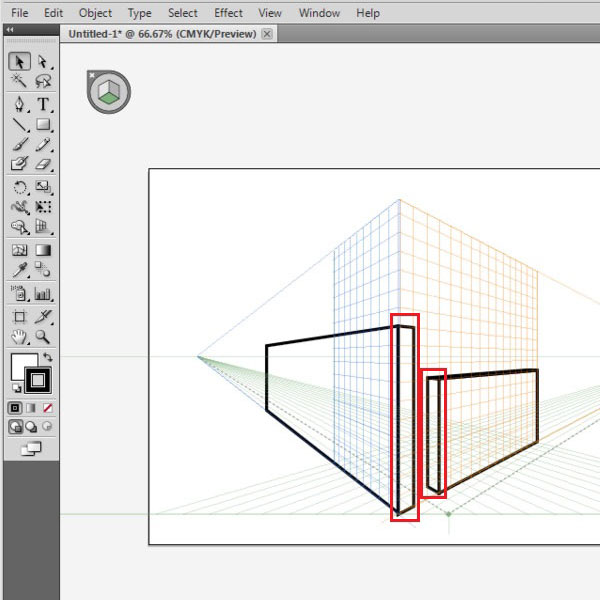
Step # 5 – Adding thickness to the planes
For an illustration to look 3-dimensional, you need to make sure that you give it thickness and in the correct perspective. Suppose you have made a plane on the left grid, then your vertical width will be on the right grid, and the thickness on the top will be on the horizontal grid.