When working with Photoshop, many people believe the software is a complex and difficult one to understand .However, this opinion is only created because of the lack of knowledge regarding its functions and different Photoshop tools. Working with Photoshop can be a fun filled experience, as not only does it allow you to discover a wide variety of options you could use to create icons and edit images, it also allows you to give your image a brand new look which differentiated it from others of its kind.
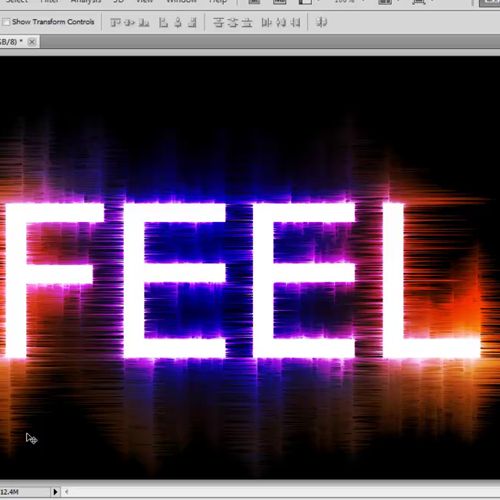
While working with this software you can use existing options like filters in Photoshop to add on to image or your illustration to as to enhance its output. In this tutorial, we will teach you how to work with the Wind Filter in Photoshop.
Step 1 – Aligning the text and using the text tool
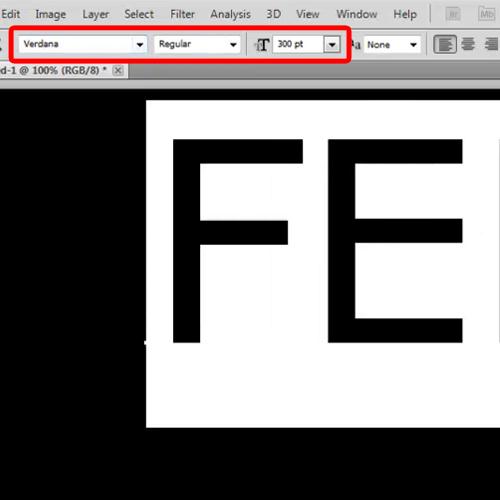
In order to start working with the wind filter in Photoshop, you must firstly use the “paint bucket” tool to paint the background black. Now pick up the “text” tool, use “Verdana” for the font, 300pt for the size and white color for the fill. Next, you will need to align the text at the center of the canvas in order to proceed.
Step 2 – Duplicating the layer
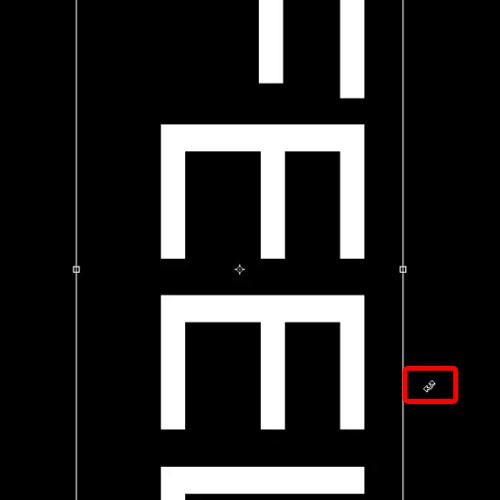
Once the above step has been completed effectively, you will need to duplicate the text layer and rotate the layer 90 degrees clockwise.
Step 3 – Selecting the wind options
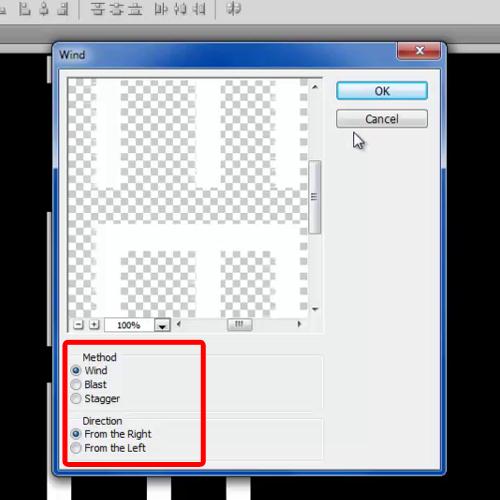
Go to the Filter menu, move over to the option titled “Stylize” and click on the “Wind” option. Here, you must Rasterize the layer, choose “Wind” for the method and keep the direction from the right. Now you will need to use the filter multiple times. In this tutorial, we have applied the filter 3 times in order to gain the desired results.
Step 4 – Reapplying the wind filter
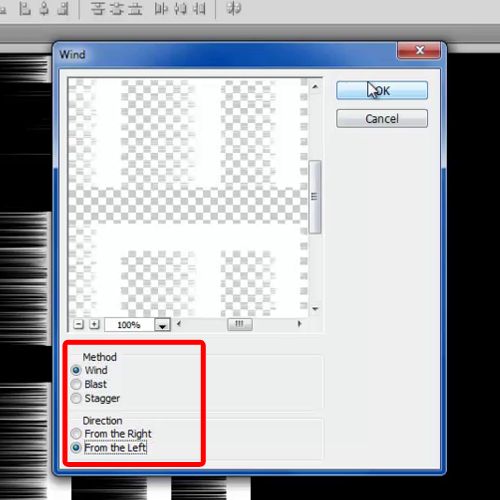
Now, you will need to open up the Wind filter once more and this time change the direction from the right to the left. You can apply the same effect here multiple times.
Step 5 – Rotating the layer and applying filter
Next, you will need to rotate the same layer counter clockwise and apply the same filter multiple times with both the directions.
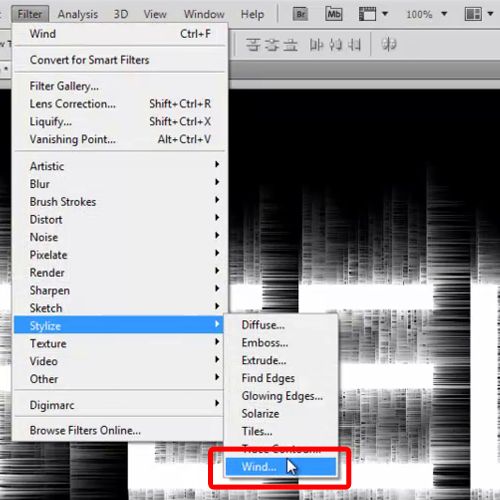
Step 6 – Creating a new layer
Select “fcb800” for the color fill and amongst the different Photoshop tools pick up the brush tool. Use 0% for the hardness and increase the size of the brush till it covers the whole canvas. Once this has been done, you must create a new layer and apply the brush at the center of the canvas. Here, you will need to change the blend mode of this layer to the option titled “Overlay”.
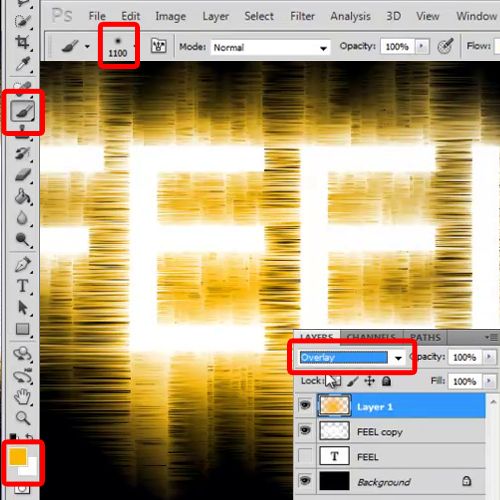
Step 7 – Changing the blend mode
With that done, you will now need to create two new layers, choose “fc5f00” for the color fill and apply the brush towards the left side in one layer and on the right side in the other layer. Change the blend mode of both these layers to “Overlay”.
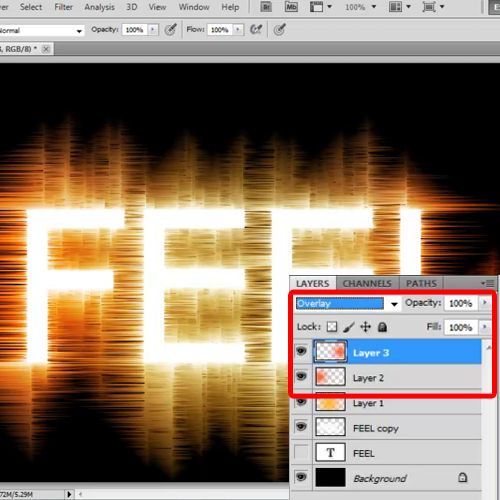
Step 8 – Creating a new layer
Create a new layer, choose “160c9c” for the color fill, apply it on the center of the image and change the blend mode of this layer to “Vivid Light”.
To further enhance your output in Photoshop add on to your design by adding more depth to the image. For that you can add a new layer and using the same color fill, apply the brush tool vertically over the canvas. Don’t forget to change the blend mode of this layer to “Overlay” in order to gain best results.
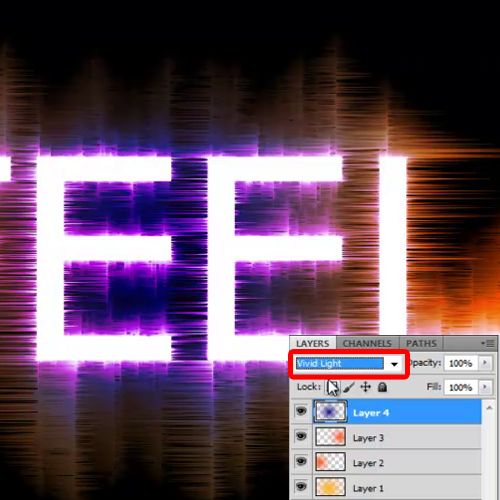
Step 9 – Using different colors
You can move around the color layers to get a feel of what looks better. Play around with different ideas a bit and see what you can come up with or what looks best when applied to your image, to give it that extra edge over similar products.
 Home
Home