In this tutorial you’ll learn how to design a underwater effect in Photoshop.
Step 1 – Creating a background layer
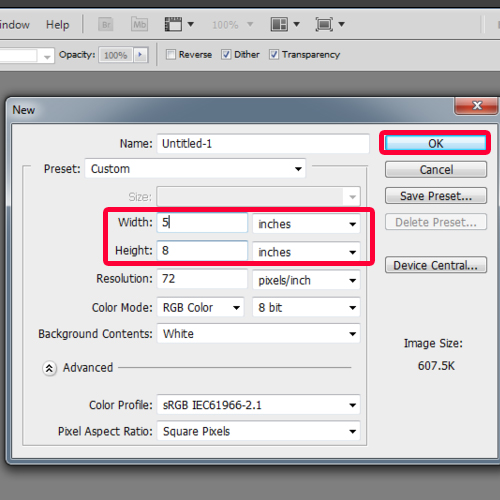
Open a new file in your Photoshop of 6×8 inches. Turn this background layer into a new layer first.
Step 2 – Choosing Color for gradient
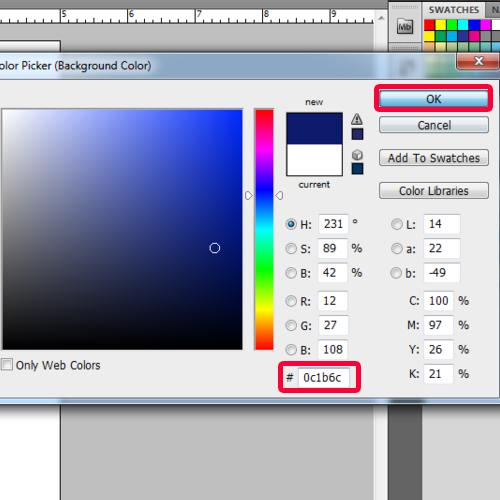
First of all we’ll choose two blue color tones to give a gradient to our layer for background and foreground separately. Here for background we take #0c1b6c and for foreground #1680d1.
Step 3 – drawing Straight Lines
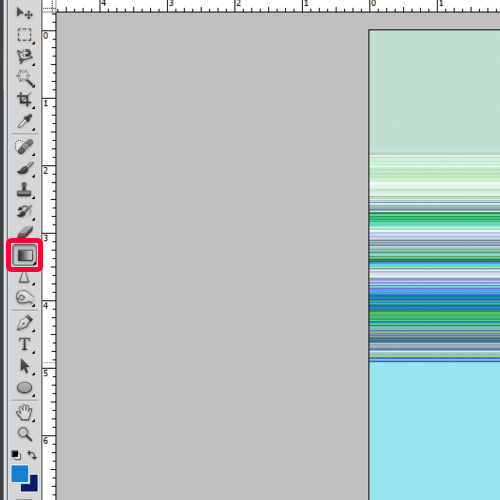
Now select the gradient tool from the tool box and choose its options from the options bar. We will keep the style as linear and by using that draw a straight line on the layer by pressing shift key.
Step 4 – Radial Gradient
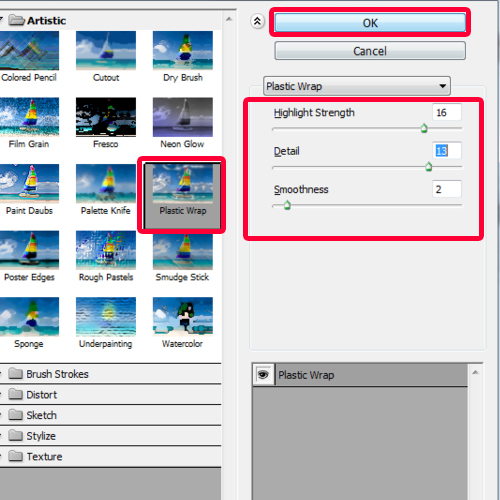
Create a new layer. Set the foreground color #b9ddf9.Select the gradient tool. Go to the options bar and select the ‘radial gradient’. Apply the gradient to this layer. Take the selection of this layer by using Ctrl command with left click on mouse. Now we’ll apply the cloud filter by going to the menu bar>Filter>Render>clouds. After doing so we’ll apply plastic wrap filter on this same selection by going to the menu bar>Filter>Artistic>Plastic wrap. The settings for plastic wrap filter are highlight 16,detail 13 and smoothness 2.Trasform the same layer by Ctrl+T and distort it by right click. Now erase the edges to give a smooth effect. Take a duplicate of this layer and change the blend mode from normal to ‘linear light’. You can have these options at the top right of layers tab. Reduce its opacity to 59%.
Step 5 – Overlay Mode
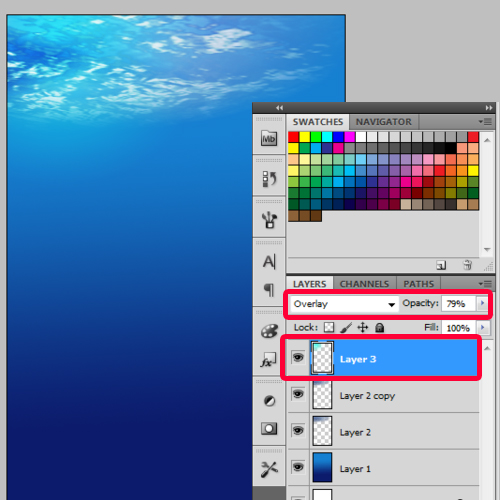
Now we have come very near in creating photoshop underwater effect, next step is to create another layer and set the color #32f7e7 for the gradient. Keep the style radial this time. Change the blend mode from normal to ‘overlay’. Keep its opacity as 79%.
Step 6 – another layer for Gradient
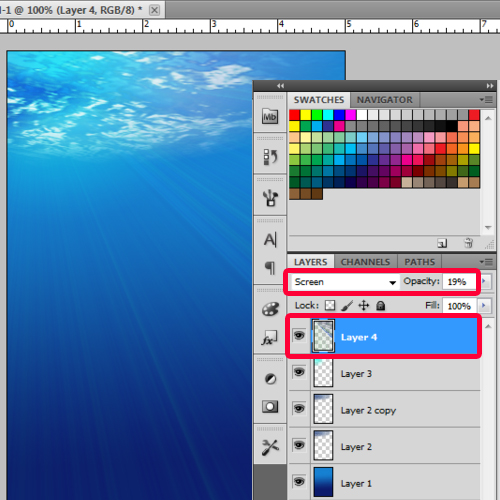
Create another new layer and set the color #32f7e7 for the gradient. Go to the gradient editor present in the options bar. Change the gradient type from solid to ‘Noise’ and roughness as 100%.Here in this gradient editor window you’ll see the button for options at the bottom right. Check on both the options that are restrict color and add transparency. Click on the OK button. Apply the gradient. Change its blend mode to ‘Screen’ and opacity as 19%.
Step 7 – Reducing Opacity
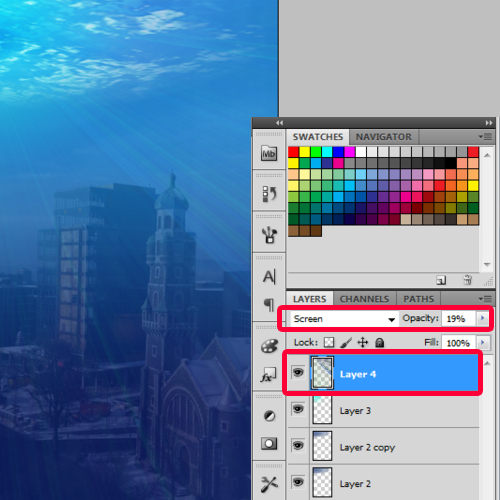
Now place your final picture by going to the Menu bar>File>Place. Fit the picture on your canvas and reduce the opacity to 19%. Bring this picture layer down right above the first layer.
Step 8 – Bubble Effect
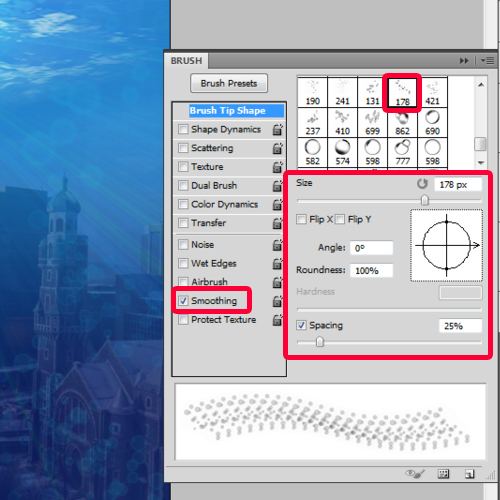
Create a final new layer for the bubble effect. Select the brush tool form the tool bar and open the brush palette by f5.Select the bubble brush from the brush presets make bubbles all over the canvas and use light colors e.g here we used white and light blue to give an underwater effect.
And this was all about photoshop underwater effect.
 Home
Home