In this tutorial on Photoshop, you will be learning about Photoshop CS6 and will also be covering the changes when you are shifting from CS5 to CS6.
Photoshop has the powerful functionality of Light Room inside Photoshop CS6 it’s called Adobe Camera Raw. In CS6 you have got Camera Raw7, it may not look different to you at first but with time you will realize how powerful this tool is. This tutorial teaches you about this specific tool.
Step # 1 – Open image in camera raw
The image here does not look appealing. We will try to adjust the colors and make it more photograph material through Camera Raw.
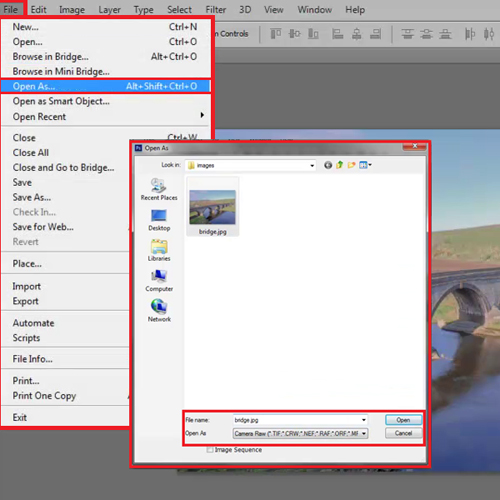
To open the image in Camera Raw, go on the ‘File’ menu and then click on ‘Open As’. Select the image you want to open and then in the format drop down open it as a camera raw file. Press ‘Ok’ and the Camera raw box will appear.
Step # 2 – Change the color balance
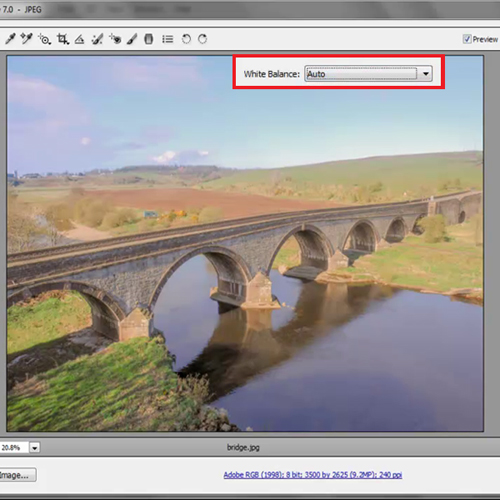
Once the image is open in Camera Raw you might want to move the color presets here and there. If you change the Color Balance of the image from ‘as shot’ to ‘auto’ a huge change in the image will be visible. As more adjustments are needed so let’s stay on the ‘as shot’ option.
Step # 3 – Adjust the sliders
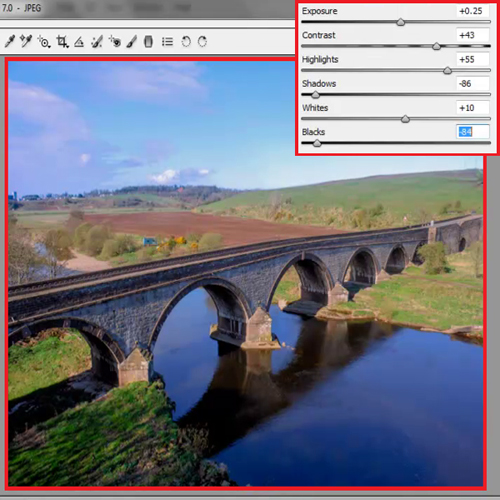
In camera raw, play with the sliders now, move the exposure slider around and see where you like it best. Do the same with the other sliders. Move them around and see what setting suits your picture perfectly.
Keep shadows less in this image, bring out the whites and brighten the blacks a bit.
Step # 4 – Alter the vibrance
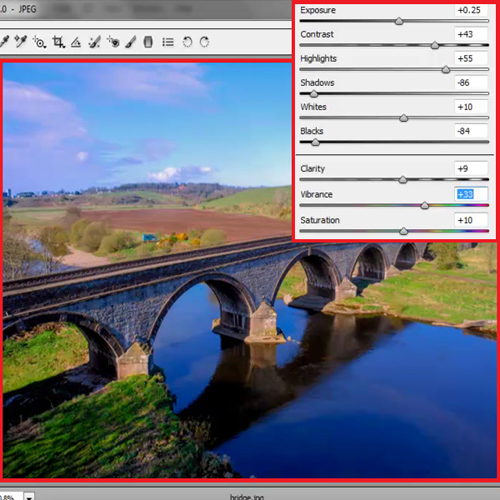
To add a bit of clarity in the picture, bring out the vibrance to 33 and increase the saturation to 10.
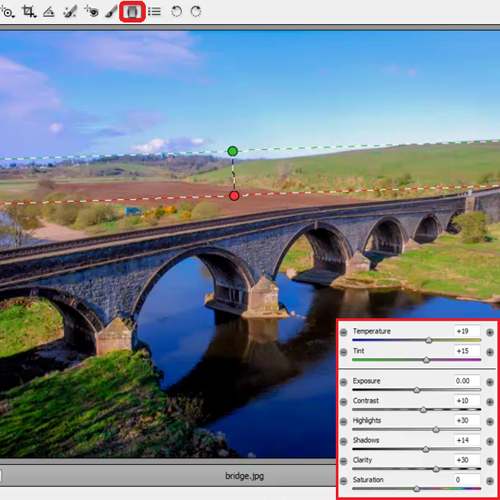
Step # 5 – Open the ‘graduated filter’
The sky looks a bit dull. So bring out the ‘graduated filter’, draw a straight line and whatever changes you now make will be applied to the line above this green point and will not be applied below the red point.
Increase the temperature and tint a bit and then increase the exposure, contrast, highlights, shadows and finally the whites. Come down to the color option and bring out the darkest blue you have on the preset. Now if you compare the initial image with this one you will be able to see a huge difference.
Through this tutorial on Photoshop you can understand how to enhance your images in this software.
 Home
Home