In this tutorial, you will be learning about Photoshop CS6 and how its tools and features allow you to turn a simple image that you have in to one that has an oil paint effect. While shifting from Photoshop CS5 to CS6 you will notice a few changes, a few places where Adobe has updated its features. Over here, the image will be turned to an oil painting using the options provided in Photoshop CS6.
Step # 1 – Convert to ‘Smart Object’
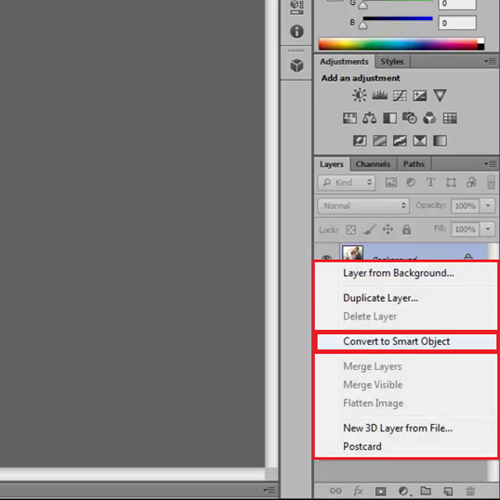
Photoshop CS6 lets you make oil paintings by using existing images through its ‘Oil Paint Filter’. To get that done first turn the background layer into a smart object. To do that, right-click on the drop down menu on the ‘layers’ panel and click on the ‘Convert to Smart Object’ option.
Step # 2 – Select the ‘Oil Paint’ Filter
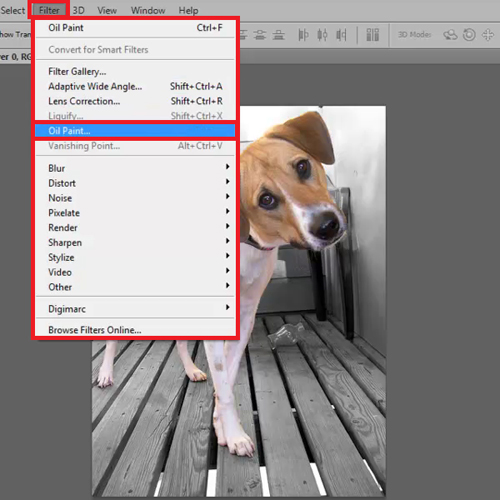
Go to the ‘Filter’ menu at the top of the page and select the ‘Oil Paint Filter’ option.
Step # 3 – Alter the ‘Stylization’ value
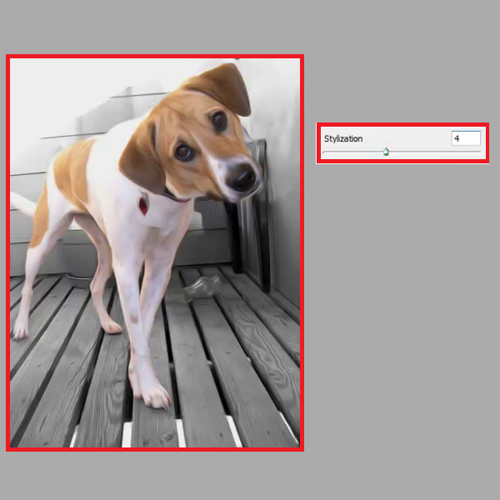
As soon as you select that the Oil Paint Box opens up with the 6 very effective features to work with.
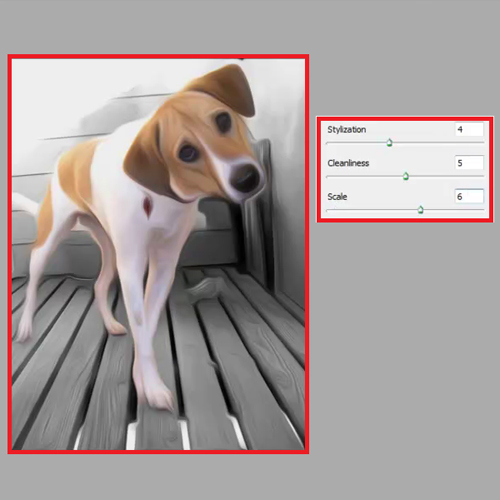
The ‘Stylization’ slider increases or decreases the length of the brush strokes. Enter ‘4’ in the space provided.
Step # 4 – Alter the ‘Cleanliness’ value
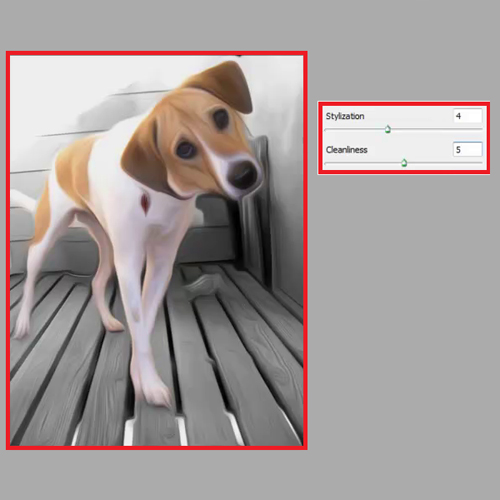
The Cleanliness slider defines the look of the strokes. The higher it is the smoother it will be and the lower it is the more uneven it will be. Choose 5 as its value.
Step # 5 – Alter the scale of the brush
The scale of the brush determines the brushstrokes that are applied. Enter a value of 6 for this image.
Step # 6 – Alter the ‘Bristle Detail’ value
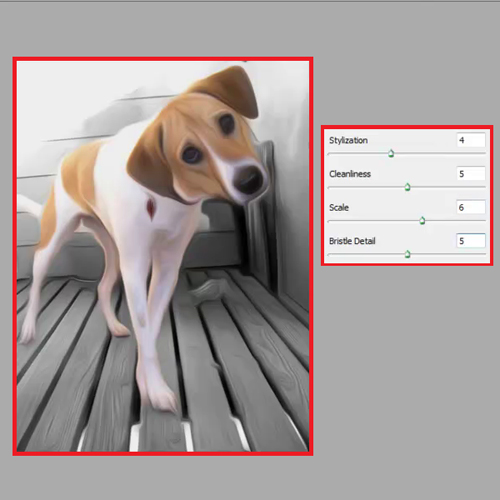
The Bristle Detail enhances the depth of the brush strokes. Keep this value at 5.
Step # 7 – Alter the light source
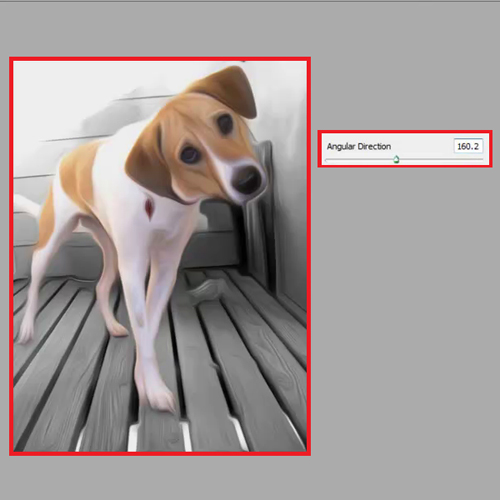
Coming down to the Lightning panel, the ‘Angular Direction’ slider in Photoshop CS6 changes the location of the light source. Enter its value as 160.2.
Step # 8 – Change the Shine value
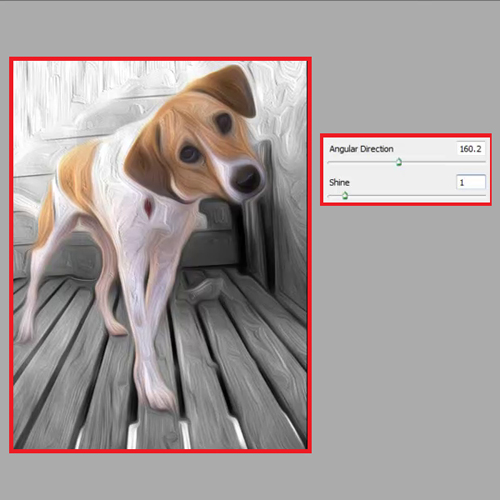
Lastly and most importantly we have the Shine slider that gives an emboss effect to the painting. As we do not want more of the emboss effect on this specific painting leave the value at 1. Press ‘OK’ once you have adjusted your settings and are happy with the oil paint result.
 Home
Home