In this tutorial on Photoshop, you will be learning about the basic interface of Photoshop CS6. This tutorial will also be covering the changes you will see when you are shifting from CS5 to CS6. Once you have launched Photoshop CS6, the first thing you will notice is its dark interface.
Step # 1 – Go to the ‘edit’ menu
If you are not happy with the dark colored interface then you can go in the ‘edit’ menu scroll down to ‘preferences’ and then select the ‘interface’ option.
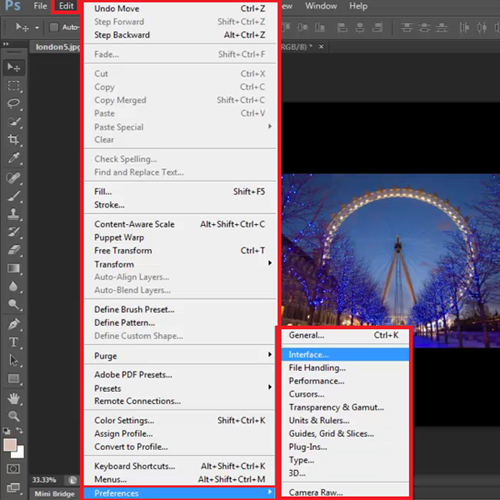
Step # 2 – Change the color
A settings panel opens and over here you can see that there are 4 default colors; Black, Dark Gray, Medium Gray and Light Gray. Select whichever color you wish. There is another way to go about it, just press ‘shift + F2’ to lighten the interface or press ‘shift + F1’ to darken it.
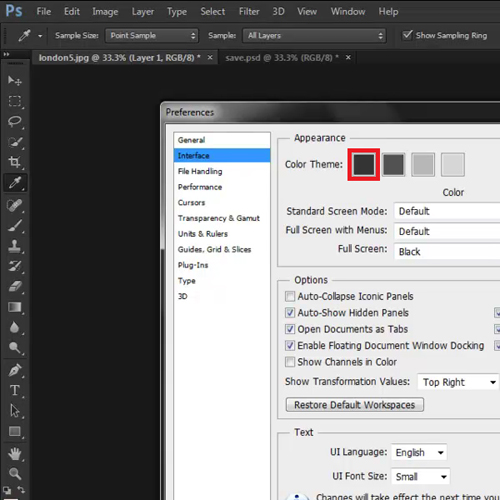
Step # 3 – Alter the pace board color
You also have the option to change the color of the pace board around the image. Right click on it and from the options that appear you’ll see that you have the same four preset colors that were available for the interface. To customize the color of the pace board yourself go to the ‘select custom color’ option. It will show you the default color and then you can pick any color you want.
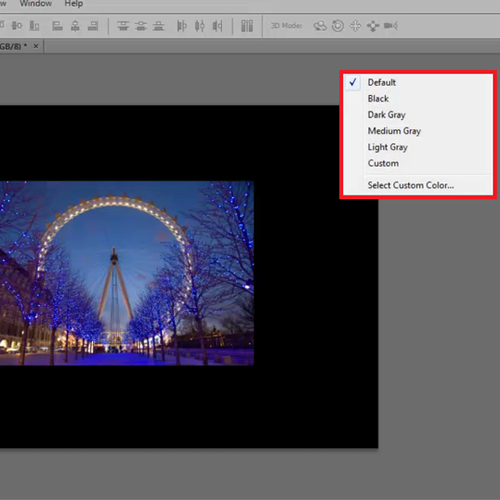
Step # 4 – Use the HUD feature
There is a new feature called a HUD Feedback which stands for Head Up Display. When you drag the picture you get information about the distance to which this image has been moved horizontally and vertically. This feature comes in handy when you need to shift images at a particular distance.
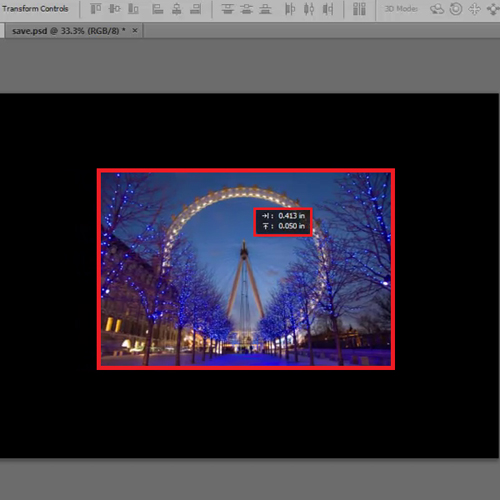
Step # 5 – Alter the image size
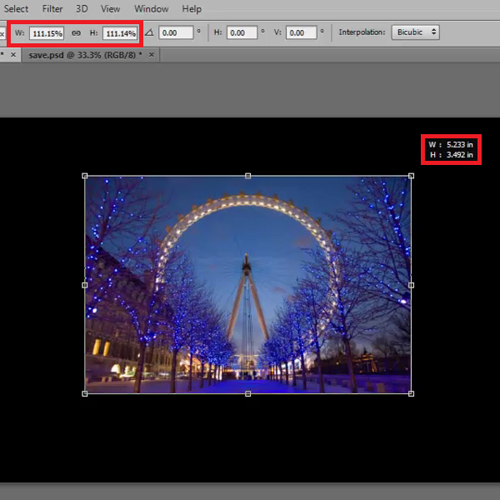
Select the ‘free transform tool’ by pressing ‘ctrl + t’. When you scale the image it gives a percentage value at the top and also gives the width and height value according to which you have increased or decreased the image. You can also edit the image size by entering the dimensions of the width and height in the space provided on the bar.
Step # 6 – Rotate the image
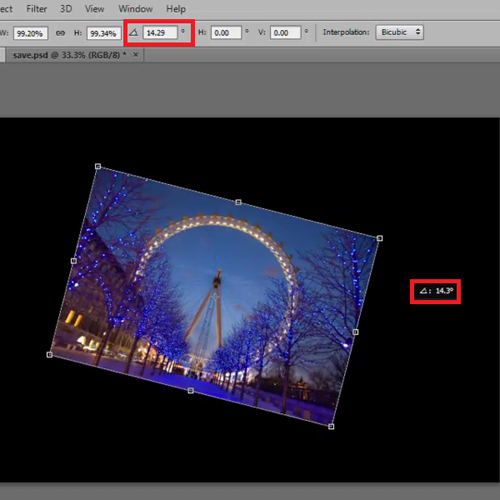
If you drag the image and rotate it then on the top bar you can also see the angle at which the rotation is taking place. The angle can also be entered at the top bar.
Step # 7 – Skew the image
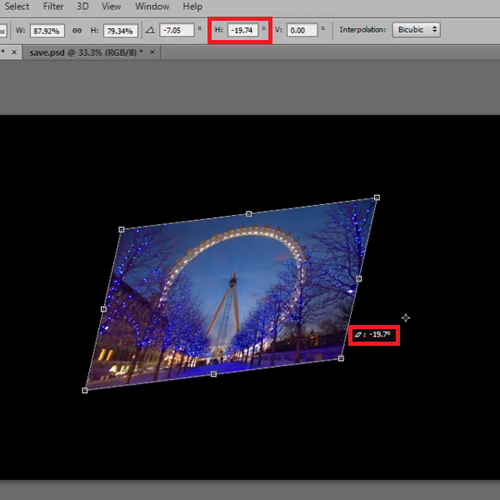
You can also skew the image by holding ‘ctrl + alt’ and dragging the picture. The image gets skewed in the direction you specify and the angle at which it does can be seen at the top bar.
Use this tutorial on Photoshop to gain a better understanding of the user interface of Photoshop cs6.
 Home
Home