While using Adobe Illustrator, adding strokes basically allow you to see your path. When you apply a stroke to your path, it becomes visible in print and in web view. Therefore, in Adobe Illustrator cs5 it is always important to know your way around the Adobe Illustrator stroke options. There are also various options to this tool which can enhance your design. Hence, it is always beneficial to know how to add and turn strokes in Adobe Illustrator.
Step # 1 – Make a vector shape
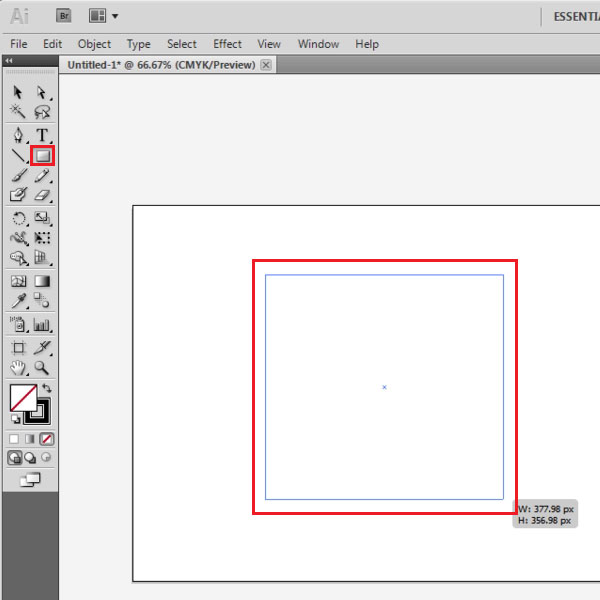
Illustrator allows you to add strokes to an image if it is vector. For now, create a vector shape using the shape tool. Select the shape tool from the tool panel and use it to draw a rectangle.
Step # 2 – Add stroke to the shape
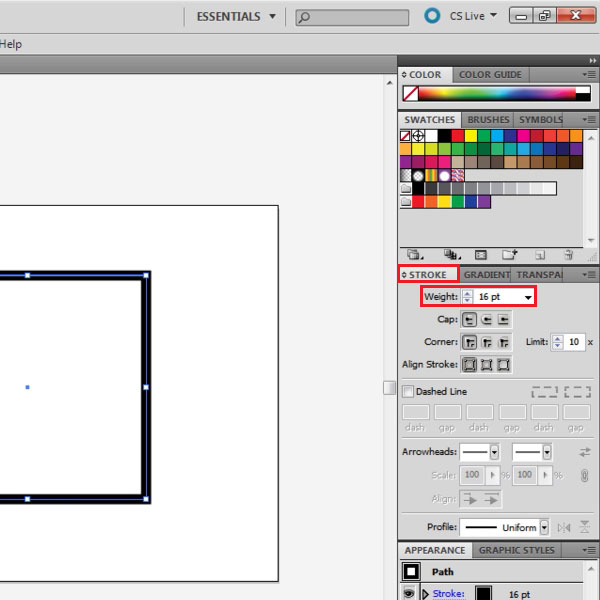
After making the shape, choose it by picking up the “selection tool”. On the right side of your page there is a stroke panel. The weight option tells the current points your outline stroke has. You can increase its width, by choosing a different number from those given. Increasing it makes the stroke thicker.
Step # 3 – Move the path above the stroke
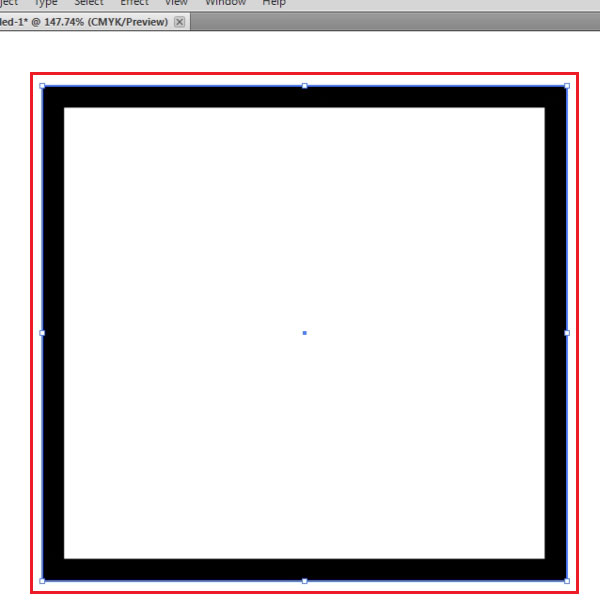
As you select the rectangle from the “selection tool”, you will be able to see that the path lies in the center of the stroke. If you click the “Align stroke to inside” option on the stroke panel then the path shifts above the stroke reducing the size of the shape.
Step # 4 – Move the path below the stroke
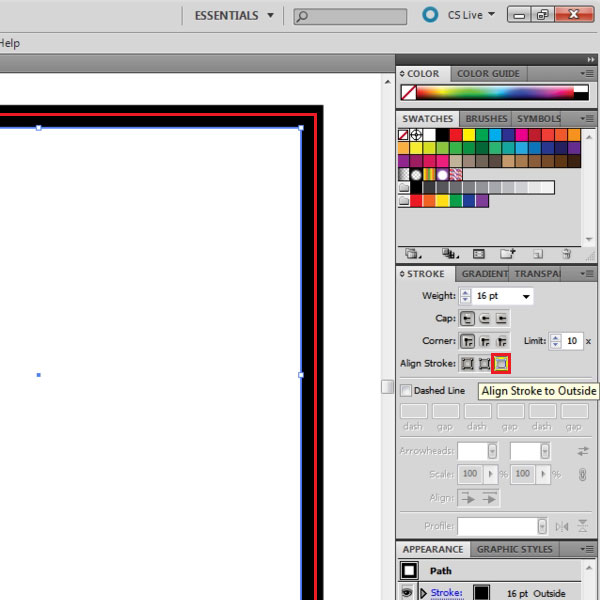
The path existing on the rectangle can also be moved below the stroke. To do this, click on the “Align the stroke outside” option on the stroke panel on the left. Doing this increases the size of the shape.
Step # 5 – Change the corners of the rectangle
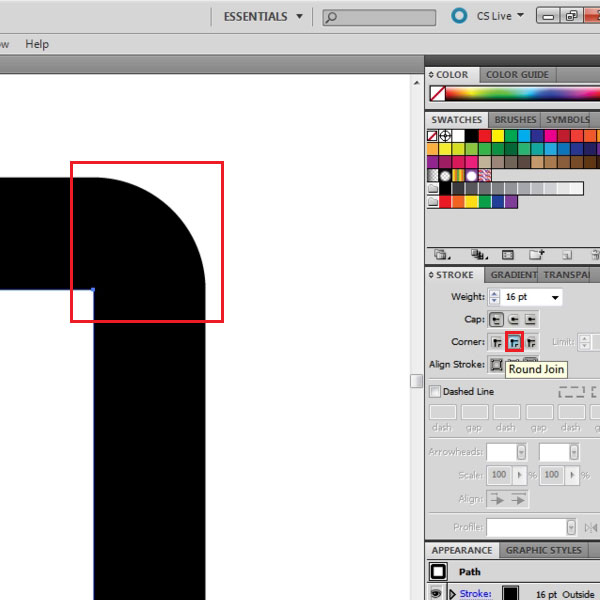
Furthermore, even the corners of the rectangle can be changed. Zoom in to the corner of the shape to see this more clearly. Right now, the corner has a pointed edge; you can make it curved by pressing the “round join” option on the stroke panel.
Step # 6 – Make a “bevel joint”
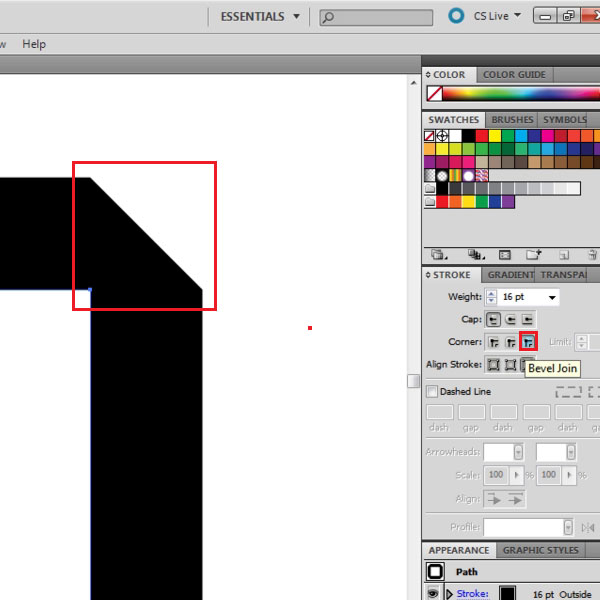
You can chop off the edge from the corner of the rectangle by going to the options on the stroke panel and clicking on “bevel joint” option.
Step # 7 – Change the line cap
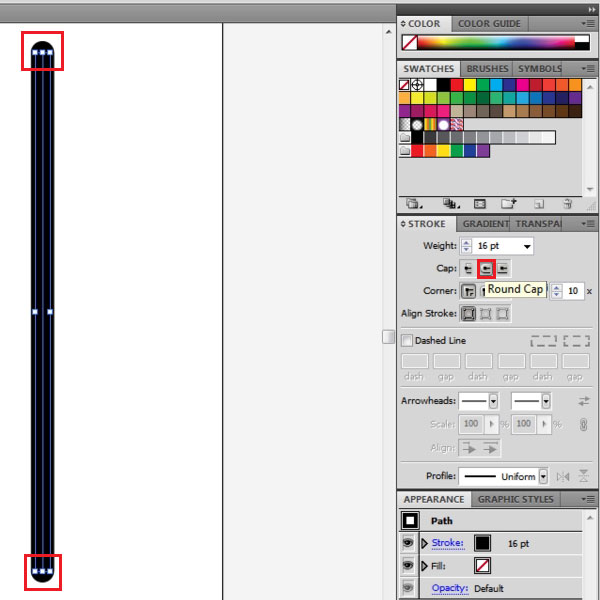
Now, draw two alignment lines on the side of the rectangle. You can change the end of these lines; that is its cap. Zoom in on the line to get a better view. Make sure, that you select the line to change its cap. Illustrator will make the cap outside of your end anchor point. Make a round cap by clicking on the “round cap” option.
Step # 8 – Make a projecting cap
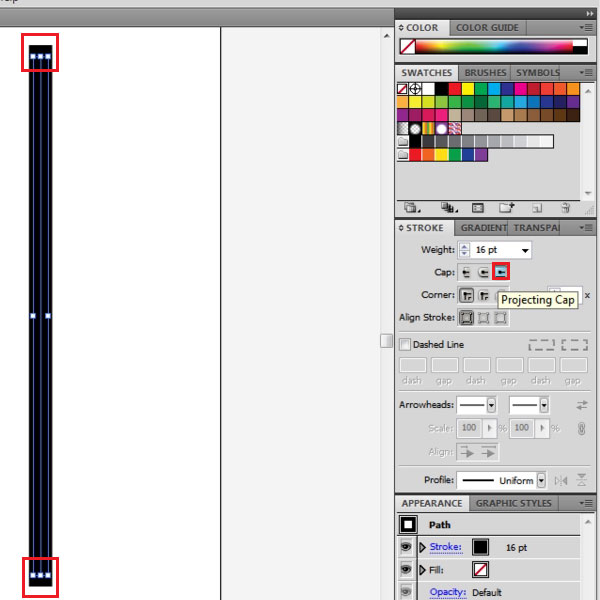
To make this cap on a straight line select the “projecting cap” option from the stroke panel on the right.
 Home
Home