When talking about the perfect imagery, its all about the lighting effects. There are various photo lighting techniques that can be applied on an image, allowing you to transform a relatively simple image into something more. There are various filters that can be applied to accentuate your image. In this basic photoshop tutorial, you would learn how to apply a light effect on image in Photoshop.
Step # 1 – Load an Image
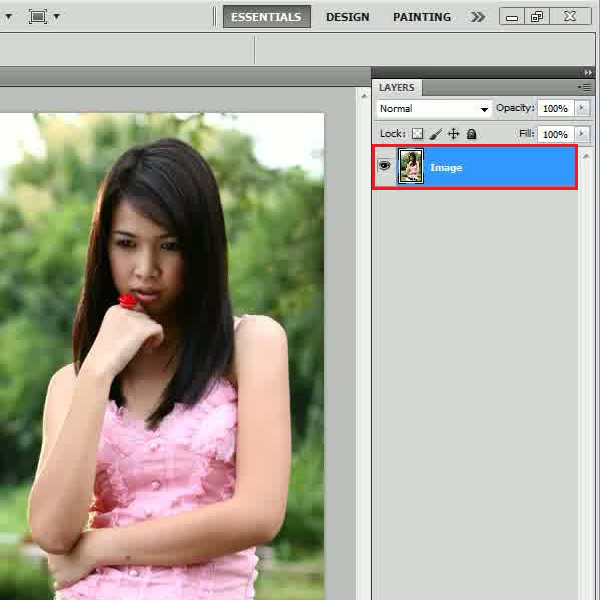
First of all, launch Adobe Photoshop and load an image on which you want to create a light effect.
Step # 2 – Apply the Gaussian Blur Filter
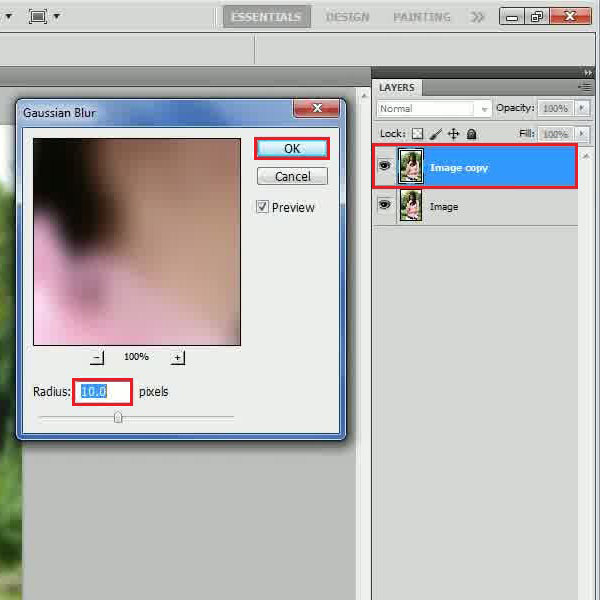
Now create a duplicate layer and go to the “Filter” menu, select “Blur” and click on the “Gaussian Blur” filter. In the filter settings panel, set the “Radius” to “10 pixels” and click on the “OK” button to apply it on the image.
Step # 3 – Paint over the Image
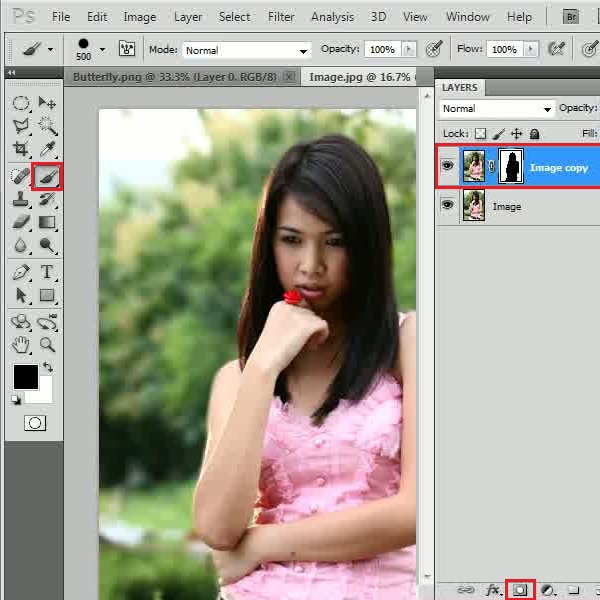
In the next step, add a layer mask by clicking on it icon at the bottom of the layer’s panel. Now select the “Brush” tool from the menu, choose the “Black” color and start painting over the part of the image that you want to focus on.
Step # 4 – Using the Pen Tool
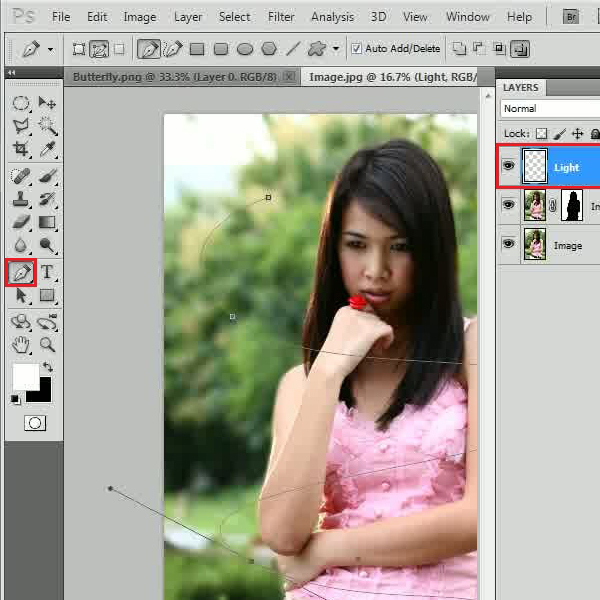
Now insert a new layer and change its name to “Light”. Select the “Pen” tool and draw spiral lines around the object.
Step # – Choose a Brush size
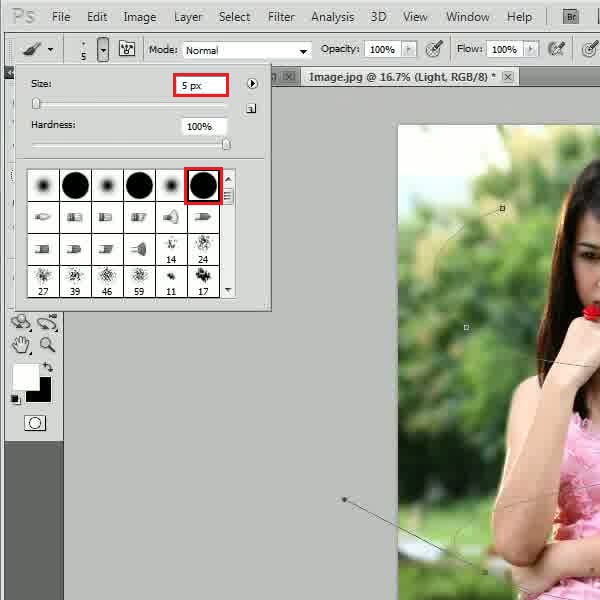
Once you have the perfect spiral, select the “Brush” tool and change its “Size” to “5 px”.
Step # 6 – Create a Path
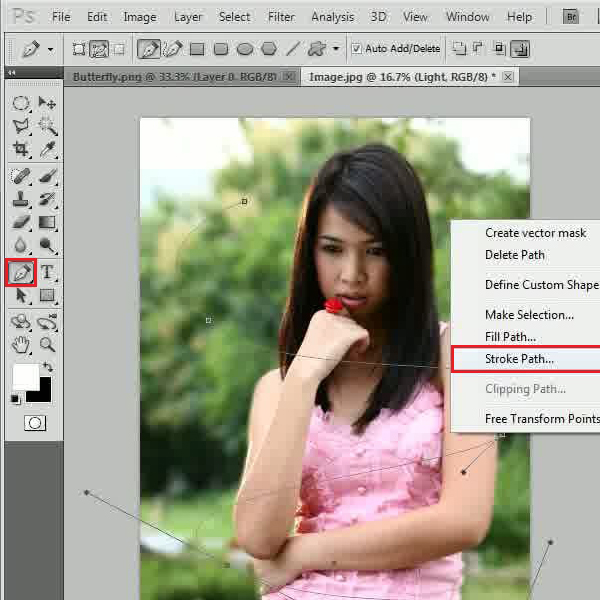
Once again select the “Pen” tool, right click on the image and select the “Stroke Path” option from the menu. Now choose the “Brush” option from the menu, select the “Simulate Pressure” option and click on the “OK” button.
Step # 7 – Adjust the Drop Shadow Setting
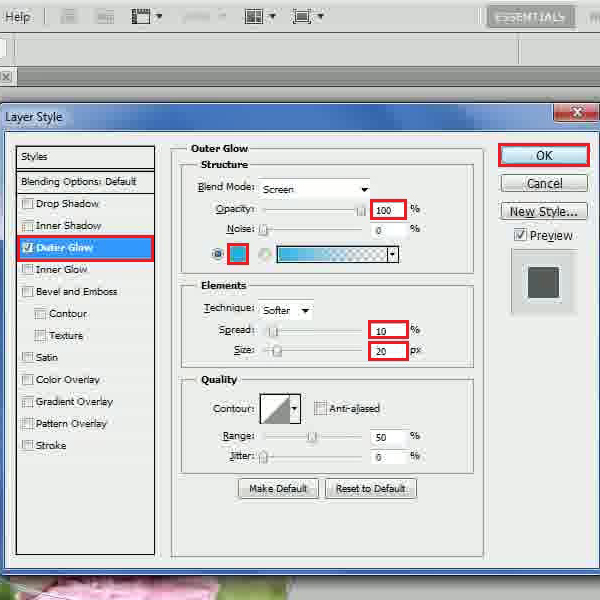
In the next step, right click on the “Light” layer and select the “Blending Options” from the menu. In the settings panel, go to the “Outer Glow” tab, increase it’s “Opacity” to “100 percent” and use “16b5e5” for the color fill.
After selecting the color, set its “Spread” to “10 percent”, “Size” to “20 px” and click on the “OK” button to apply it.
Step # 8 – Using the Eraser Tool
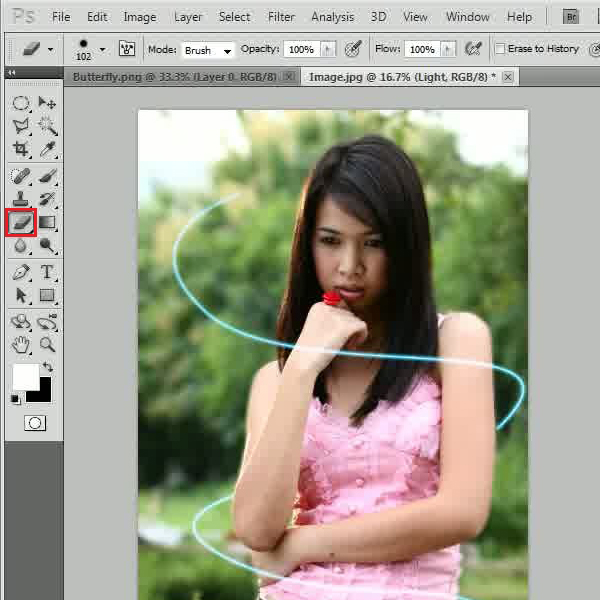
Now select the “Eraser” tool from the menu and remove some parts of the spiral lines over the object.
Step # 9 – Adjust the Brush Size and Shape
Once done, create a duplicate copy of the “Light” layer, select the “Brush” tool and open the brush properties panel. In the “Brush Tip Shape” tab, select the “Star” shaped brush and set its “Size” to “20 px” and “Spacing” to “50 px”.
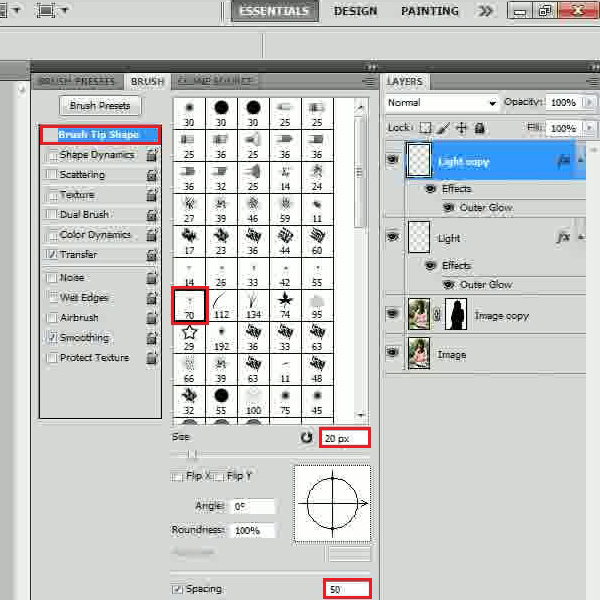
Step # 10 – Adjust the Brush Scattering
Now move over to the “Scattering” tab, set the “Scatter” to “1000 percent”, “Count” to “1” and close the settings panel.
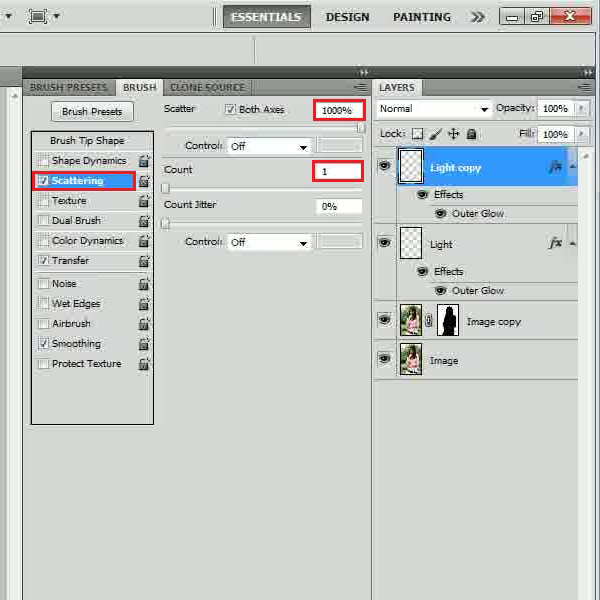
Step # 11 – Create a Duplicate Layer
Using the “Brush” tool, apply a few strokes over the corners of the spiral line.
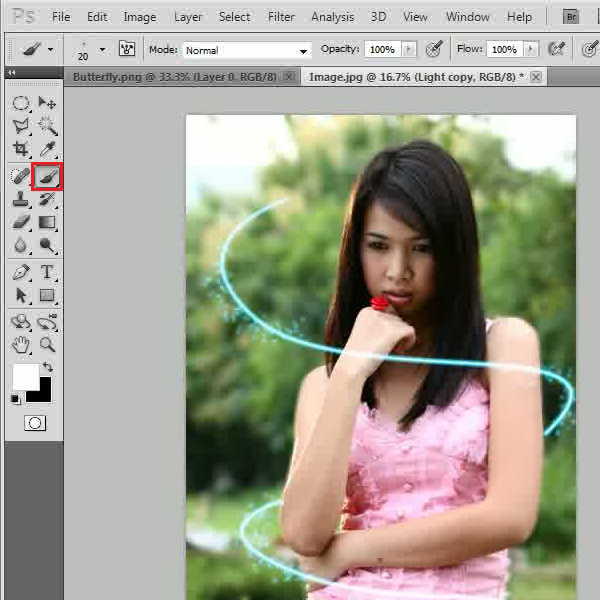
Step # 12 – Insert an Image
In the last step, drag an image of a “Butterfly” over the image. Adjust its size and place it according to the background. Change the “Blending Mode” of this layer to “Linear Light” and you’re done.
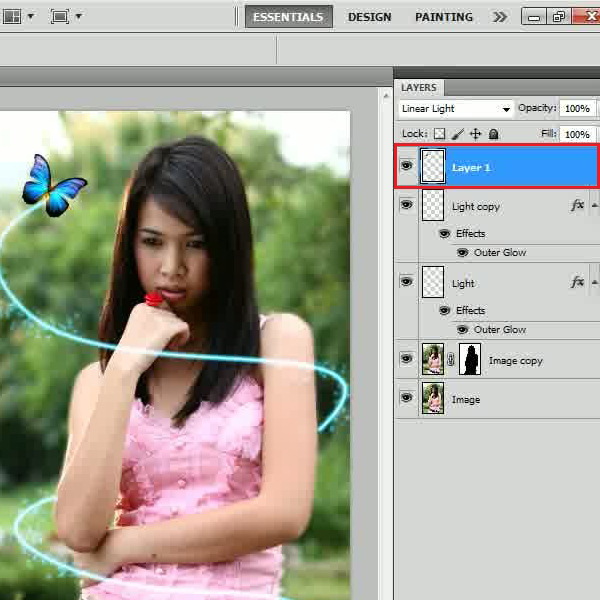
 Home
Home