Give 3D effects in Illustrator to your vector text and images. Through this you can give your text in Illustrator a perspective which can be used for different design purposes.
To understand how to create a polished 3d text effect in Adobe Illustrator follow the steps below.
Step # 1 – Make the background
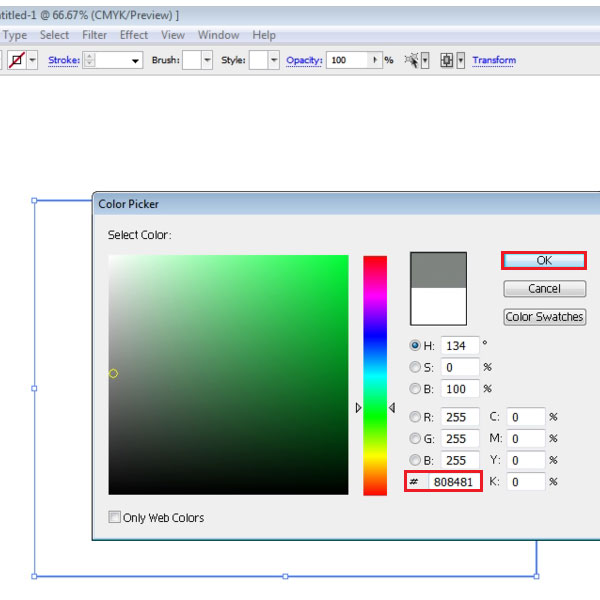
Start off by making a rectangle the same size as your page for the background. Choose the selection tool to position the rectangle. A shortcut for the selection tool is by pressing the “v” key.
Step # 2 – Insert text
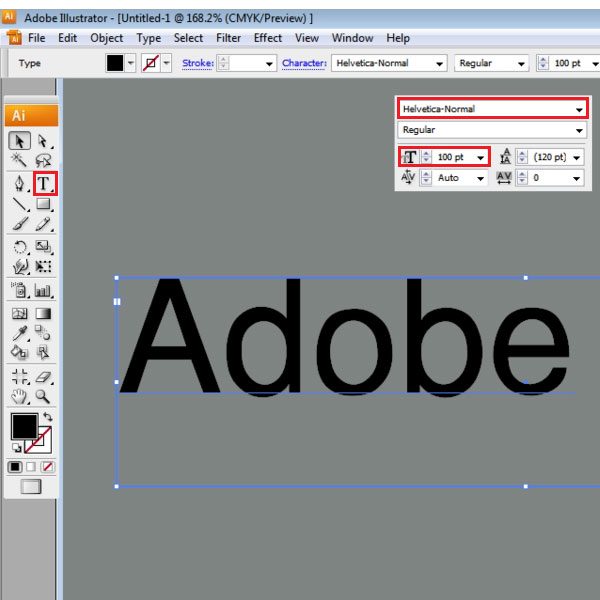
Now, enter the text by making a text box. The font type chosen here is “Helvetica-Normal” and the size is “100pt”. Zoom in to the text to get a better view.
Step # 3 – Add new fill
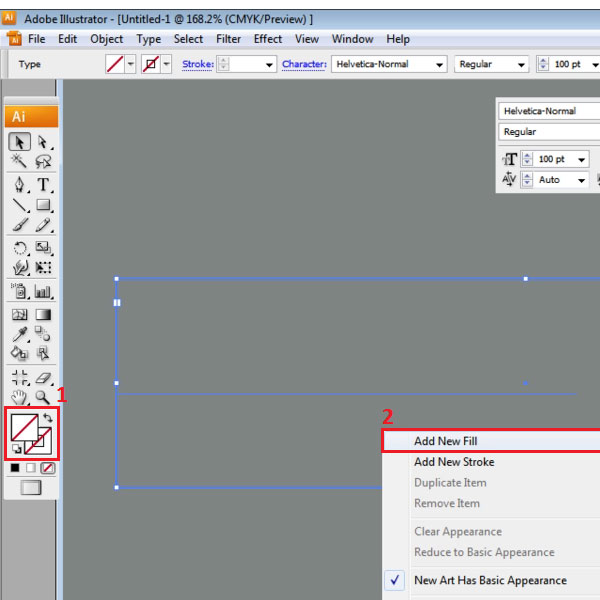
Remove the color in the text as this will be added through the appearance panel. Keep selecting the text box and go to the appearance panel. From the drop down arrow choose the “add a new fill option”.
Step # 4 – Add gradient to the fill
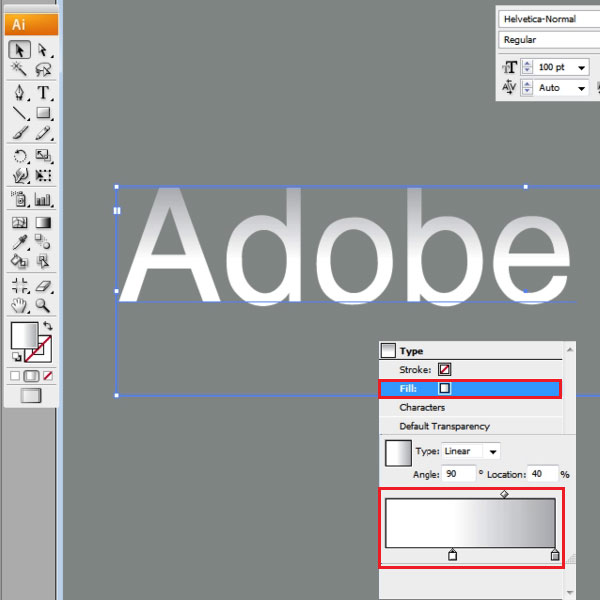
Add gradient to the fill with the gradient slider. Choosing white for the left side and light gray for the right side. Set the angle to “90” and make the location to “40”.
Step # 5 – Insert another fill
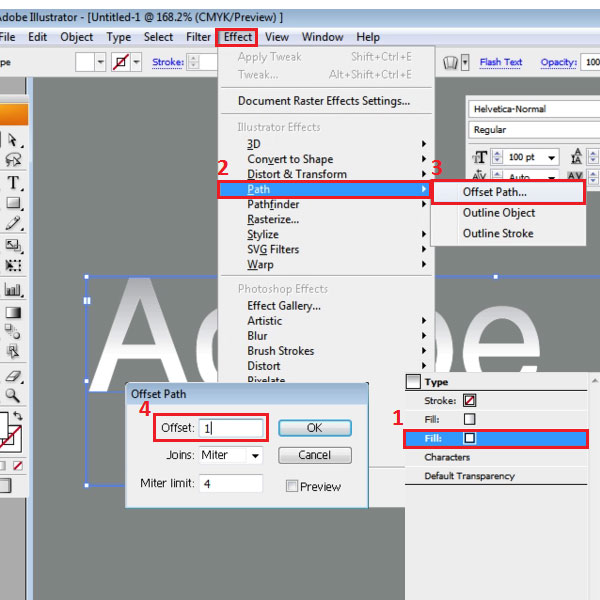
Add another fill with its color set to white. While selecting this fill, go to the “effects” menu, drop down to “path” and choose the “offset path” option. Set the offset to”1px”.
Step # 6 – Add the “transform” effect
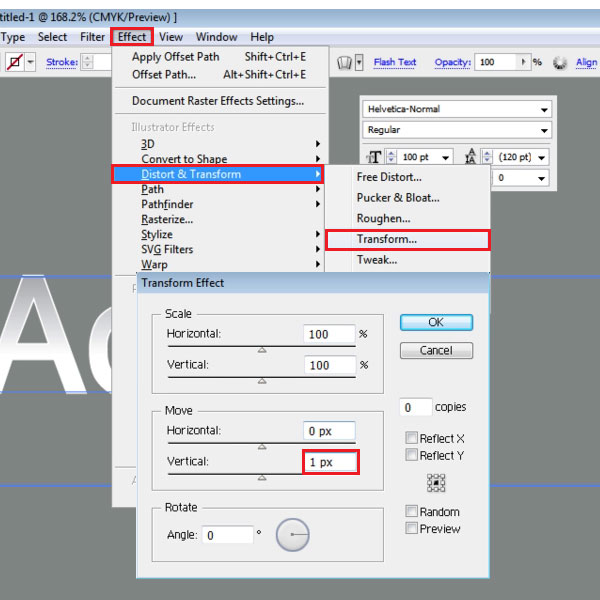
Now apply the transform effect by going to, effectn – distort and transform and choose the transform option. From the transform settings enter 1 for the vertical move.
Step # 7 – Duplicate the fill
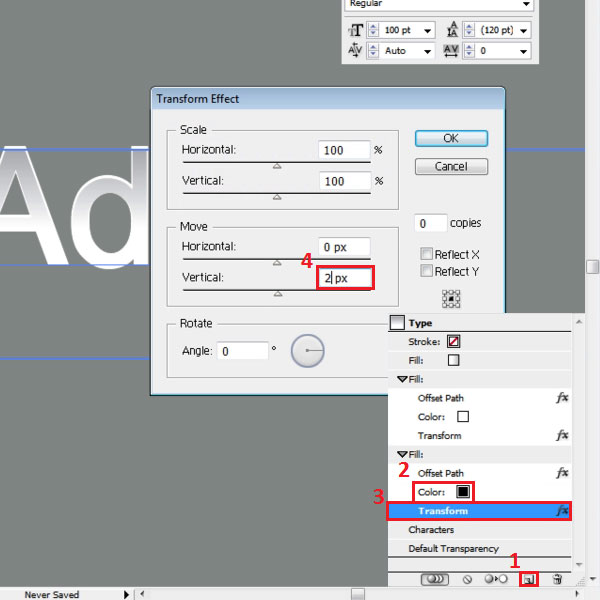
Duplicate this fill by the icon present on the bottom of this panel. Select its color as black. Edit its transform effect by double clicking it and then changing the vertical move to “2”.
Step # 8 – Create another copy
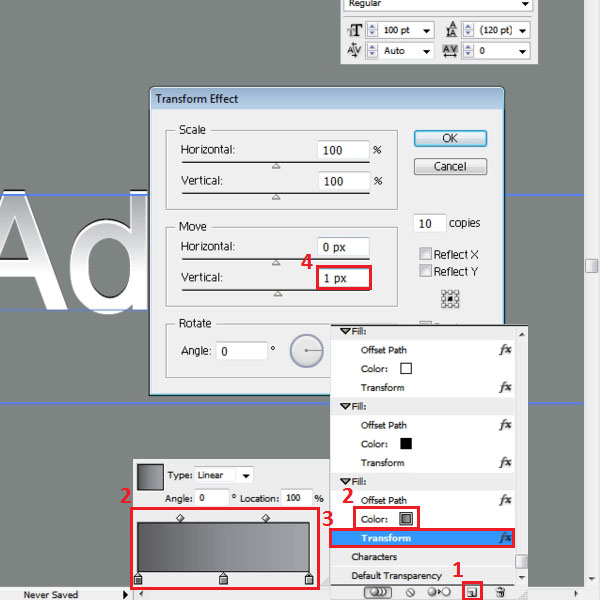
Next, duplicate the current fill that you were working on. Add gradient to it with three gradient sliders which move from dark gray to light while going from left towards right. Edit its transform settings, by changing the number of copies to “10” and setting the vertical move to “1”.
Step # 9 – Add the “drop shadow” effect
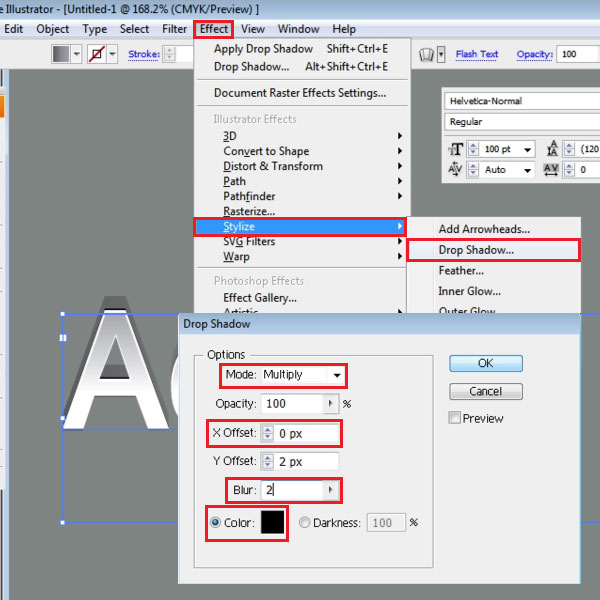
Keep selecting the fill and add another effect by going to, effect – stylize and choosing the drop shadow option. From the settings increase the opacity to “100%”, set the X Offset to “0”, Y Offset to “2” and the blur at “2”. Press “ok” to apply this change.
 Home
Home