Photoshop is a easy-to-use software that allows you to manipulate images in a way that fades the difference between reality and fiction. Besides manipulation, it is also used to design and create various images and graphics. Here in this tutorial, we are using a basic noise filter and few designing tools to create a bar code image. We start from nothing but a blank white canvas and create our design in few simple steps.
Follow this step by step guide to learn how to create a bar code in Photoshop.
Step # 1 – Create a Rectangular Shape
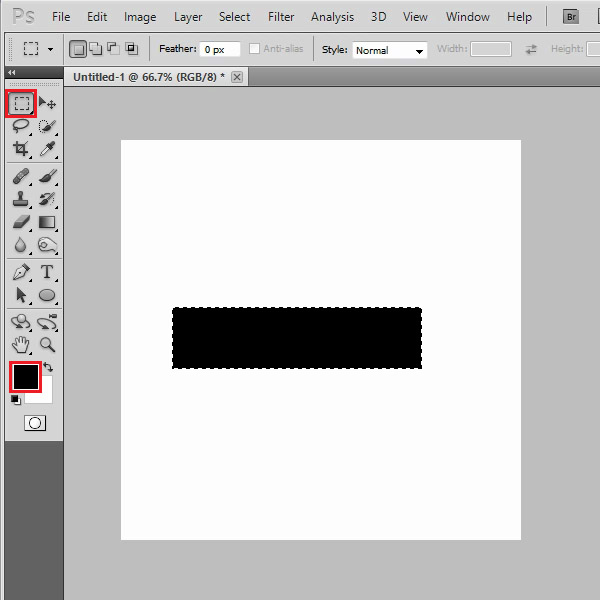
In the first step, launch Adobe Photoshop and open up a new document having White background. Now select the “Rectangular Marquee” tool from the tool bar located at the left corner of the window. Once done, draw a rectangular selection and fill it with Black color.
Step # 2 – Apply the Noise Filter
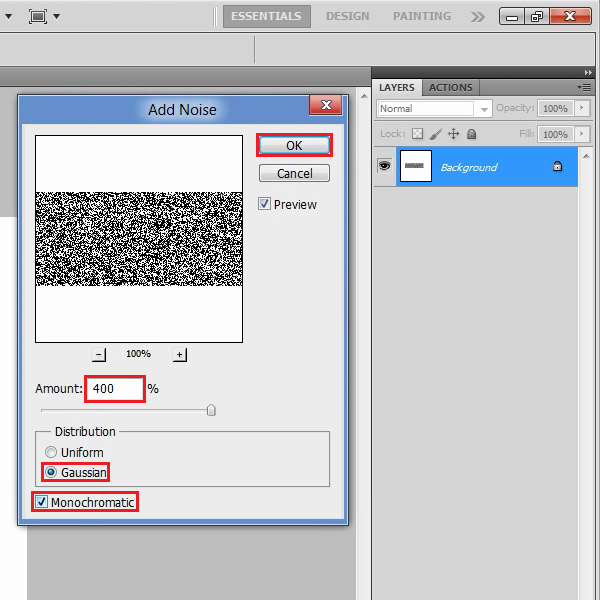
In the next step, go to the “Filter” menu, select “Noise” and click on the “Add Noise” filter from the list. In the filter settings panel, set the “Amount” to “400 percent”. Now select the “Gaussian” and “Monochromatic” options. After changing these settings, click on the “OK” button to apply it on the layer.
Step # 3 – Stretch the Selection
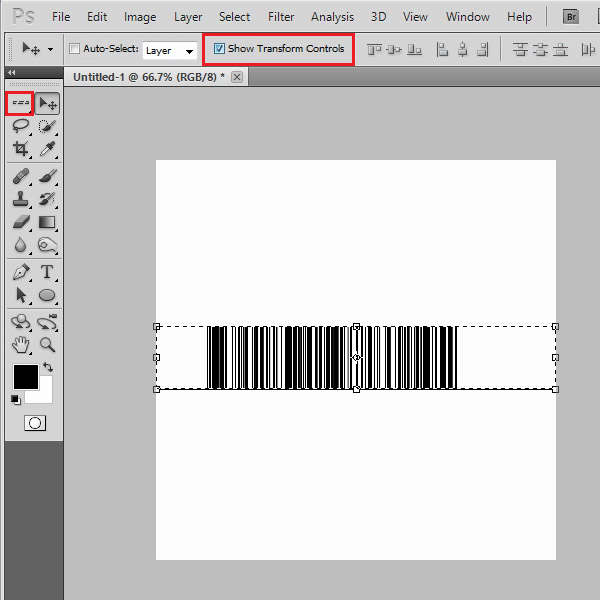
In this step, select the “Single Line Marquee” tool and apply it on the rectangular box. Now select the “Shot Transform Controls” option and stretch the selection vertically. This will nicely create a Bar Code image.
Step # 4 – Insert the Numeric Text
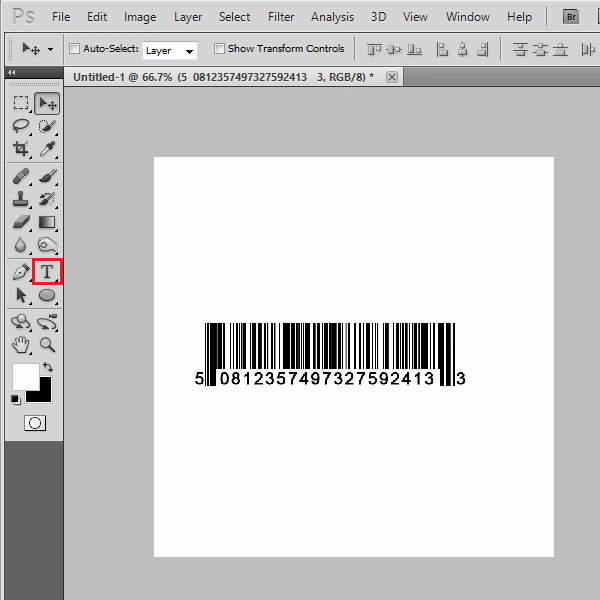
Now select the “Rectangular Marquee” tool, make a selection on the lower part and fill it with White color. Once done, select the “Text” tool and insert some random numbers at the bottom of the bar code. Now select this bar code and press the “Ctrl+C” key on the keyboard to copy it.
Step # 5 – Adjust the Blending Mode
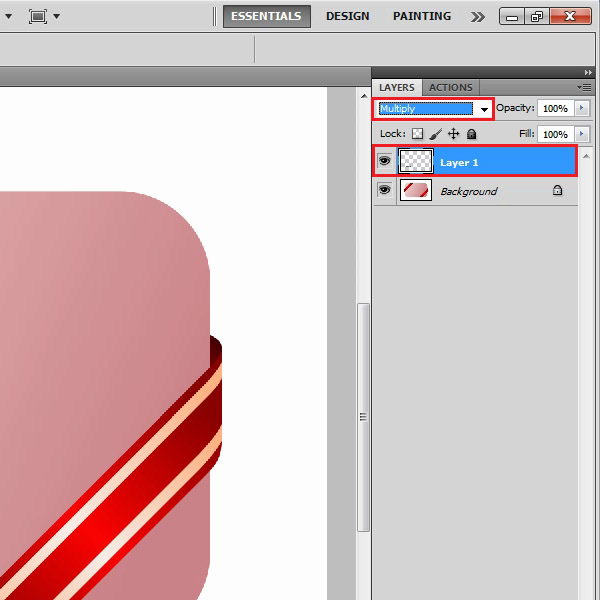
In the final step, open up a new image and press the “Ctrl+V” key on the keyboard to paste the bar code over it. Once done, select the bar code and adjust its size and placing on the image. Now change the blending mode of this layer to “Multiply” and you’re done.
 Home
Home