The biggest advantage of modern image editing applications is that you can apply various effects and tones on images without using expensive tools or photographic equipment. You can also add a texture to photos to give them a whole new look. Creating a texture effect is very simple. You can easily learn how to create a metal texture in Photoshop in few steps.
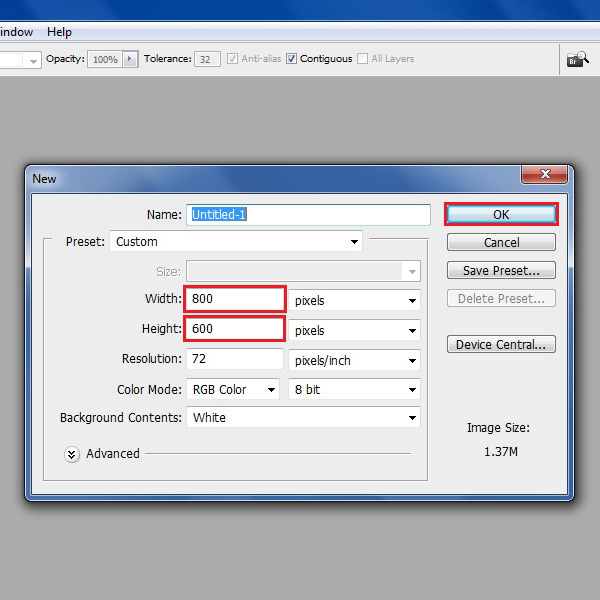
Step # 1 – Open a New Document
In the first step, launch Adobe Photoshop and create a blank document. Choose its size as “800 x 600” pixels and click on the “OK” button to create it.
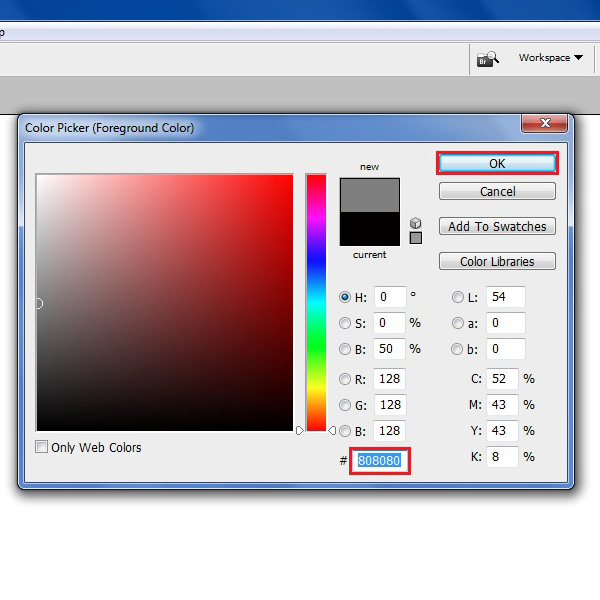
Step # 2 – Choose a Metal Grey Color
Click on the colors panel and choose the foreground color to “Metal Grey”. For the reference, you can use the color’s code which is “808080”.
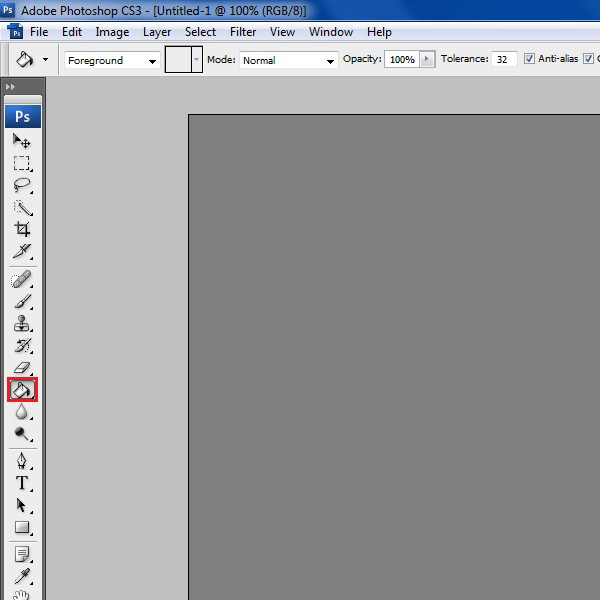
Step # 3 – Apply the Color on the Page
Select the “Paint bucket” tool from the menu and click on the blank page to apply the selected color on it.
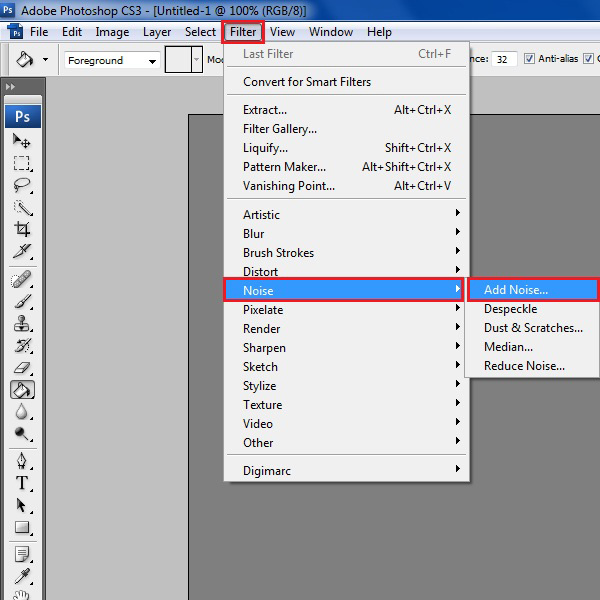
Step # 4 – Apply a Noise Filter
Now go to the “Filter” menu which is located on top of the window. Select the “Noise” option from the list and click on the “Add Noise” filter to apply it.
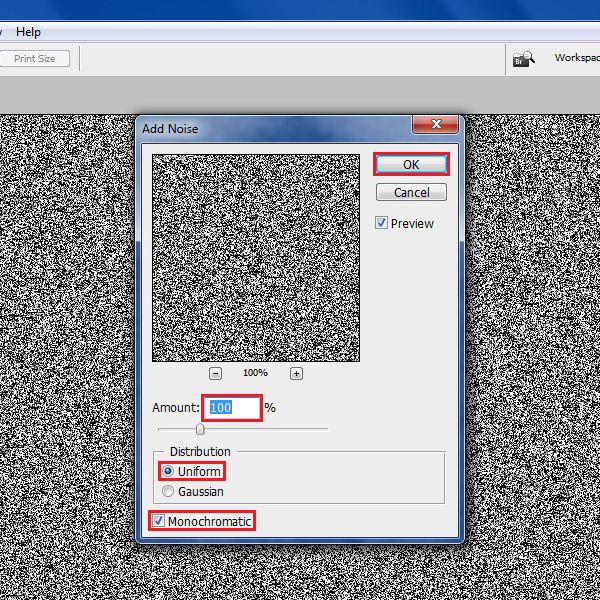
Step # 5 – Choose the Noise Settings
In the “Noise” settings panel, choose the “Uniform” distribution option and enable the “Monochromatic” effect. Now change the Amount level to “100%” and click on the “OK” button to apply the filter.
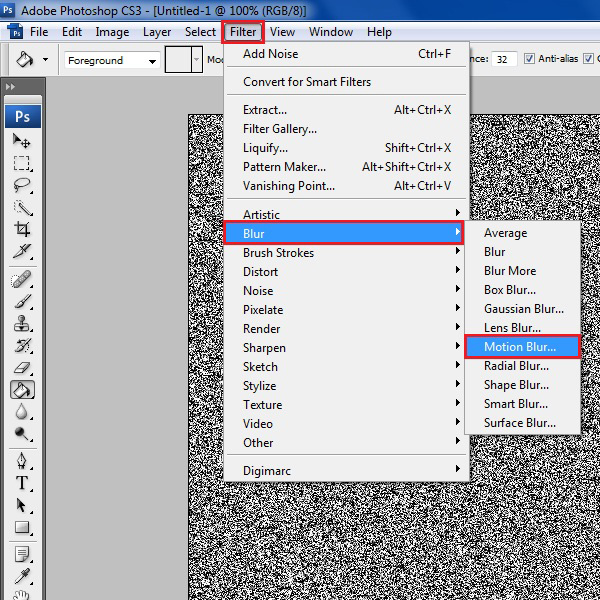
Step # 6 – Apply a Motion Blur
Now go to the “Filter” menu and select the “Blur” option from the list. Click on the “Motion Blur” filter to apply it on the image.
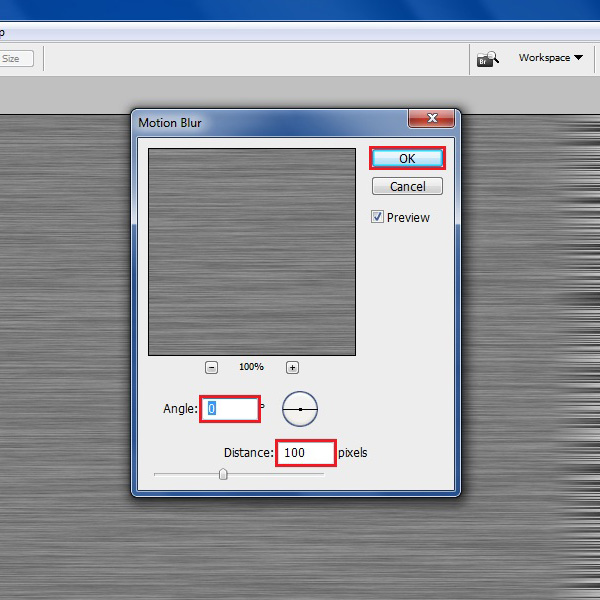
Step # 7 – Choose the Blur Settings
In the Motion Blur settings, set the “Angle” to “0°”. After it, change the “Distance” option to “100” pixels. Now click on the “OK” button to apply these settings.
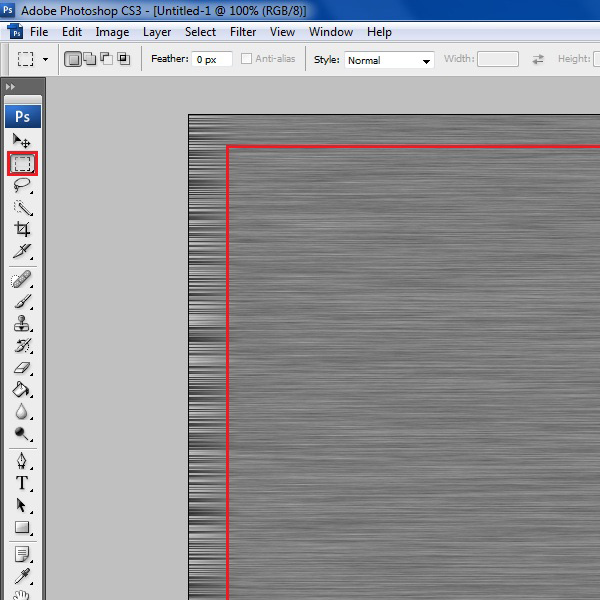
Step # 8 – Select the Center of the Page
Choose the “Rectangular Marquee” tool from the menu and select the middle portion of the texture excluding the edges.
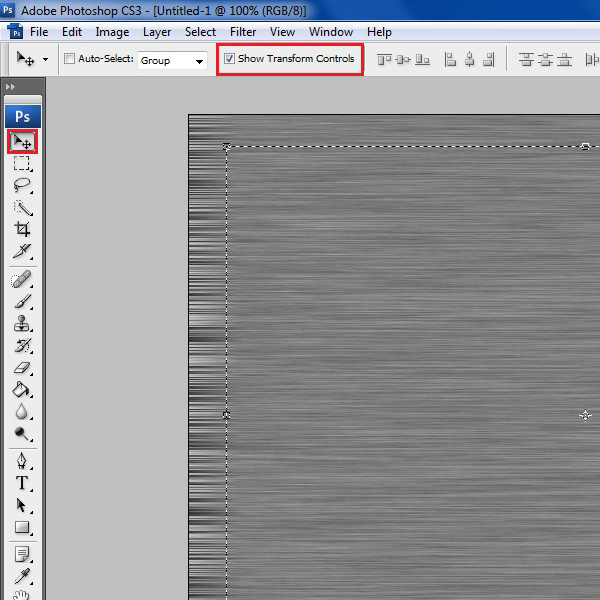
Step # 9 – Stretch the Center towards the Edges
Now use the “Select” tool from the menu and choose the “Show Transform Controls” option which is located at the top of the window. After selecting it, stretch the selected middle portion towards the edges. This will uniform the image and remove the roughness on the edges.
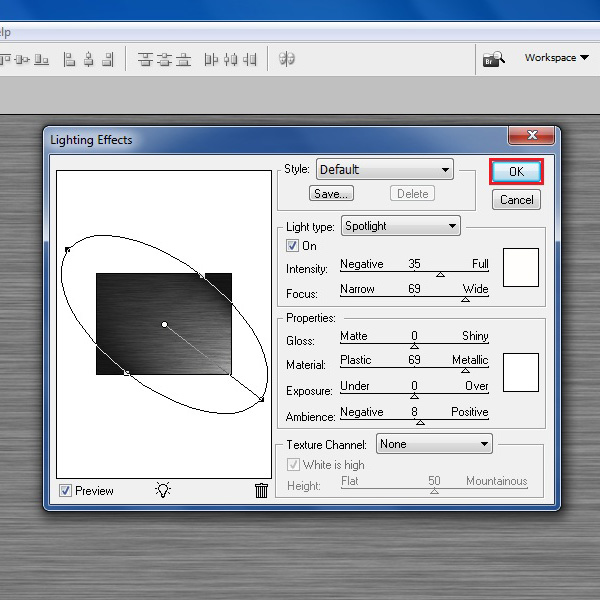
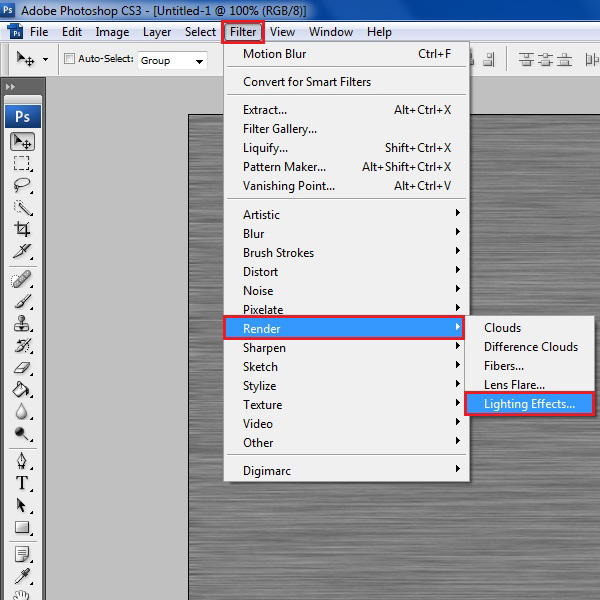
Step # 10 – Apply a Lighting Effects Filter
Now go to the “Filter” menu and select the “Render” option from the list. Click on the “Lighting Effects” filter from the menu to apply it. This will make the image more realistic and metallic.
Step # 11 – Adjust its Settings
In the Lighting Effects settings window, choose the “Style” to “Default” and “Light type” to “Spotlight”. Now select the “ON” option and change the “Intensity” to “35” and “Focus” to “69”.
In the “Properties” portion, change the “Gloss” to “0”, “Material” to “69”, “Exposure” to “0”, “Ambience” to “8” and “Texture Channel” to “None”.
Now click on the “OK” button to apply these settings on the image.