In this tutorial, we will show you a very easy and simple technique to create a beautiful design of a tornado. We will use few Photoshop gradients and style filters to complete the design. Here we use nothing but basic designing techniques and their creative usage that brings out fantastic and colorful designed spiral.
Follow this step by step guide to learn how to create a colorful tornado in Photoshop.
Step # 1 – Apply the Radial Gradient
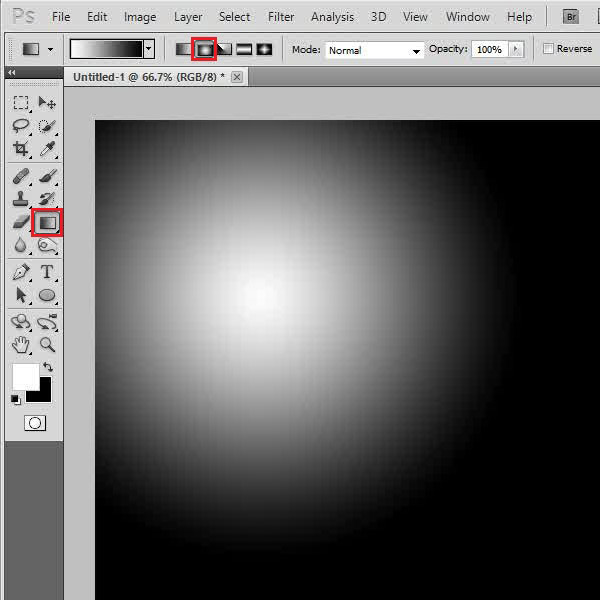
In the first step of this tutorial, launch Adobe Photoshop and open up a new document. Set the foreground color to “White” and the background color as “Black”. Now select the “Gradient” tool from the tool bar located at the left corner of the window. Once done, choose the “Radial Gradient” from the menu and draw it on the page.
Step # 2 – Apply a Wave Filter
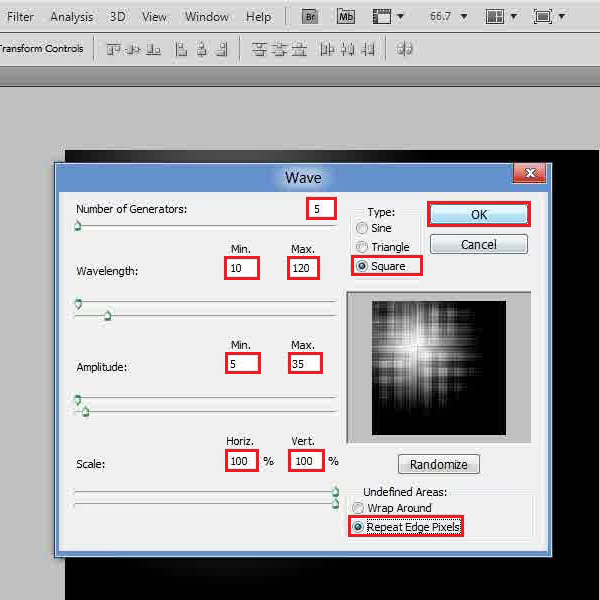
Now go to the “Filter” menu, select “Distort” and click on the “Wave” filter from the list. In the filter settings panel, set the number of generators to “5”, wavelength to minimum “10” and maximum to “120”. Set its amplitude to minimum “5” and maximum “135”. Now set the scale at horizontally and vertically “100 percent”, choose its type as “Square” and undefined areas as “Repeat Edge Pixels”. After changing these settings, click on the “OK” button to apply it on the layer.
Step # 3 – Apply the Twirl Filter
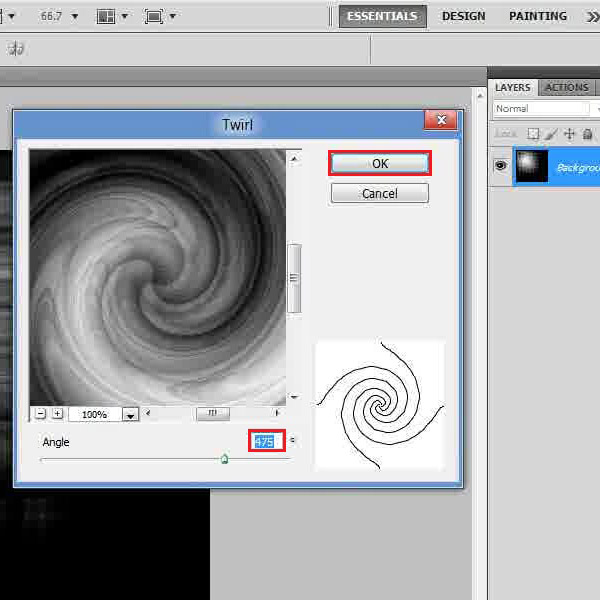
In the next step, go back to the “Filter” menu, select “Distort” and click on the “Twirl” filter from the list. In the filter settings panel, set the “Angle” to “475 degrees” and click on the “OK” button to apply it on the layer.
Step # 4 – Create a Duplicate Layer
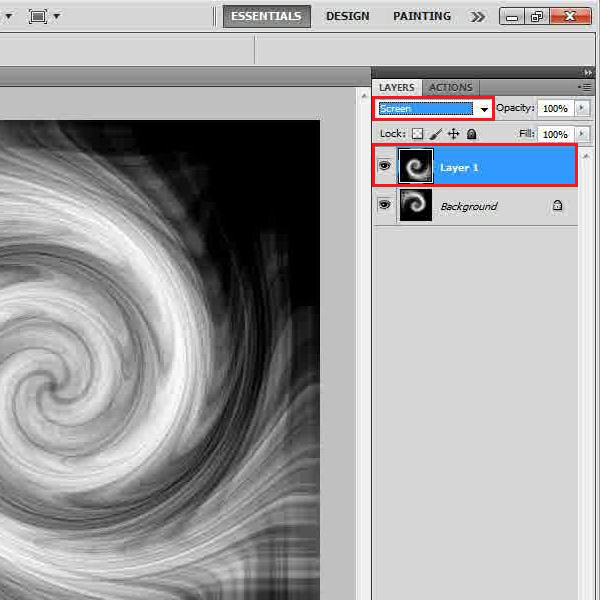
Now create a duplicate, go to the “Edit” menu, select “Transform” and click on the “Rotate 180 degrees” option. Once done, change the blending mode of this duplicate layer to “Screen”. Now select both layer and press the “Ctrl+E” keys on the keyboard to merge them together.
Step # 5 – Apply the Gaussian Blur
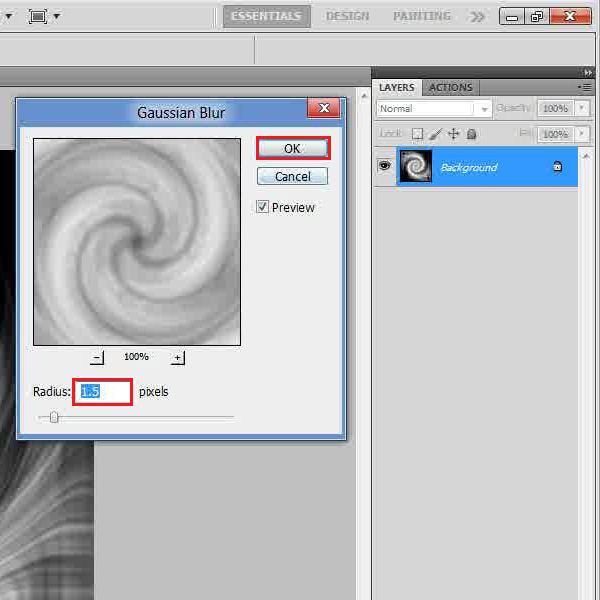
In the next step, go to the “Filter” menu, select “Blur” and click on the “Gaussian Blur” filter from the list. In the filter settings panel, set the “Radius” to “1.5 pixels” and click on the “OK” button to apply it on the layer.
Step # 6 – Insert a Colorful Radial Gradient
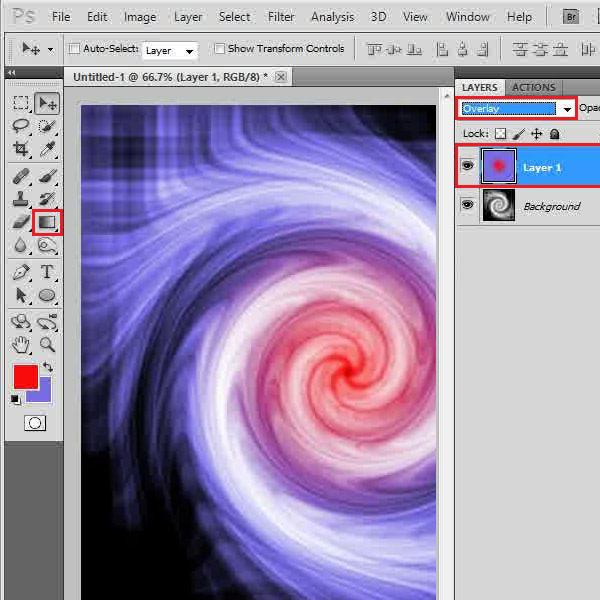
In the last step, insert a new layer, select the “Gradient” tool, choose your desired colors for the foreground and background and apply it on this layer. Once done, change the blending mode of this layer to “Overlay” and you’re done.
 Home
Home