In this tutorial, we will design a beautiful and eye catching font style. We will use Photoshop filters and through their effective usage complete our design. After completion, the text will show a plaster looking surface with floating air bubbles over it. This overall tutorial consists of basic Photoshop tools and simple designing techniques.
Follow this step by step guide to learn how to create a floating bubble text in Photoshop.
Step # 1 – Insert Your Desired Text
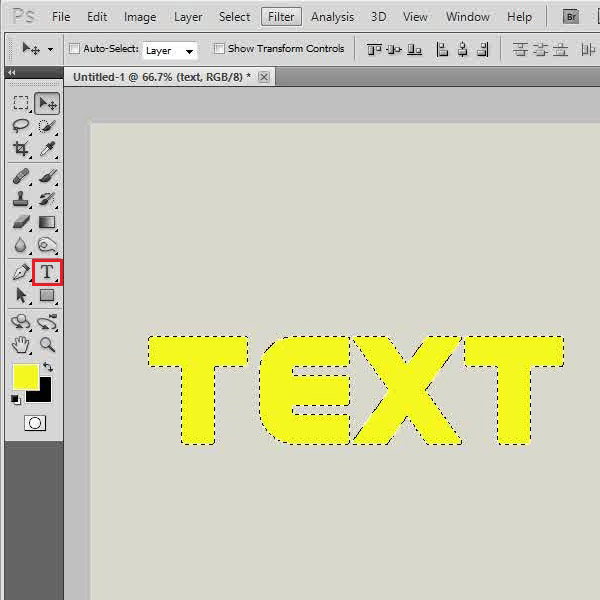
In the first step, launch Adobe Photoshop and open up a new document. You can choose any color of your choice and fill the background with it. Now select the “Text” tool from the tool bar located at the left corner of the window. Insert some text and align it to the center of the page. Once done, hold down the “Ctrl” key on the keyboard and click on the “Text” layer to select its outline.
Step # 2 – Apply the Sponge Filter
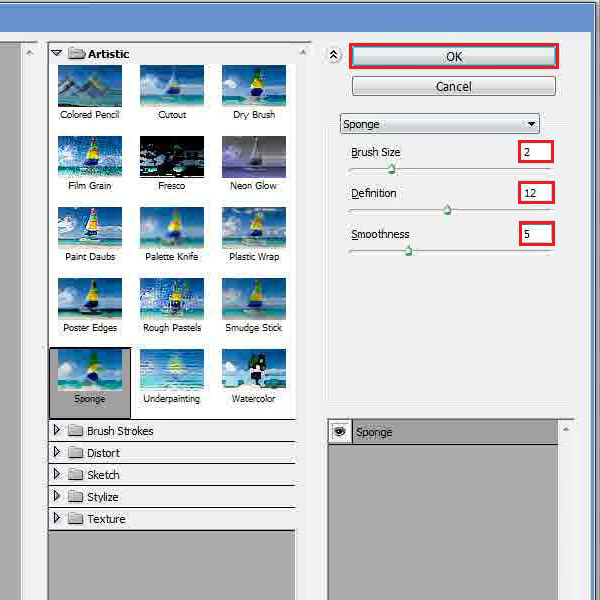
In the next step, go to the “Filter” menu, select “Artistic” and click on the “Sponge” filter from the list. Rasterize the layer then set the brush size to “2”, definition to “12” and smoothness to “5”. After changing these settings, click on the “OK” button to apply it on the layer.
Step # 3 – Apply the Glowing Edges Filter
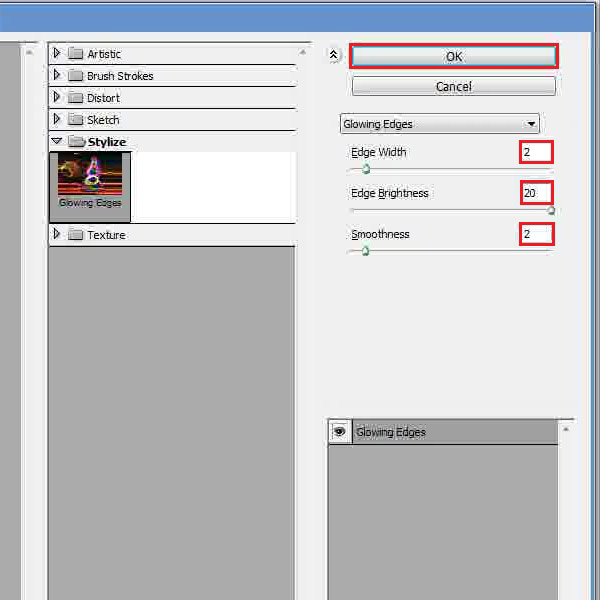
In the next step, go back to “Filter” menu, select “Stylize” and click on the “Glowing Edges” filter from the list. Now set its edge width to “2”, edge brightness to “20” and smoothness to “2”. After changing these settings, click on the “OK” button to apply it on the layer.
Step # 4 – Apply the Plaster Filter
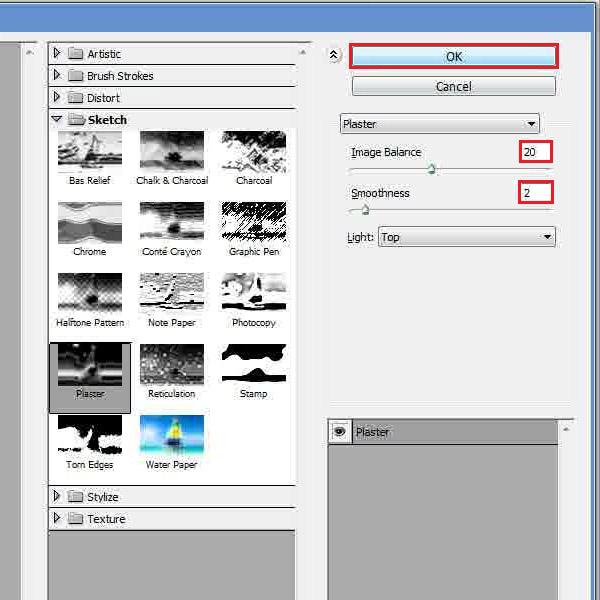
Now press the “Ctrl+I” key on the keyboard to invert the text color. Once done, go to the “Filter” menu, select “Sketch” and click on the “Plaster” filter from the list. In the settings panel, set the image balance to “20” and smoothness to “2”. After changing these settings, click on the “OK” button to apply it on the layer.
Step # 5 – Adjust the Drop Shadow Settings
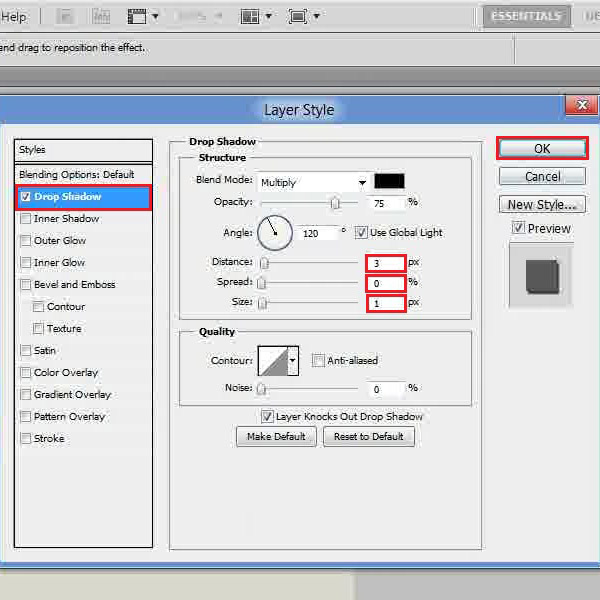
In the final step, press the “Ctrl+I” key on the keyboard to invert it again and press “Ctrl+D” to deselect it. Now open the blending options of this layer and move over to the “Drop Shadow” tab. In this tab, set the distance to “3px”, spread to “0 percent” and size to “1px”. After changing these settings, click on the “OK” button to apply it and you’re done.
 Home
Home