In this Photoshop tutorial, we are going to design a metallic typography by using basic tools, few patterns and gradients and a simple designing technique. We’re going to start with a blank page creating a metal pattern first then applying it on the background and text.
Follow this step by step guide to learn how to create metallic typography in Photoshop.
Step # 1 – Creating a Metal Holes Pattern
In the firsts step, launch Adobe Photoshop and open a new document of “4 x 4 pixels” in dimension with a transparent background. Zoom in and select the “Ellipse” tool. Now draw a circle at the bottom of the page using the black color. Duplicate the layer and create two more circles and place them on the top in a way that only their half part is visible. Once done, go to the “Edit” menu, select “Define Pattern”, enter its names as “Metal Holes” and click on the “OK” button to save this pattern.
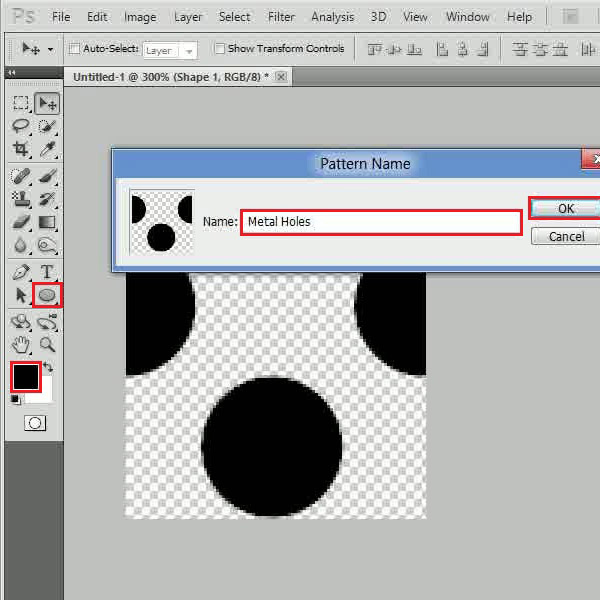
Step # 2 – Applying the Pattern on a Page
Now open up a new document choosing the white background, double click on its layer to unlock it and again double click on it to open the blending options. In the blending options panel, go to the “Pattern Overlay” tab, choose the “Metal Holes” pattern which you have just created and set its scale to “30 percent”.
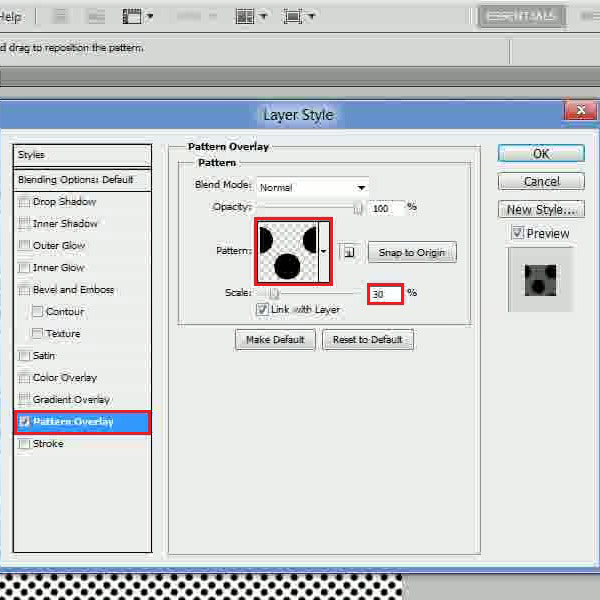
Step # 3 – Adjusting the Gradient Overlay Settings
In the next step, go to the “Gradient Overlay” tab, choose its blending mode to “Multiply” and click on the gradient color. Choose the color as “080808” for the left gradient, “343434” for the center and “020202” for the right side gradient. After choosing the gradient, set the angle to “-90 degrees” and click on the “OK” button to apply it.
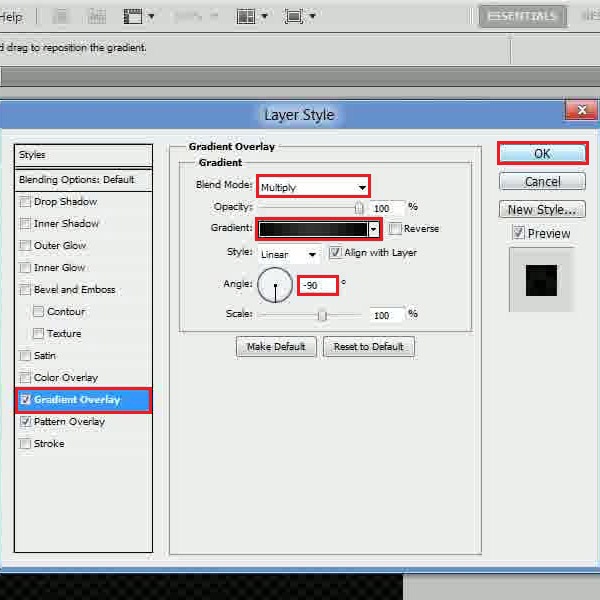
Step # 4 – Applying the Brush Tool
Now insert a new layer, select the “Brush” tool and paint over the page by using a soft brush with white color. Once done, change the blending mode of this layer to “Overlay”.
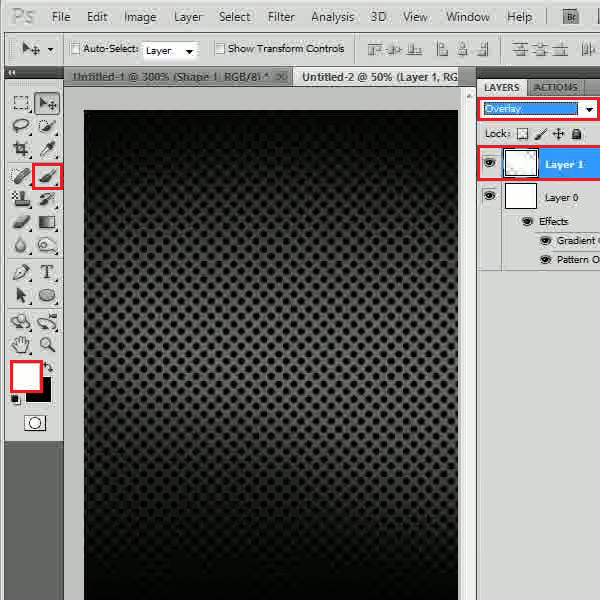
Step # 5 – Adjusting the Outer Glow Settings
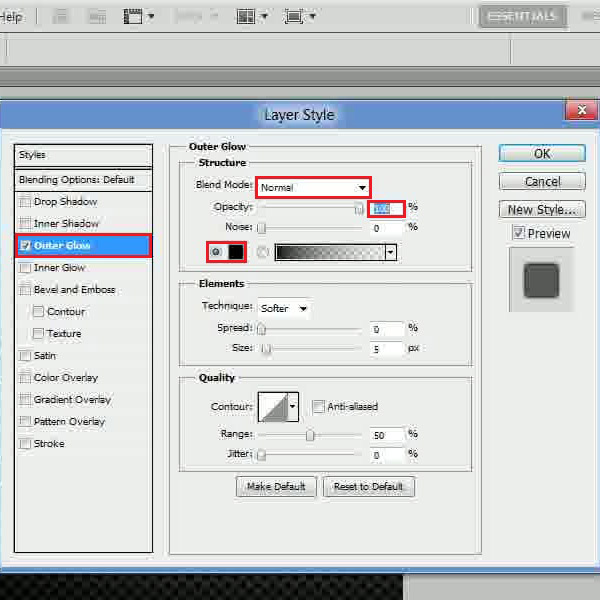
Now insert some text, open its blending options and move over to the “Outer Glow” tab. In this tab, choose its blending mode to “Normal”, set the opacity to “100 percent” and color as black.
Step # 6 – Adjusting the Bevel and Emboss Settings
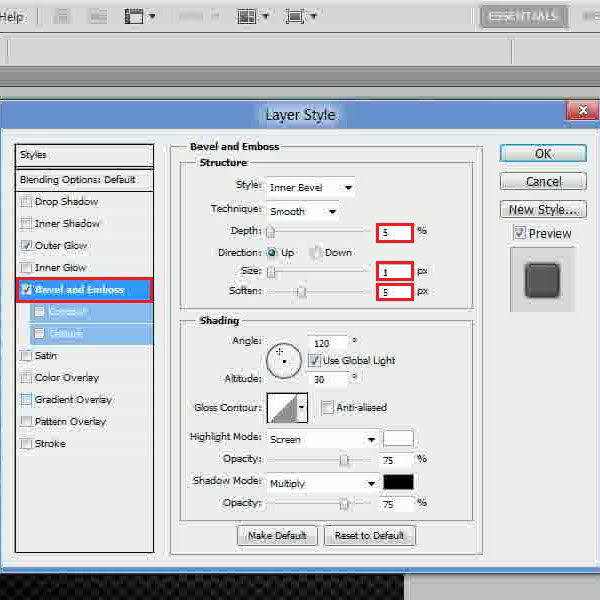
Now move over to the “Bevel and Emboss” tab, set its depth to “5 percent”, size to “1px” and soften to “5px”.
Step # 7 – Adjusting the Gradient Overlay Settings
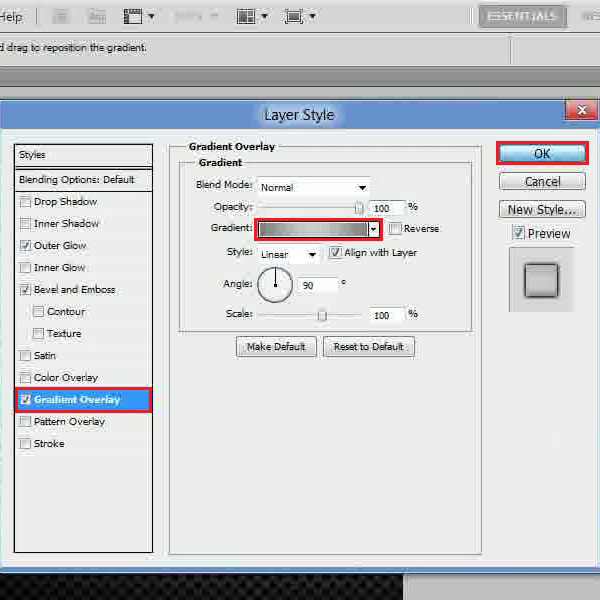
In the last step, move over to the “Gradient Overlay” tab and click on the gradient option. Choose the color as “828282” for the left and right and “cecece” for the middle gradient. After changing these settings, click on the “OK” button to apply it.
 Home
Home