Adobe Photoshop is used for a lot purposes other than photo editing as well. Typography is basically the style and arrangement of text. It is considered as the most powerful way of communication because of its intense visual impact. We can use typography and text effects in websites to bring the attention of viewers. Here we are using Photoshop to convert text into an image. You can also go through our other typography tutorials to learn other helpful techniques.
Follow this step by step guide to learn how to create typography in Photoshop.
Step # 1 – Opening a New File
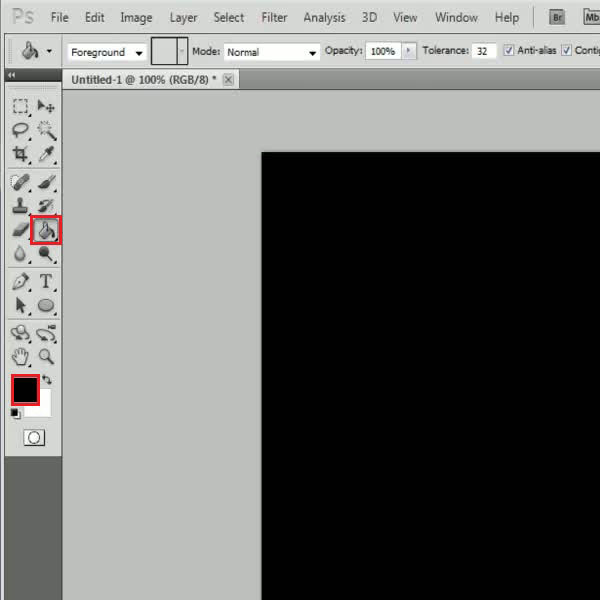
In the first step, launch Adobe Photoshop and open a new document. You can choose the size of the file according to your choice. After opening it, select the “Paint Bucket” tool from the menu and choose the “Black” color. Now click on the image to fill it up with this color.
Step # 2 – Adjusting Font’s Settings
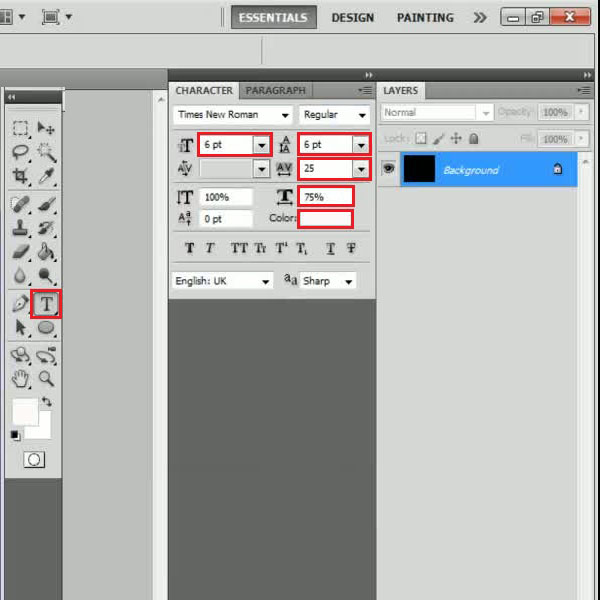
After filling up the page, click on the “Text” tool from the menu which is available at the left corner of the screen. Now click on the “Character and Paragraph” option to open it. In the settings panel, choose “Fonts size” to “6 pt”, “Leading” to “6 pt”, “Tracking” to “25”, “Horizontal scale” to “75 %” and “Color” to “White”.
After changing these values, you may close the panel now.
Step # 3 – Entering Text to Fill up the Document
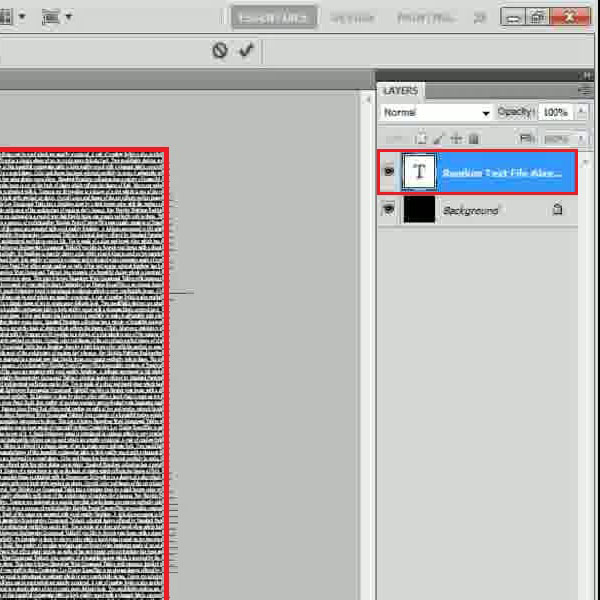
Now enter some random text. You have to insert the text in such a way that it completely covers the background frame.
Step # 4 – Loading an Image
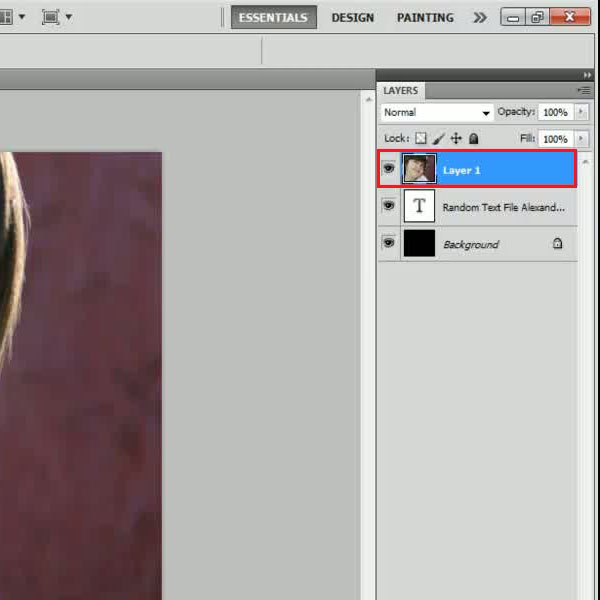
Once you have completely covered the page with text, go to the “File” menu at the top of the page on Photoshop screen and click on the “Open” option. A browsing window will open in front of your screen which allows you to open a new image. Now browse and select an image and click on the “Open” button to load it. After loading the image, drag it over the current working file.
Step # 5 – Applying the Text over the Image
Now select the “Text” layer by holding down the “CTRL” key from the keyboard. This will select the text in the layer. After selecting it, go to the “Select” menu and click on the “Inverse” option from the list. Now here is the best part. Press the “Delete” button form the keyboard to apply a typographic effect on the image and press “CTRL+D” keys from the keyboard to reveal it.
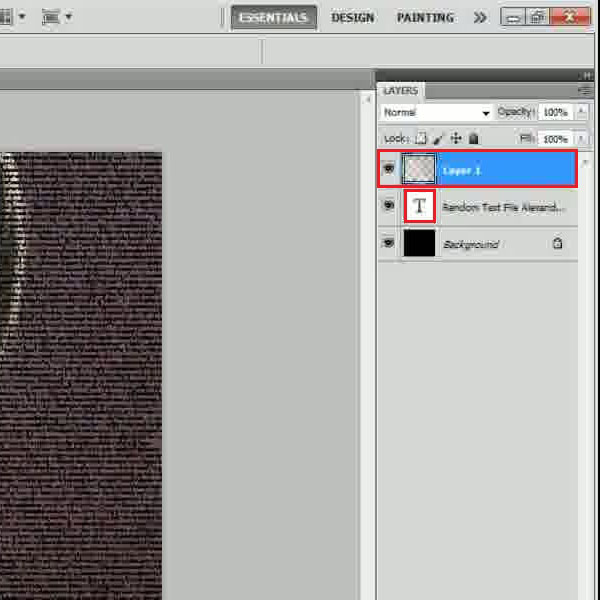
Step # 6 – Entering Additional Text
The typographic effect is almost complete. We just need to add few final effects to smarten it up. Double click on the layer and change its name to “Image”. Once this is done, select the “Text” tool from the menu and add some random text on the image according to your choice.
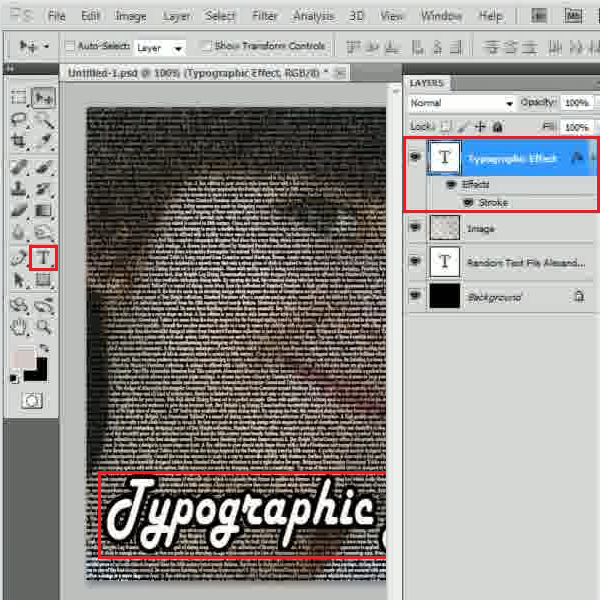
Step # 7 – Adjusting the Brightness and Contrast
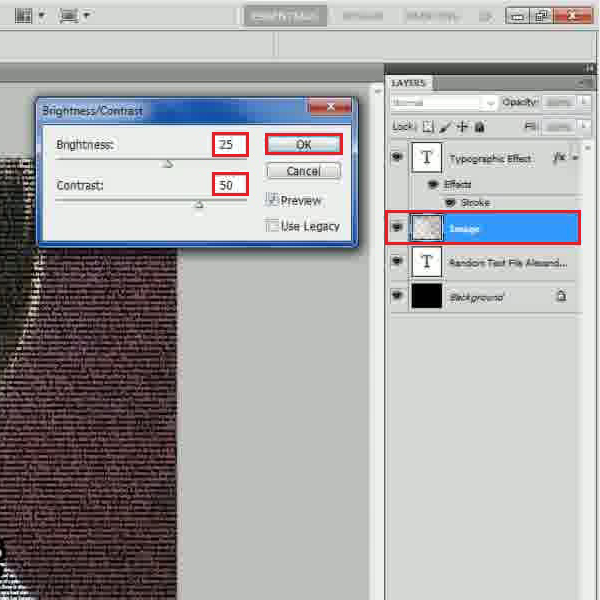
In the final step, select the “Image” layer, go to the “Image” menu, select “Adjustments” and click on the “Brightness/Contrast” option from the list. In the settings panel, increase the “Contrast” level to “50” and the “Brightness” level to “25”. After changing these values, click on the “OK” button to apply these settings on the image.
This way photo editing can be done on an image not by altering the image itself but by adding another layer of text on the pictures that gives it a completely new effect.
 Home
Home