Adobe premiere is an extremely useful software when it comes to video editing. In this premiere tutorial, we will guide you on how to use the lens flare effect in Premiere Pro CS 6. Lens flare is the reflection of the light, which is scattered by passing through different sources of light when the camera is diagonally angled against Hard Light. It is totally dependent on the focal length of the respective lenses, and that’s how the lens flare is generated.
Step 1 – Placing the effect on a clip
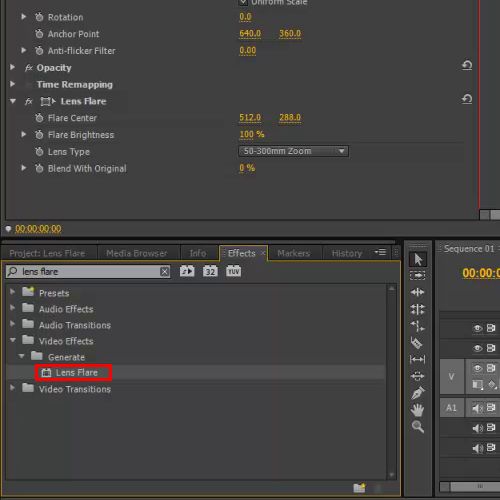
The effect can easily be placed on a clip through the effects library. For that, move forward in the timeline to see when and where the lens flare is needed.
For example in this tutorial, we would need a lens flare when the sun is just about to set. For that, go to the Effects panel and type in “lens flare”. From the options, drag the effect to the timeline.
Step 2 – Configuring the effect
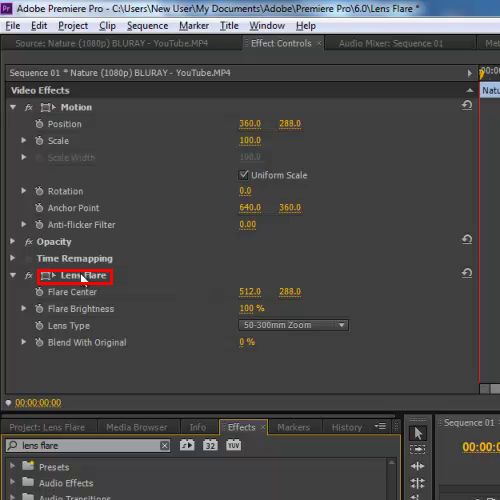
In order to configure the effect, you will need to move over to the effect control panel and go to the “lens flare” option.
Step 3 – Placing the effect on an axis
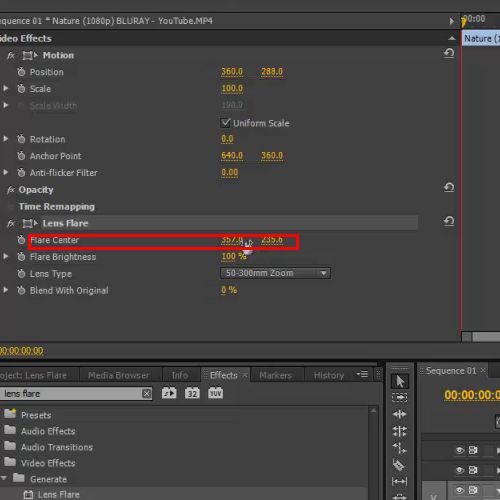
In Flare center, you will be asked to place the effect with the actual source of light, whether on the y-axis or the x-axis.
Step 4 – Configuring the amount of light
Flare Brightness allows you to configure how much light should be produced. For example in this tutorial, we are putting up 80 percent for the brightness, since that’s sufficient for this scenery.
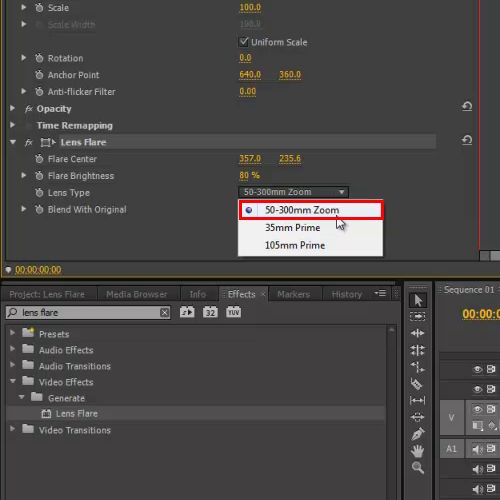
Step 5 – Switching between lenses
You can also switch between the different types of lenses. For example, you can also switch to 35mm prime or 105mm prime depending on the focal length of the lenses used while shooting.
In this premiere tutorial, we would be selecting the default lens type, that is, 50-300mm zoom and is also used by most of the editors.
Step 6 – Changing the blend mode
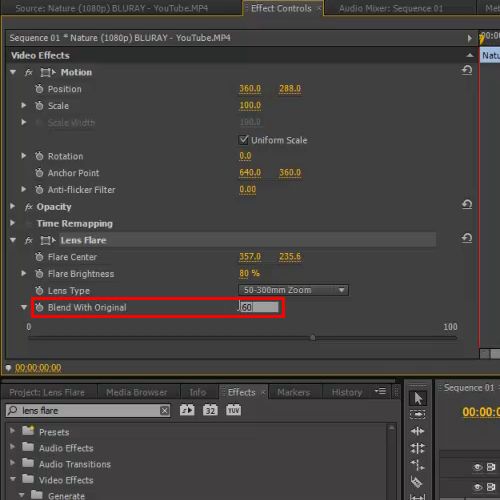
Now change the blend mode value to 60, which will add softness to the flare.
Step 7 – Using the toggle animation button
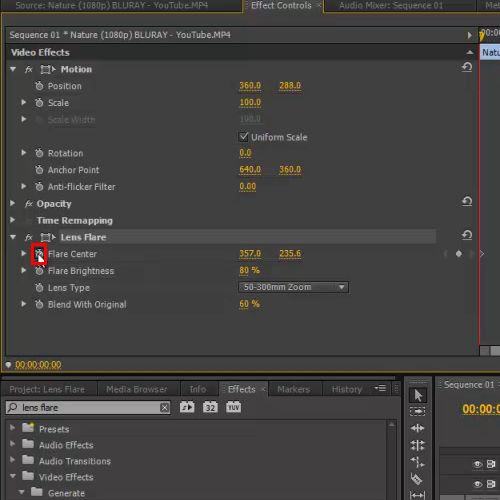
Once done, preview the video. Here you can see that the effect is not animated according to the scene, thus it is kind of useless. In order to make this effect more dynamic, go to the Flare Center option and click on the toggle animation button.
Step 8 – Connecting the effect to light source
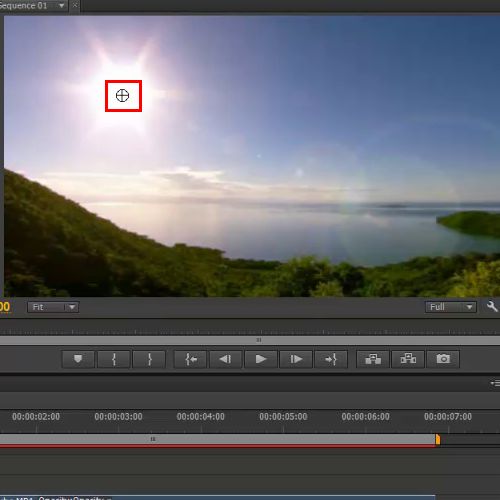
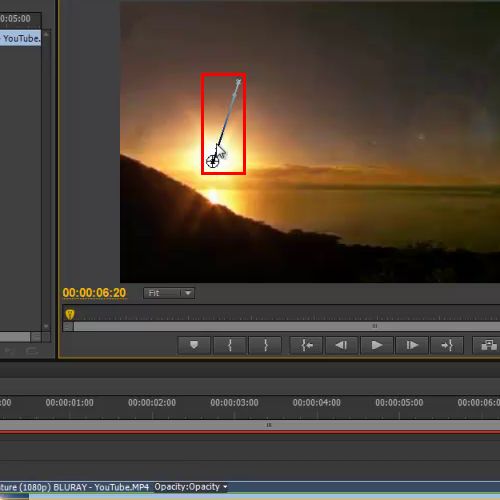
Now animate the effect on the y-axis by connecting it to the source of light in the clip, which is the Sun in this case.
Step 9 – Previewing results
Lastly, hit the “enter” button on your keyboard in order to render and start previewing your new edited sequence.

 Home
Home