In this tutorial we will guide you on how to use the color key effect in Adobe Premiere Pro CS6. Color Keying is a post-production technique for layering two images or video streams together based on their chroma range. The technique has been used heavily in many fields to remove a background from the subject of a photo or video.
For this tutorial, you will need a video shot with a green or blue background and a virtual set for the background.
Step 1 – Transforming the image according to frame size
First of all, you must go to the media library in Premiere and drag the virtual set which you want to use as the backdrop. Next, you will need to transform the image according to the frame size and position it accordingly.
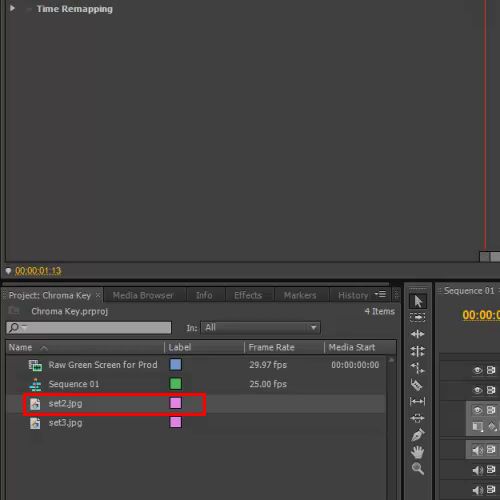
Step 2 – Resizing the footage
Now drag the footage with the green screen background on the overlay track, resize it and position it according to the background layer in order continue further with the process.
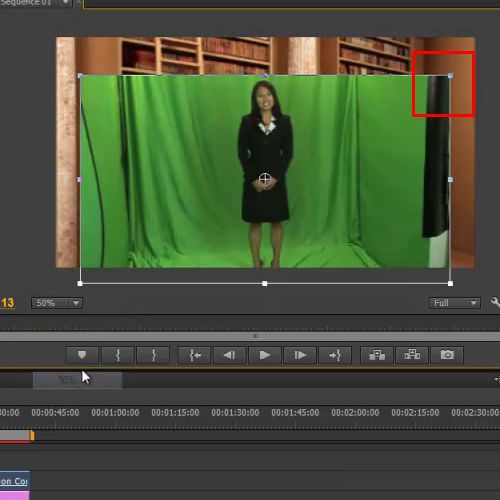
Step 3 – Using the crop video effect
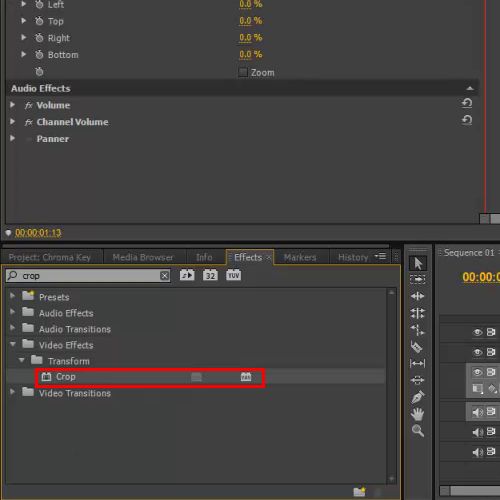
Once you have done it, you will need to go to the effects menu and apply the crop video effect on the green screen clip. This will allow removing the unwanted area of the clip and it makes it easy for you to apply color keying. Next, go to the effect control panel and crop the clip from both the right and left side.
Step 4 – Applying the auto contrast effect
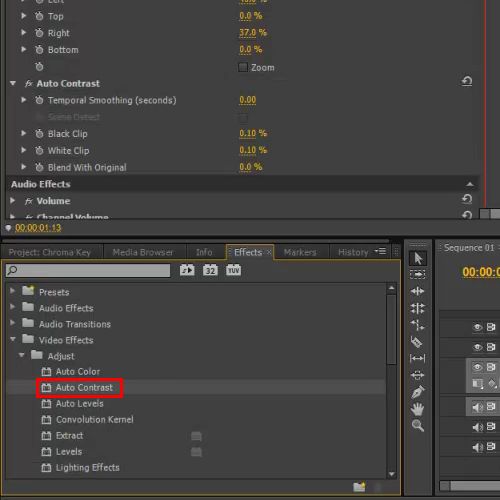
Next, apply the “Auto Contrast” video effect on the same clip which will enhance the colors of the video. Make sure all the steps are carried out as shown in the tutorial in order to get best results.
Step 5 – Using the ultra key filter
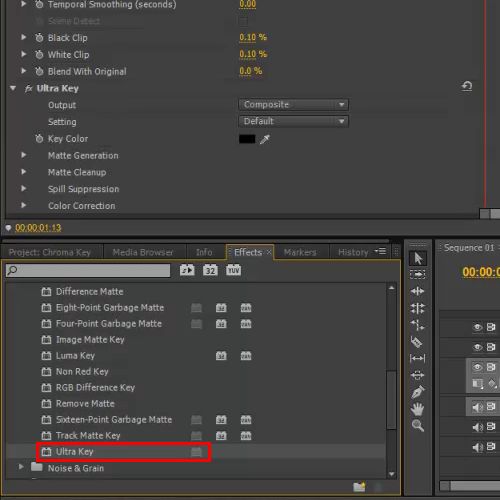
Once you are done, go to the effect menu again. Move over to the folder named Keying and apply the Ultra Key filter on the clip. In order to do so, you must simply move over to the effect control panel and expand the ultra key Menu.
Step 6 – Editing the background
Click on the color picker from the key color option and select the background color to be removed. And there you have it; the background is completely removed from the clip. But if you look closely, you can still see some shades exist within the frame.

Step 7 – Using the alpha channel
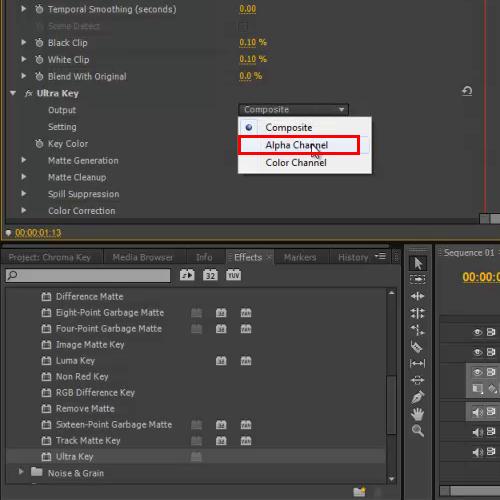
Now, select the alpha channel from the output menu and you will see that the background is still clearly visible.
Step 8 – Configuring options
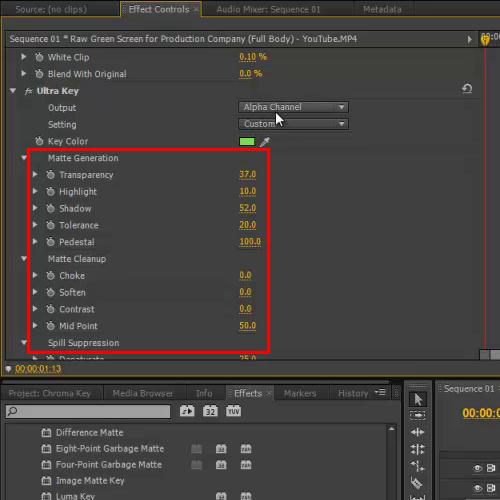
Now configure each of the following options. Set the Pedestal to 100, Midpoint to 50, Highlight to 10, Transparency to 37, Shadow to 52 and Tolerance to 20.
Step 9 – Using the composite option
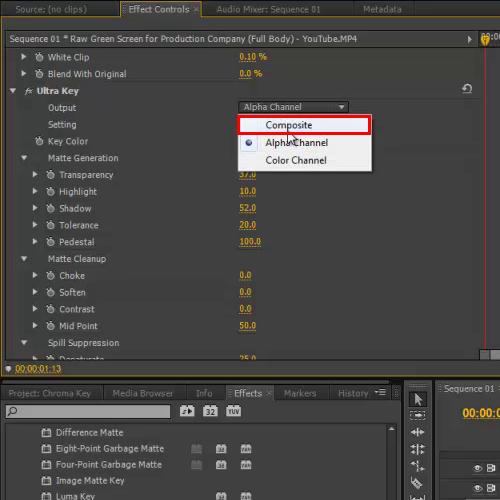
Once this has been done, you will be required to switch to composite from the output menu.
Step 10 – Viewing the final output
Now simply hit the “enter” key on your keyboard in order to render the whole sequence. Now you can view the final output. In this manner, you can use Premiere to edit your videos.

 Home
Home