Creating 3-dimensional text in Adobe Illustrator is not that difficult. However, adding gradient to it can be somewhat tricky. To apply 3d graphics to your text you just need to apply a simple effect.
To learn more of how to create 3D text in Adobe Illustrator follow the tutorial below.
Step # 1 – Enter 3D text
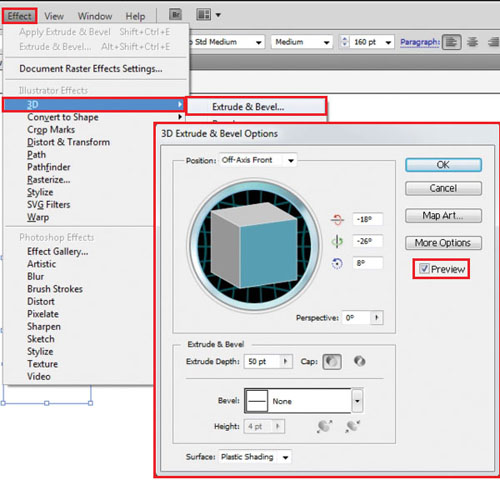
First of all, enter a letter with a font type and size of your own choice. Make it 3D by going to effect> 3D> extrude and bevel. Checking the “preview” option allows you to see how the letter is being extruded. Make sure that your letter is filled with a soft color as that would allow you to view the effects you add more clearly.
Step # 2 – Expand the text appearance
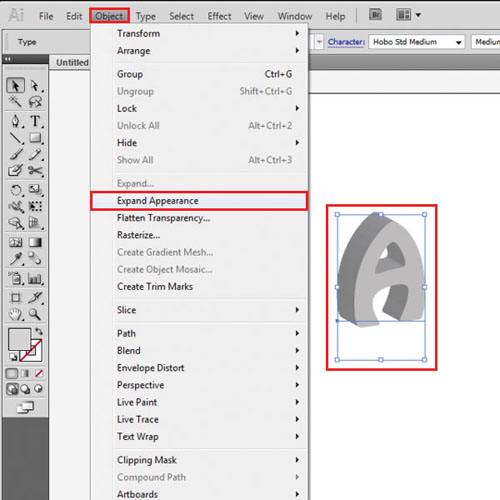
While selecting the letter; go to the “object” menu and choose the “expand appearance” option.
Step # 3 – Ungroup the text
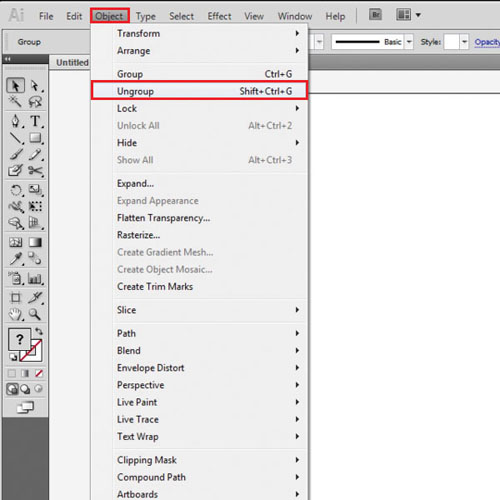
Ungroup the letter from the same menu several times until and unless it is completely separated.
Step # 4 – Unite the portions
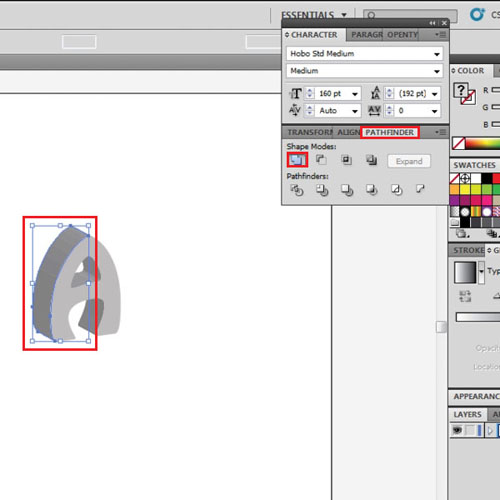
Once you have the different portions, combine each side separately by selecting it and pressing the “unite” option on the “pathfinder” panel.
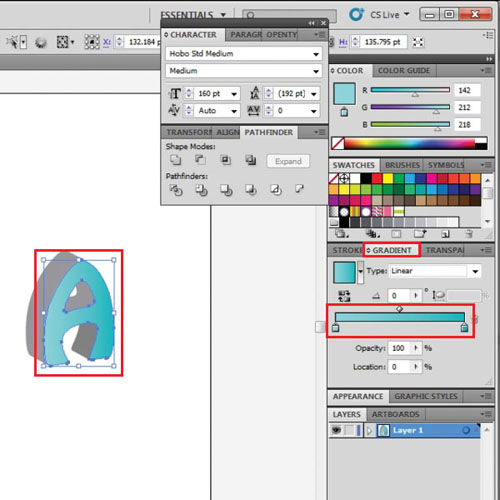
Step # 5 – Add gradient to the letter
Add gradient to each portion of the letter separately, keeping in mind your light direction. Add angle to the gradient if necessary.
Similarly, follow the same steps while adding other letters to the canvas as well.
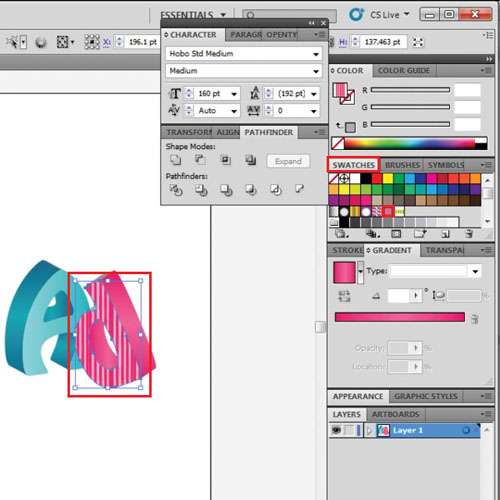
Step # 6 – Add patterned swatch
Patterned swatches can be created in Adobe Illustrator that can be used to fill any part of a letter. For this, make any design and drag it into the swatches panel. Apply it to any surface of the letter by selecting the portion of the letter you wish to apply it to and then the swatch.
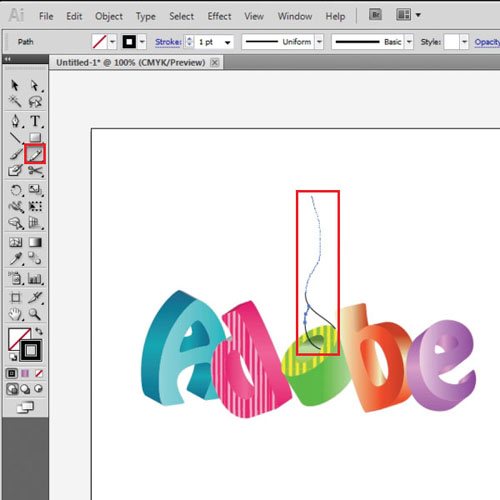
Step # 7 – Adding details
Different details can be added once you have completed adding 3d graphics to your letters. You may tie a letter with a rope or any other detailing as per your wish. The rope can be drawn from the “pencil tool”.
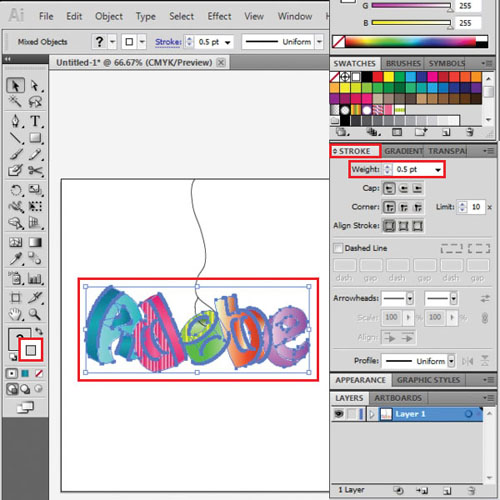
Step # 8 – Add a stroke
Select the letters place them in the center and add a “0.5 pt” white stroke to them. You can vary the stroke weight as per your requirement.
Step # 9 – Make shadows
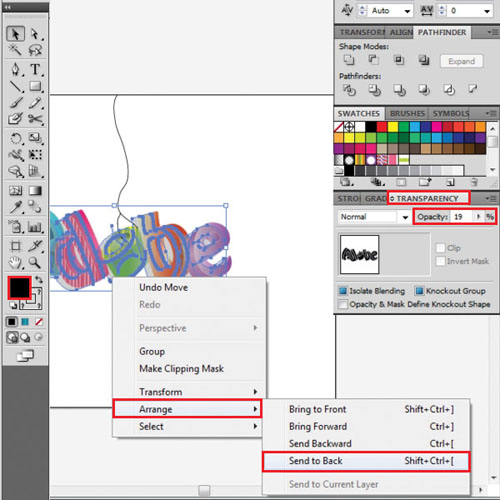
Copy and paste the letters reduce their opacity and from the “arrange” option that emerges after right clicking on it send these shadows to the back.
Step # 10 – Draw a background
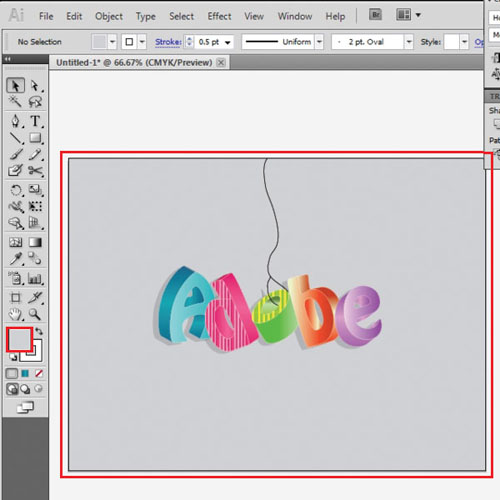
To create a background, create a rectangle the size of the canvas, send it at the back and fill it with a soft gray color.
 Home
Home