Patterns in Illustrator can be easily turned into a color fill by following certain easy steps. Your Illustrator swatches panel can range from different patterns to different colors. Using these patterns as a fill with a patterned brush outline can give you a stitched type effect.
To understand how to create a stitched type effect in Illustrator, follow the steps given below.
Step # 1 – Make a patterned swatch
First use the shape tool to create a square with dimensions “10mm x 10mm”. Make a pattern in that square. Over here it is made from different colored rectangles. After this, select it by means of the “selection tool” and drag it into the swatches panel on the right. You can repeat this method to create other patterns as well.
Step # 2 – Draw the letters
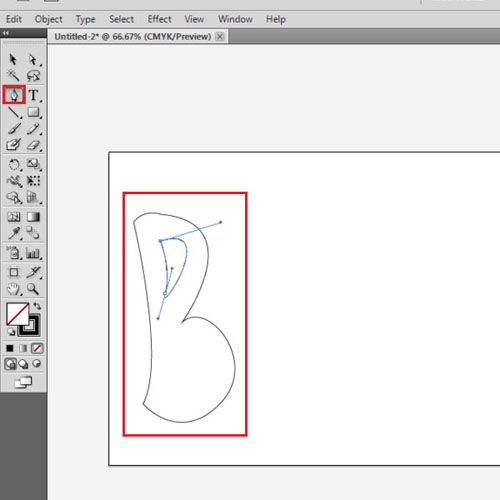
Next, make letters on the page by using the “pen tool”. Draw the letter “B” through this tool by making curves and straight lines. In the same way make rest of the letters “i”, “r” and “d” from the pen tool.
Step # 3 – Fill the letters with patterns
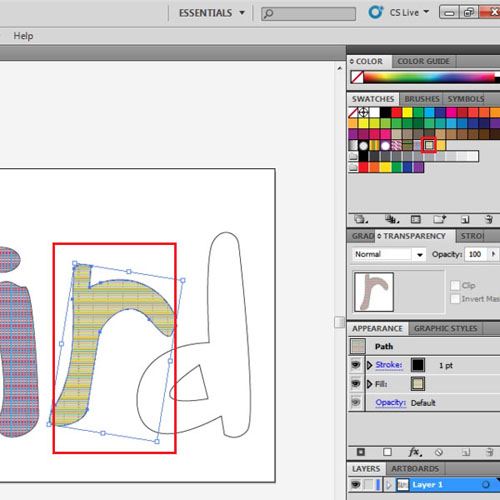
The letters that you have just made can be filled by the patterns created previously. To do this simply select the alphabet and choose the pattern from the color swatch panel. You can select different patterns for different letters.
To make the inside of the letters “B” and “d” appear hollow, color the inside shapes with what you will use as the background color.
Step # 4 – Create a background
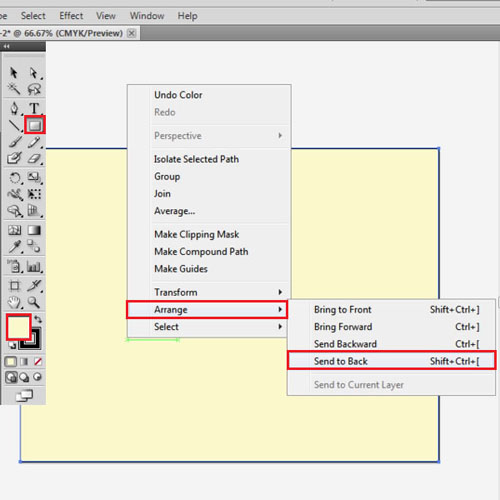
To apply color to the background, make a rectangle the size of the canvas. Fill color to the shape. After this right click on it, go to “arrange” and click on “send to back”.
You can even add the patterned Illustrator swatches made above as a fill in this background.
Step # 5 – Lock the background
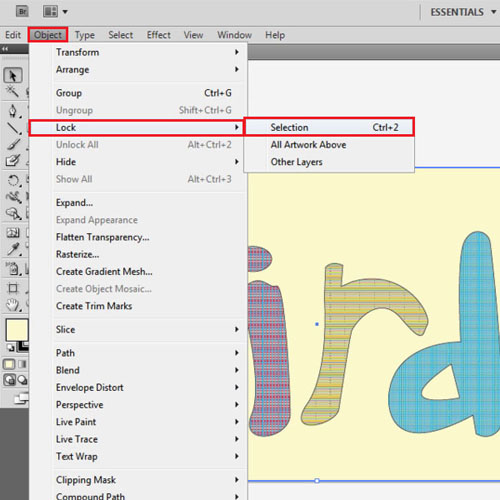
While still working on the illustration lock the background so that it does not come in the way. To do this go to “object” on the menu panel, drop down to “lock” and then click on “selection”.
Step # 6 – Create a pattern brush
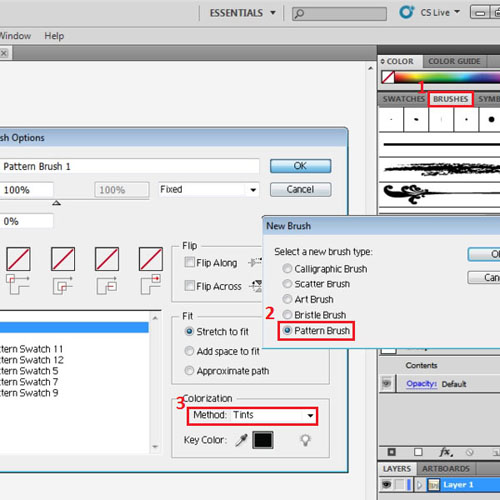
Now create a pattern brush which is to be used as an outline for these letters so as to give them a weaving effect. To make this brush, first make a square of “2mm x 2mm”. Select “no fill” and do not add any stroke to the shape. Next, make an ellipse the same height as that of the square but reduce its width and fill it with black and no stroke. Group these two shapes together and drag them into the brushes panel. When you drag it in it asks the type of brush you want to create, select “pattern brush”. Adjust the settings as shown below.
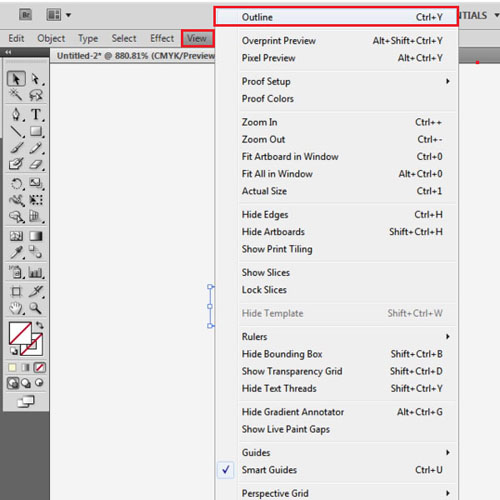
To see these shapes clearly without the stroke and inside fill, switch to “outline” view by going to the “view” menu and selecting the “outline” option.
Step # 7 – Create a pattern brush outline
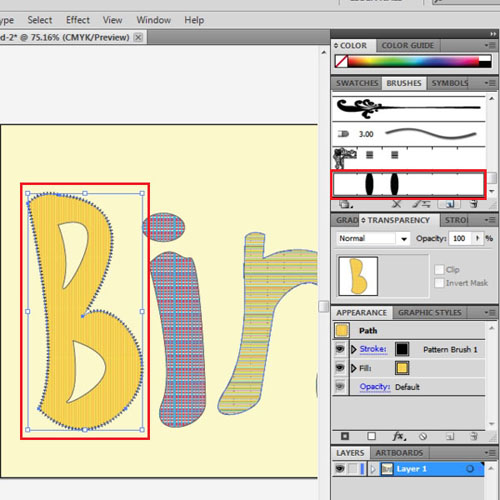
To create an outline using the pattern brush select the letters or portions you want to outline and then click on this brush. An automatic outline of the created brush appears. You can even create patterns in Illustrator on the background shape; they can be those similar to the outline you just made on the letters. First unlock it by going to the “object” menu and clicking “unlock”. Now, select the background and click on the pattern brush.
 Home
Home