Follow this step by step tutorial to learn how to work with masks in After Effects. You will learn how to put your masked layer behind any layers if need be. Furthermore, we will teach you how to add a text layer and apply effects as well. For the purpose of this tutorial, we have applied drop shadow effect.
In this tutorial, we will guide you on how to mask content in Adobe After Effects CS6.
Step # 1 – Select the solid option
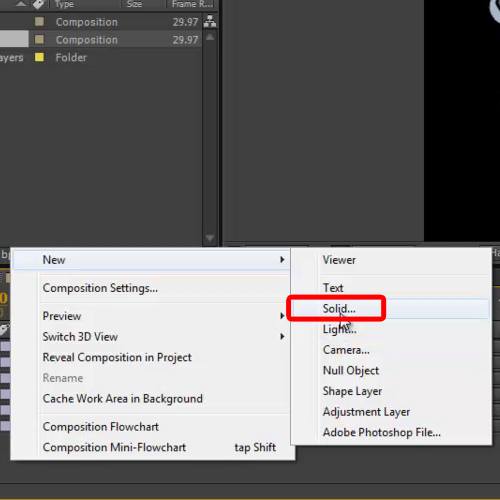
In this illustration, let’s apply a mask over the yellow ellipse. For that, move to the composition menu, right click, move over new and select the solid option.
Step # 2 – Adjust the solid settings
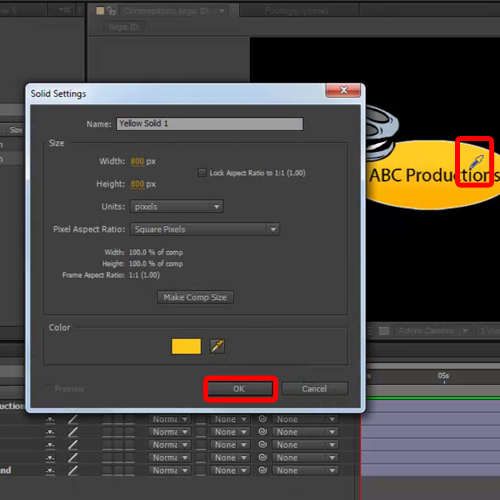
Configure the new solid layer and click on the Okay button. For example, here we will select the color for the layer using the color picker to pick the same color as that of the ellipse.
Step # 3 – Draw an ellipse
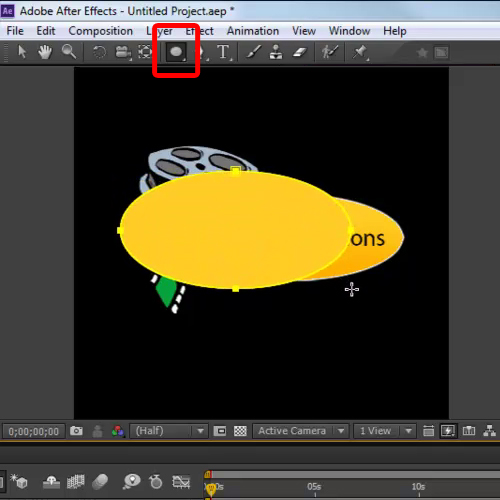
Now move to the tools bar options at the top and select the shape option.
Click on the menu and keep hitting the “q” button on the keyboard until the ellipse option is selected.
Once done, click and draw the shape on the screen.
Step # 4 – Transform the image
Once the shape is drawn, place it in front of the unwanted area and transform it accordingly by selecting the selection tool from the top.
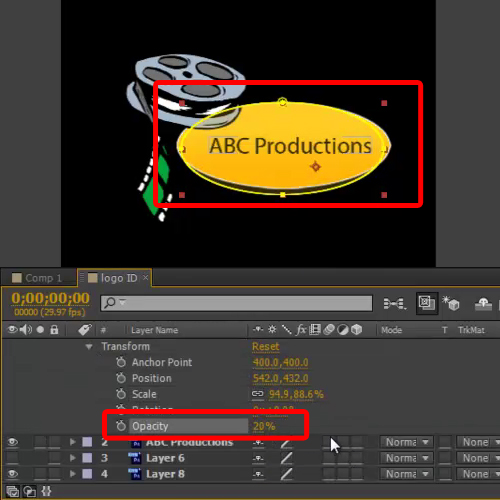
To make sure the correct transformation is done appropriately, decrease the opacity to 20%. This will allow you to see the layer behind the shape so that you can transform the image accordingly.
Step # 5 – Place the masked layer behind
Notice how the film reel is behind the ellipse. To bring it in the front, simply place the masked layer below that layer. In this tutorial, that would be layer number 8. This is how you work with masks in After Effects.
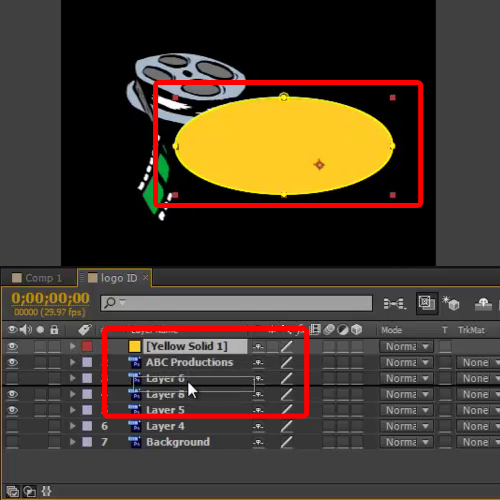
Step # 6– Create a text layer
Now create a text layer and type in your text and configure it according to your need.
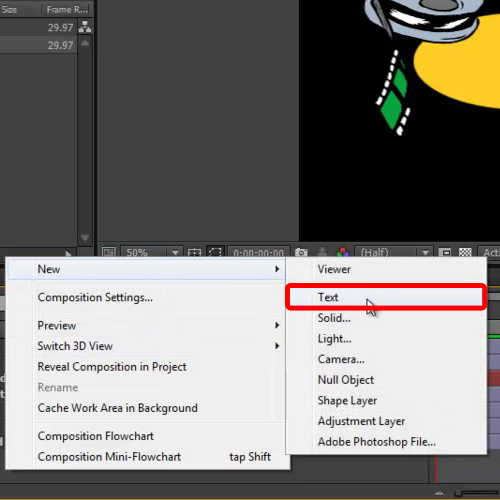
Step # 7 – Apply Drop Shadow Effect
You can also apply effects to the masked layer by right clicking on the layer. Here you will see a wide range of options available for example various blend modes, transformation options, switches etc.
In this tutorial, we will add a drop shadow effect to the layer. In order to do so, move over to layer styles and click the drop shadow option.
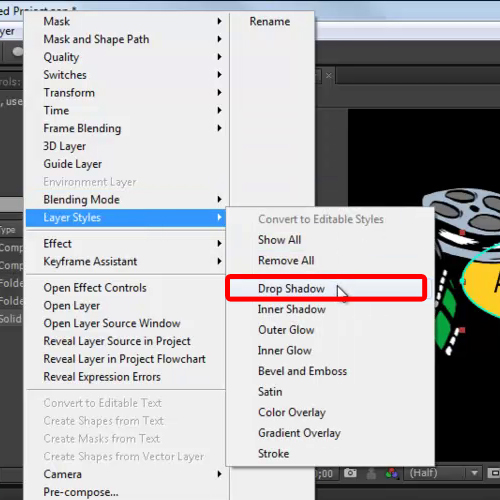
Step # 8 – Configure the effect settings
Once done, you can configure the settings of this particular effect. For example in this tutorial, we have selected white color for the effect. We kept the spread at 5 and changed the size to 26.
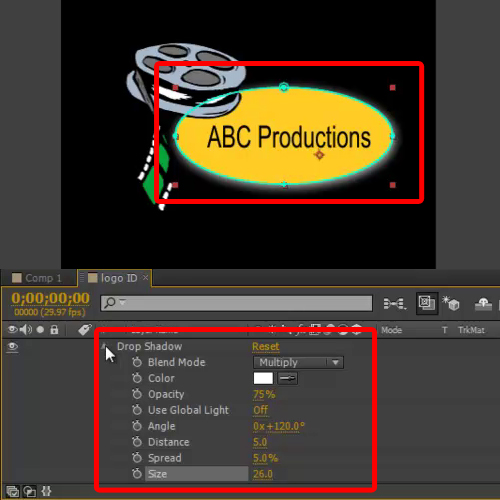
 Home
Home