The Grunge effect has become more and more popular and is the next generation of design. Grunge effect consists of stains, dirty textures, rips, torn images, decay, broken icon and scratches to form a dark and gritty result. If the effect is done correctly, you’ll get a professional result! This effect is a popular trend that gives designs a more organic and realistic look.
In this tutorial, we will learn how to create a grunge effect in Photoshop.
Step # 1 – Insert a text
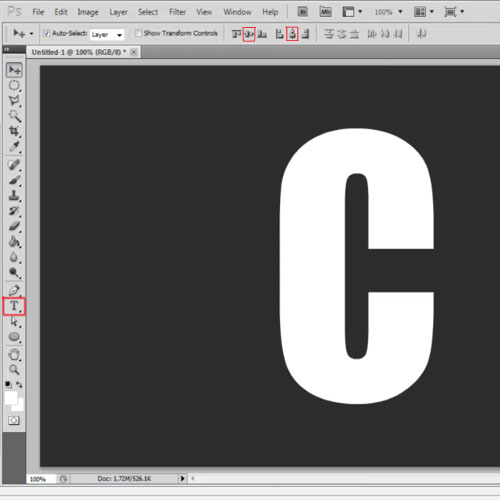
First of all, we will type in the text using “type tool” and align it at the center of the document. Over here, we have used “Impact” for the font.
Step # 2 – Create a torn effect
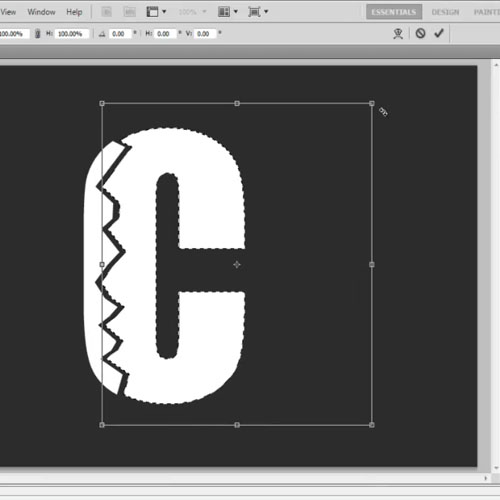
Now rasterize the text layer, pick up the “polygonal lasso tool” and create a simple torn effect. To do so, make a quick selection on the text, press “control + T” and move the selection away.
Step # 3 – Apply texture to the text
Now that you’re done with the basic text, it’s time to bring in the texture layers to the document. Over here, we will be working with three different grunge paper textures.
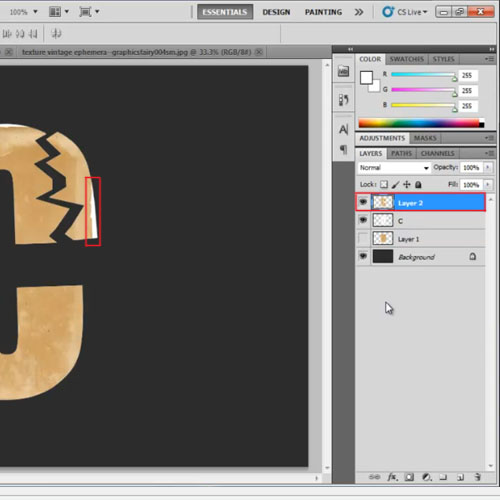
Bring the first one in your Photoshop document and change the size of the layer according to the text. Now load the selection of the text layer and copy paste the selection from the texture layer on to a new layer. Bring the newly created layer right at the top and over here you’d notice that we got a bit of the white background section in the selection that we had created.
Step # 4 – Applying color range option
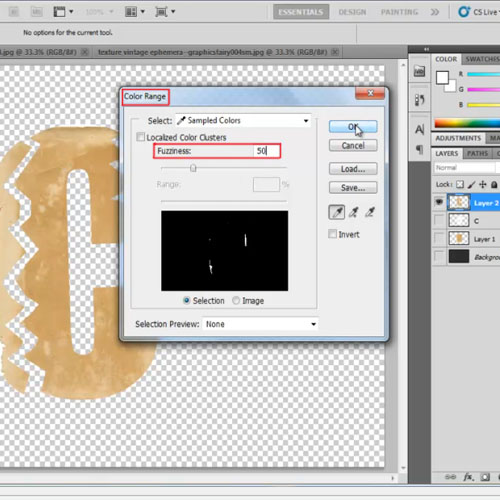
To remove this, go to the “select” menu and choose the “color range” option. Select the white color from the color picker and reduce the fuzziness according to the image. Once the selection is created, hit the “delete” button.
Step # 5 – Apply the “Multiply” blend mood
Now duplicate the layer and change its blend mode to “Multiply”. With that done, duplicate the layer once more.
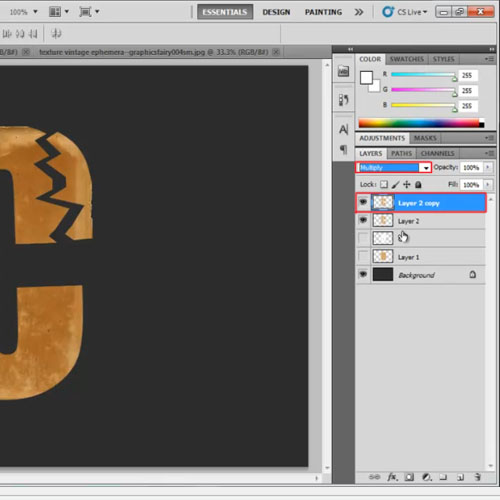
Step # 6 – Create an outline of the text
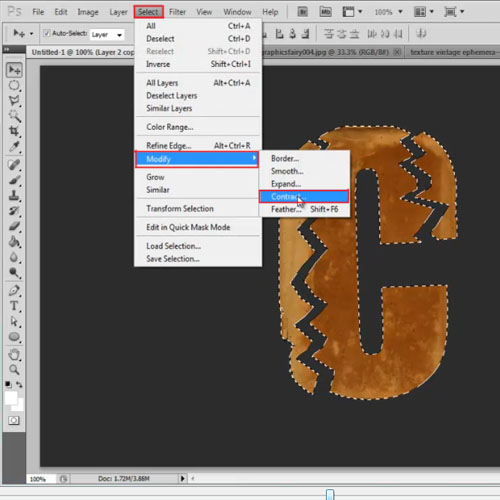
Now load the selection of the newly created layer, go to the “select” menu, move over to “Modify” and select the “contract” option. Contract the selection by “5 pixels”. With that done, simply hit the “delete” button and we will have an outline of the text. Duplicate the outline layer once more, just to darken the outline a bit.
Step # 7 – Applying new vintage paper texture
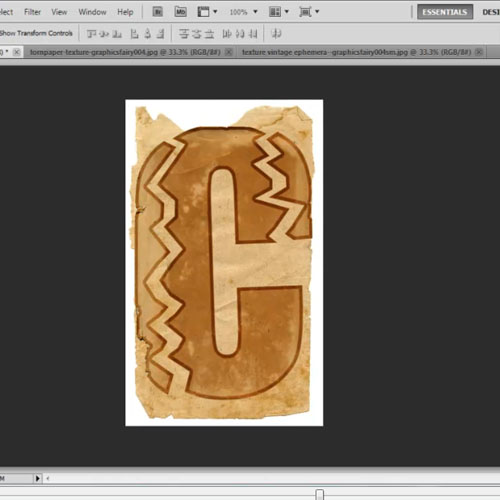
Now, we will move on to the second texture. Let’s call it vintage paper texture. Bring it on to the document, move it right at the bottom and reduce its size according to your text.
Step # 8 – Change the blend mode of the layer
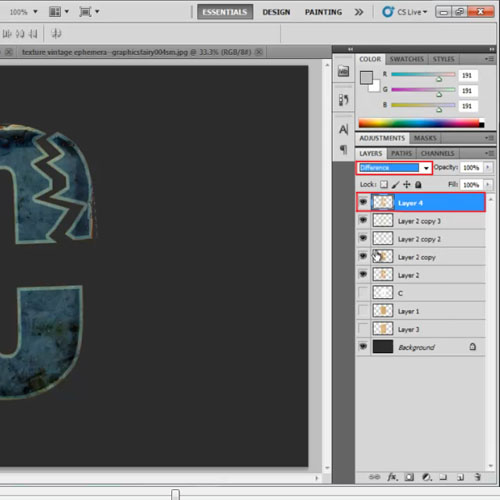
With that done, load the selection of the text, click on the vintage paper texture and copy paste the selection on to a new layer. Bring the layer right at the top, hide the rest of the layers and remove the white background that we got in the selection.
With that done, change the blend mode of the layer to “difference”.
Step # 9 – Apply another texture layer
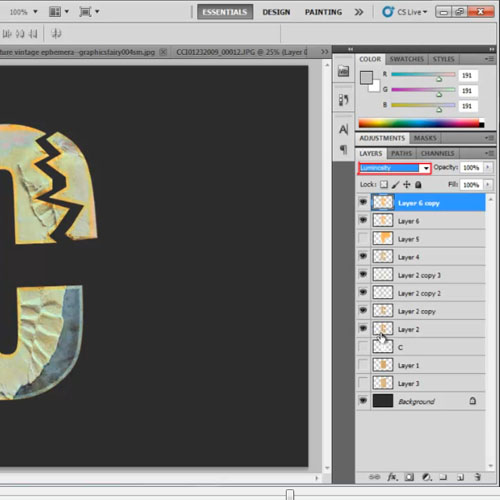
Now further on for the grunge effect bring in the third texture on to the canvas. We have already removed the white background from this image. Position it on the canvas, load the selection of the text layer and copy paste the selection on to a new layer. With that done, change the blend mode of this layer to “Overlay”.
Now duplicate this layer and change its blend mode to “Luminosity”.
Step # 10 – Copy paste the different selection
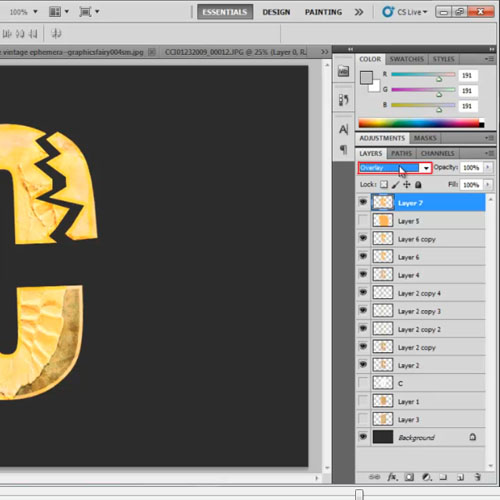
Now what we’ve done is used the same texture layer, moved it a bit on the canvas only to copy paste a different selection on to a new layer. With that done, we changed the blend mode of the layer to “Overlay”.
Step # 11 – Applying Rough Pastel Filter
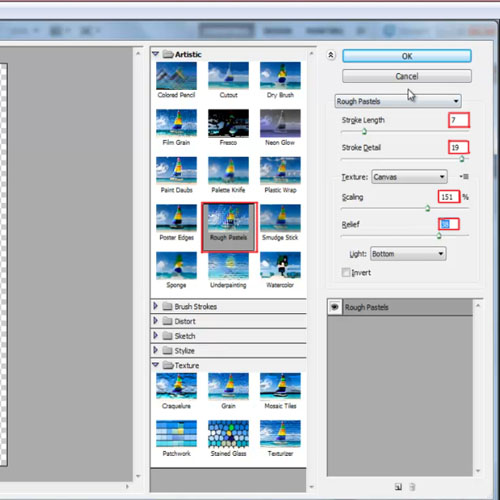
Now duplicate this layer and change its blend mode to “Luminosity”. Now we are going to move around the original texture layer only to make a different selection for the third time. This time, we will cover the whole body of the text. This is to add texture to your text. With that done, move over to the filter gallery. Select the “rough pastels” option and set the stroke length to “7”, stoke detail to “15”, scaling to “151%” and relief to “18”. With that done, change the blend mode of the layer to “Overlay” and open up the “Hue/Saturation” option. “Desaturate” the layer and reduce the lightness to “-70”.
Step # 12 – Applying Drop shadow to the layer
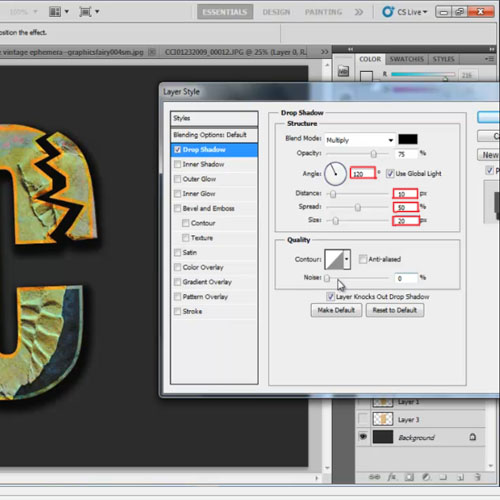
Now go to the base layer for your text effect. Open up the “layer style” options and click on the “drop shadow” tab. Over here, set the opacity to “50%”, angle to “120 degrees”, distance to “10 pixels”, spread to “50 percent” and size to “20 pixels”.
Your grunge effect in Photoshop is now ready.
 Home
Home