The layer freeze and lock option in the Autocad software can come in handy while working on your designs. It allows you to block out layers that you are not currently working on and ones that you do not wish to alter accidently while working on another layer in the design. Hence, you can apply these options easily on the layers so as to assist you and not destroy the work that you have already done.
Step # 1 – Apply the “freeze” option
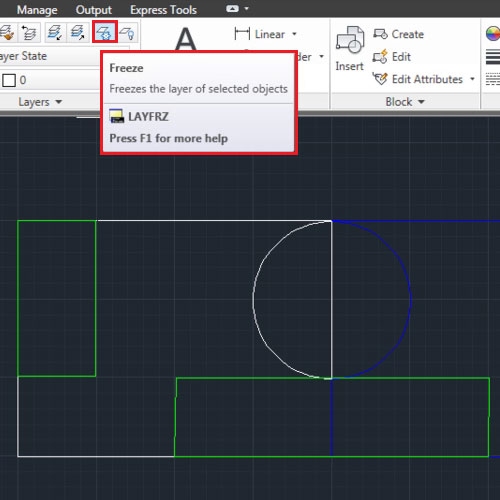
The “freeze” option is present in the “layers” panel. Select it, click on the object whose layer you wish to freeze and right click to finalize your selection.
However, AutoCAD does not freeze the current layer that you are working on.
All of the objects present in this layer disappear. The “freeze” option hides the layers from AutoCAD as well. This allows you to work easily while designing complex drawings.
As this option hides the frozen layers from AutoCAD as well so when you are working on a complex design it allows AutoCAD to run faster as it reduces its work load.

Step # 2 – Un-freeze a layer
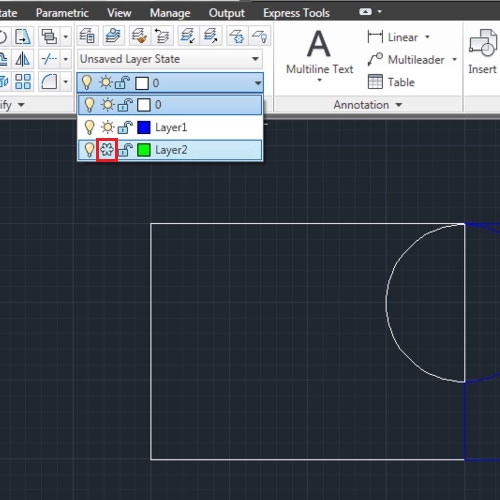
To un-freeze a layer simply go to the drop down menu in the “layers” panel and select the “freeze” icon to de-select it and make it return back to the “sun” icon. The hidden layer now appears again.

Step # 3 – Lock a layer
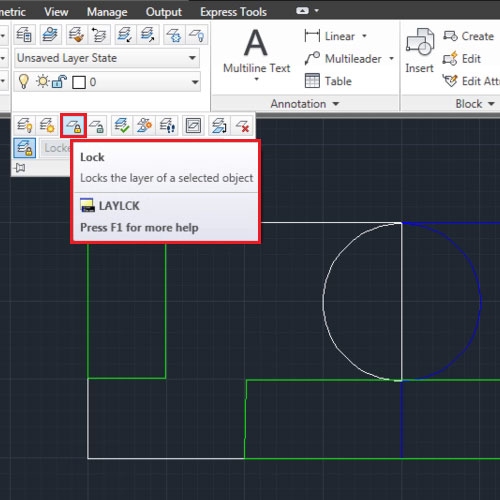
The “lock” tool in the layer panel unlike the layer freeze option serves a slightly different purpose. This is present in the extended options in the “layers” panel.
Select it and then the object whose layer you wish to lock. Apart from the options present here you can even perform this action by pressing the lock and unlock icon next to the current selected layer.
Once a layer is locked you cannot select or edit the shapes on it. However you can still draw on that layer.

Step # 4 – Alter level of fading
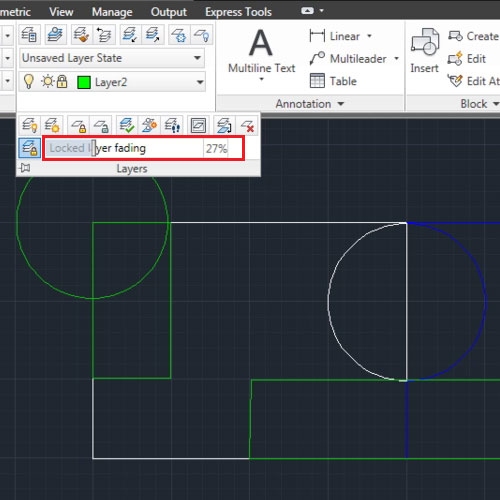
In the Autocad software the color of the layer fades as you lock it. The level to which the layer fades can be altered from the extended options in the “layers” panel.

 Home
Home