In this tutorial you would learn how to process images using Photoshop in batches. Through Adobe Photoshop you can process and edit images in batches. This technique is very helpful when you have to add the same effect on many pictures. With this method you can just record the whole picture editing process once and it will be applied on a group of selected pictures.
Step 1 – Create Folder for Images:
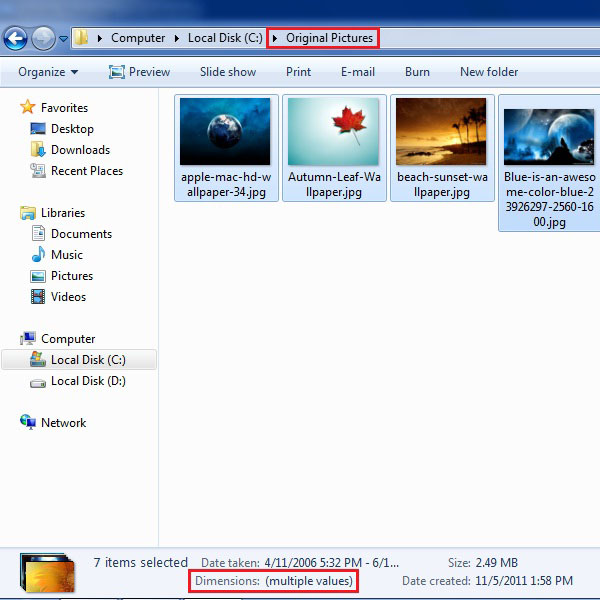
First of all create a folder and store all the pictures that you want to edit. For this tutorial, we have created a folder named “Original Pictures” and stored various wallpapers in it. Notice that all the images are of different dimensions. We will use this technique to resize all the images in a batch. You also need to create another folder to store the edited images. For this tutorial we have created a folder named “Resized Pictures”.
Step 2 – Open Action Panel:
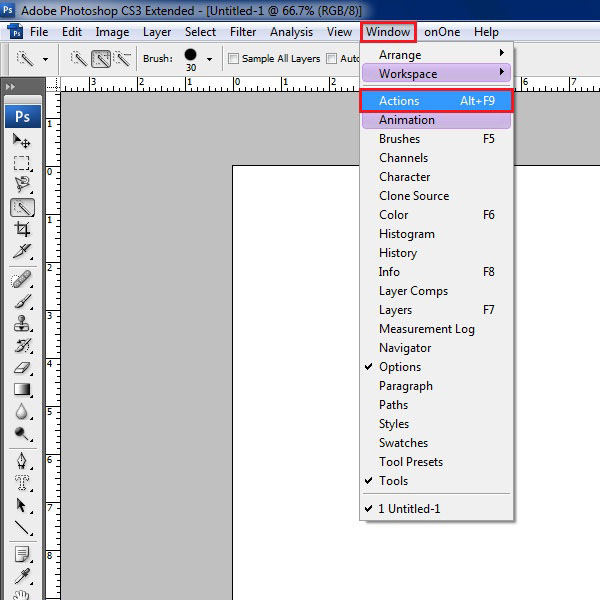
Open up Photoshop and go to the menu on top of the window. Go to the “Windows” option and then select “Actions, This will bring up an action panel in front of your screen.
Step 3 – Create a New Action
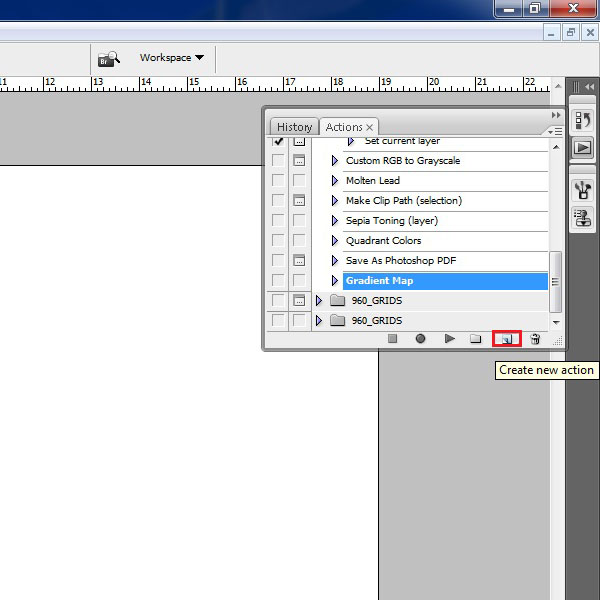
Once the action panel has opened, click on the “Create New Action” button which is available at the bottom of the action panel. This will let you start recording an action that you want to apply on all the images.
Step 4 – Name Your Action:
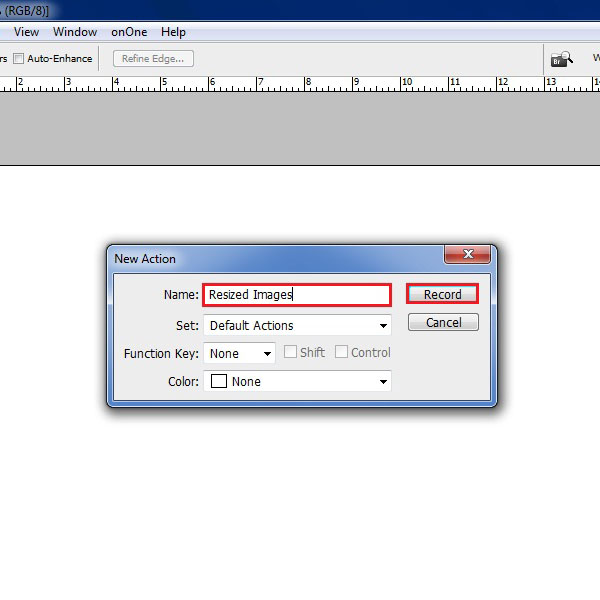
A small window will appear in front of you. In this window you will have to enter a name for your action. For this tutorial we use the name “Resized Images” and set it to Default Actions. After that click on the “Record” button to start recording your action.
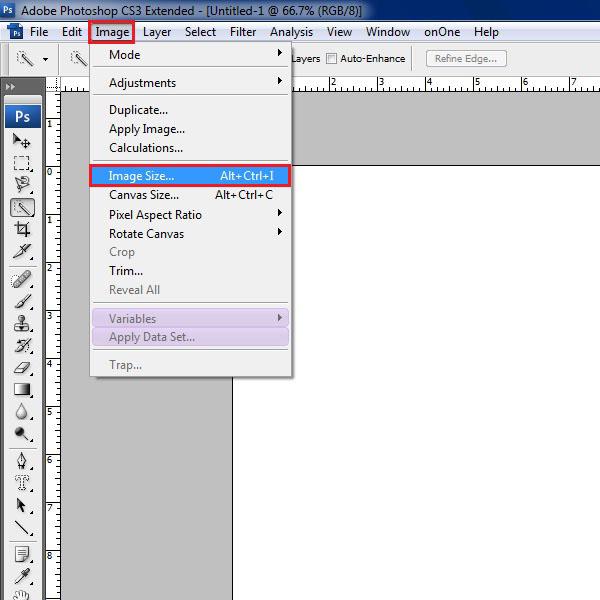
Step 5 – Open Image Size Panel:
Go to the “Image” option from the menu on top of the window. Now, select the “Image Size” option from the menu.
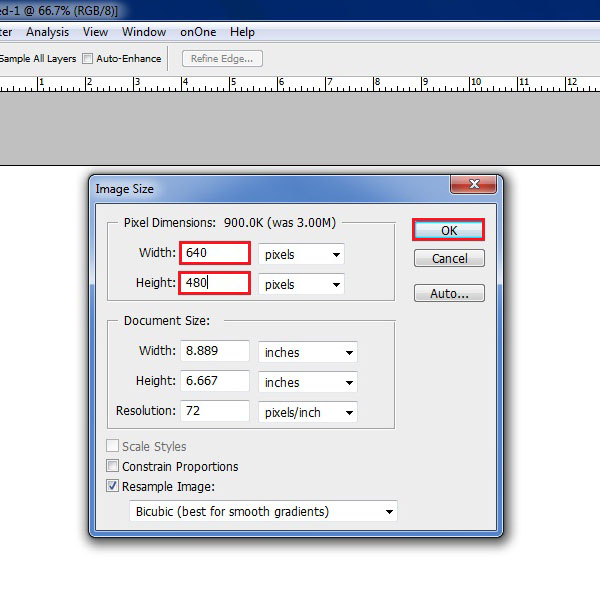
Step 6 – Set The Size:
Once the new window opens, enter the width and height that you want to keep for all the images. For this tutorial, we would keep 640 pixel for width and 480 pixels for height. Once done, click on the “OK” button to save it.
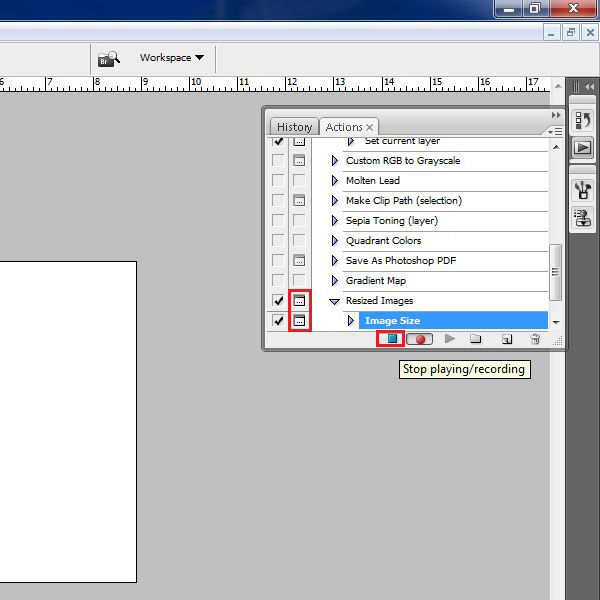
Step 7 – Save Your Action
Once you have completed the steps, click on the “Stop Playing Recording” button, highlighted in the image below. Now tick on the check boxes next to your recording.
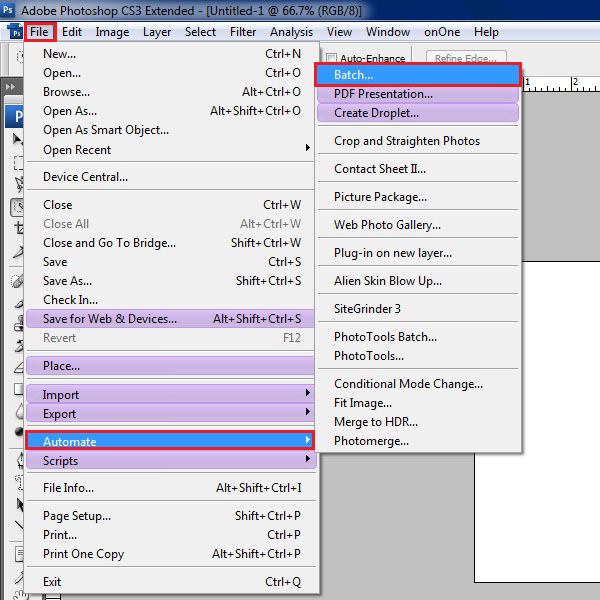
Step 8 – Open Batch Panel:
Click on the “File” option form the menu and select “Automation”. Now click on “Batch” option from the menu.
Step 9 – Batch Settings:
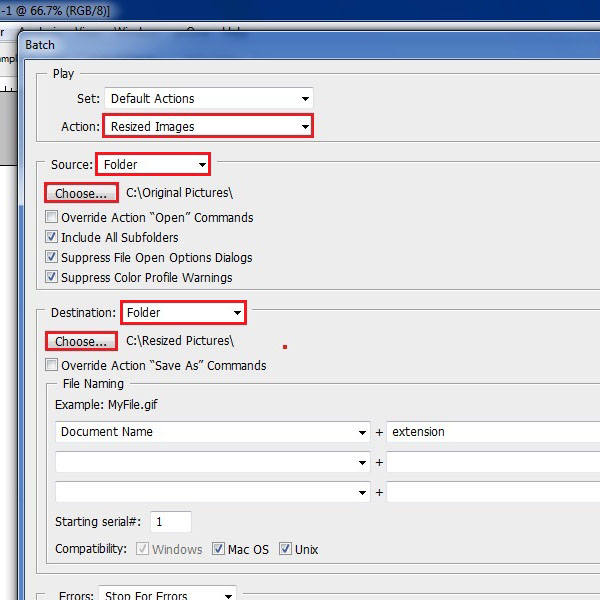
Select “Resized Images” under the “Action Label”. Set the source to “Folder” and then click on the “Choose” button to select the folder in which you have stored your original images. Same thing has to done with the destination option. After this, click on the “OK” button to start processing the images. Photoshop will now open and resize all the images stored in the source folder and save them in the destination folder.
Step 10 – Output:
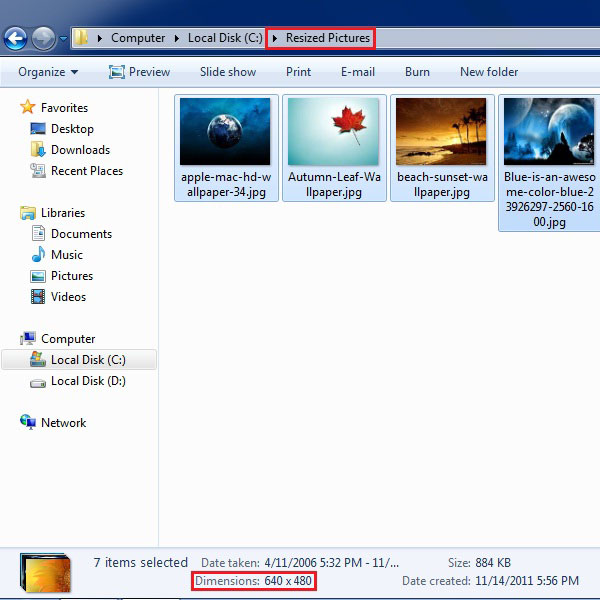
Now open the destination folder and you can see that all the images have been resized to the same size.
 Home
Home