It’s not difficult to create a digital photographic effect on images nowadays. There are various photo effect tutorials available online through which you can create beautiful effect for pictures and portraits. This tutorial is all about creating a Pop Art effect which is the most appreciated effect amongst young generation. It adds a dramatic feel to your regular photos. You can apply the Pop Art effect on your photos and print them on various accessories like T-Shirts, Cups and other gift items as well.
Step # 1 – Create a Duplicate Layer
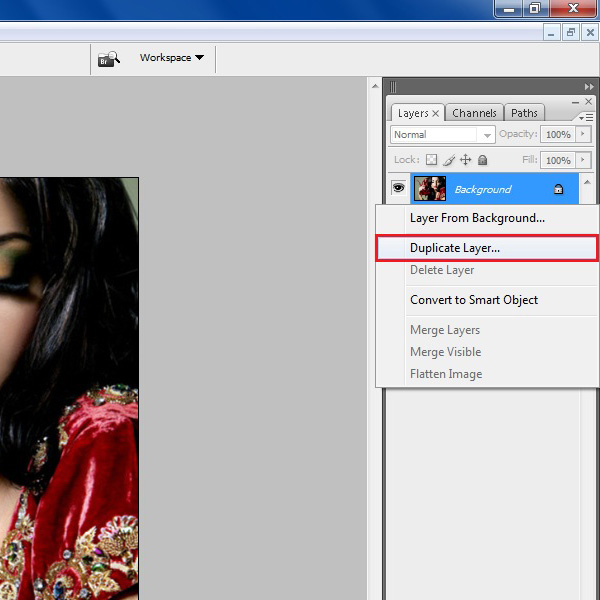
In the first step, launch Adobe Photoshop and load an image on which you want to apply the Pop Art effect. Right click on the image’s layer and select the “Duplicate layer” option from the menu. This will create a copy of this layer.
Step # 2 – Change the Blending Mode
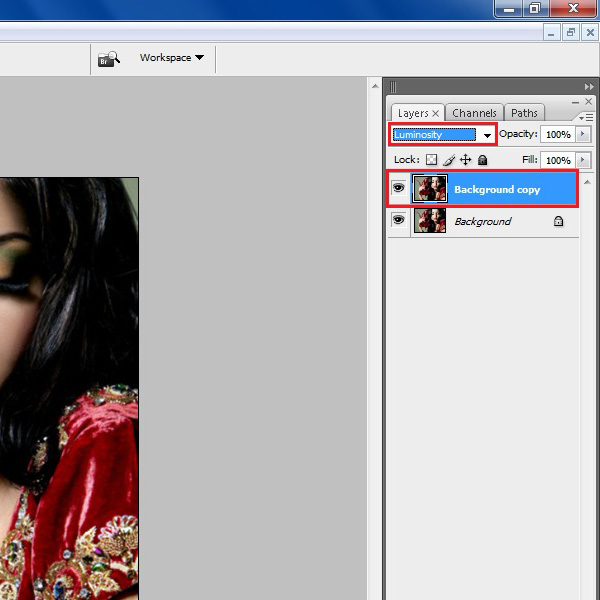
Now click on the Blending option which is located on top of the layers panel. Select the “Luminosity” option from the drop down list of the blending mode.
Step # 3 – Invert the Image
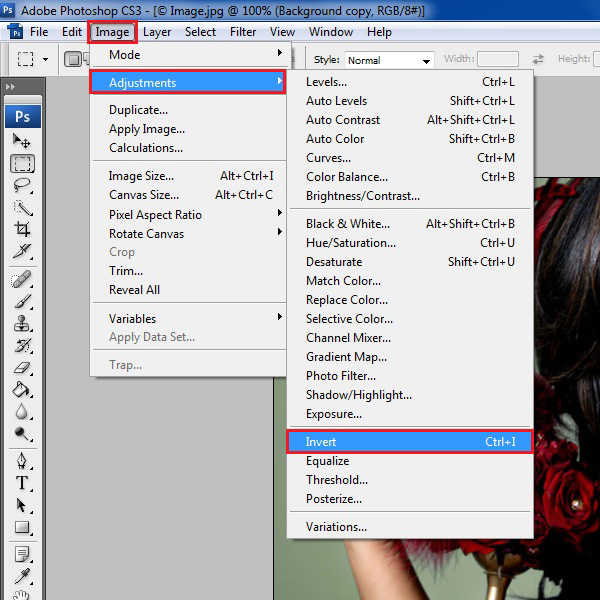
Now go to the “Image” menu which is available at the top left corner of the window. Select the “Adjustments” option from the menu and click on the “Invert” option from the list.
Step # 4 – Decrease the Opacity
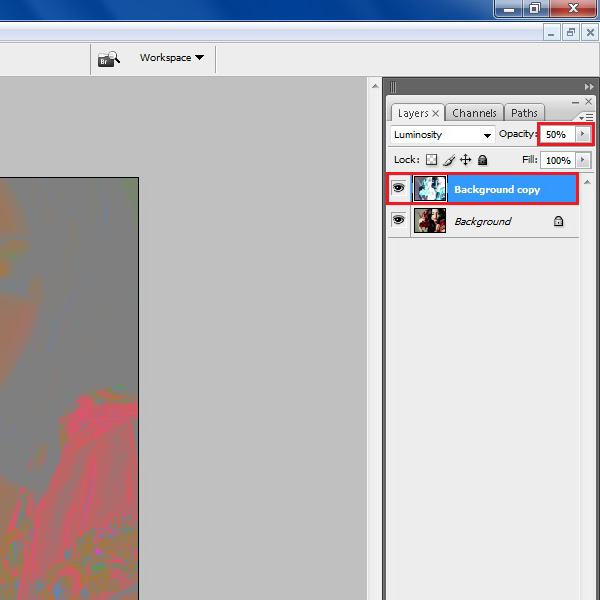
After inverting the image, click on the Opacity option which is available at the top right corner of the layers panel. Decrease the “Opacity” to “50%”.
Step # 5 – Merge all Layers in a New Layer
Now press “Ctrl + Shift + Alt + E” from the keyboard to form a new layer by merging all layers and their effects in a single layer. After creating a new layer, delete the previous layer.
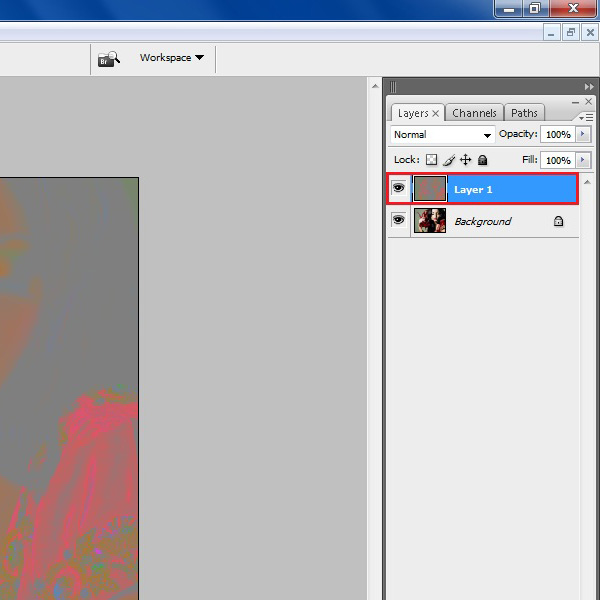
Step # 6 – Change the Blending Mode
Make another copy of the original layer by using the “Duplicate” option. Now move the duplicate layer on top of all the layers. Click on the Blending option and change the Blending Mode to “Multiply” by selecting it from the list.
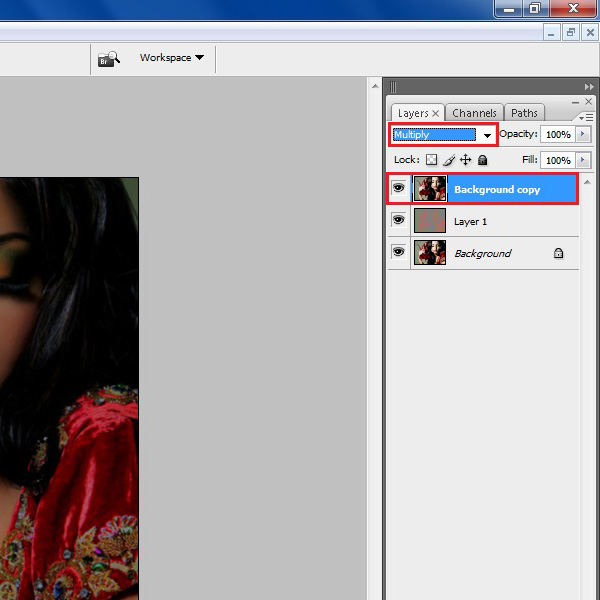
Step # 7 – Open the Threshold Panel
Now open the “Image” menu and select the “Adjustments” option from the list. Open the “Threshold” panel by clicking on its name from the menu.
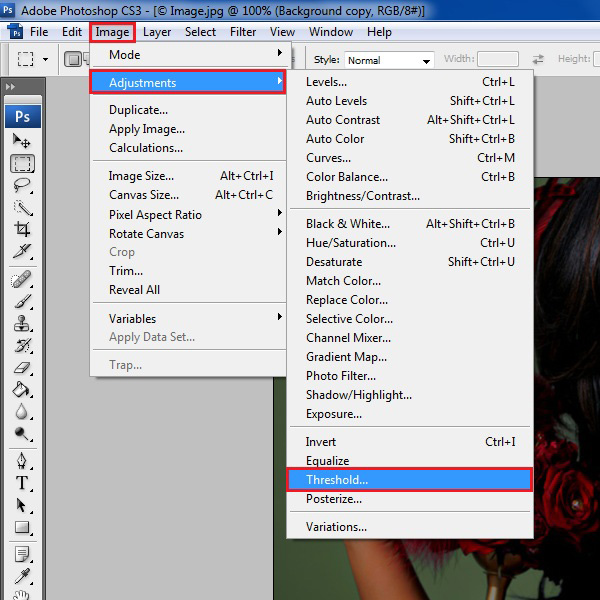
Step # 8 – Modify the Threshold Level
A new window will open in which you can see the threshold settings. Change the “Threshold Level” to “100” and click on the “OK” button to apply the settings on the image.
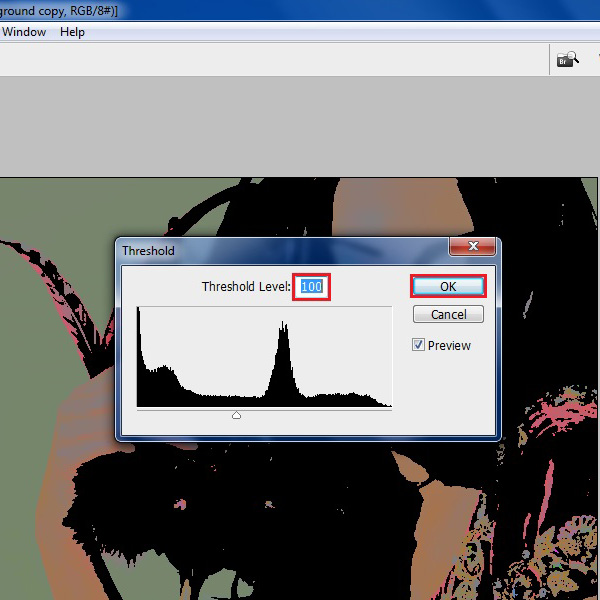
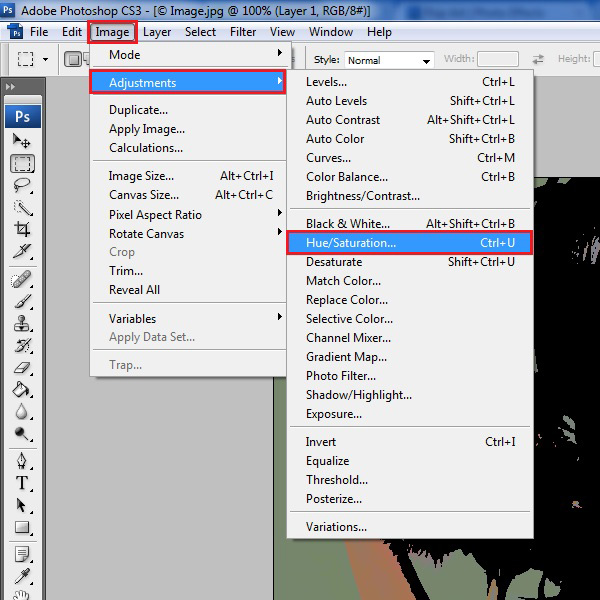
Step # 9 – Open Hue / Saturation Settings
Now go to the “Image” menu and select the “Adjustments” option again. Open the “Hue / Saturation” option from the list to open the settings panel.
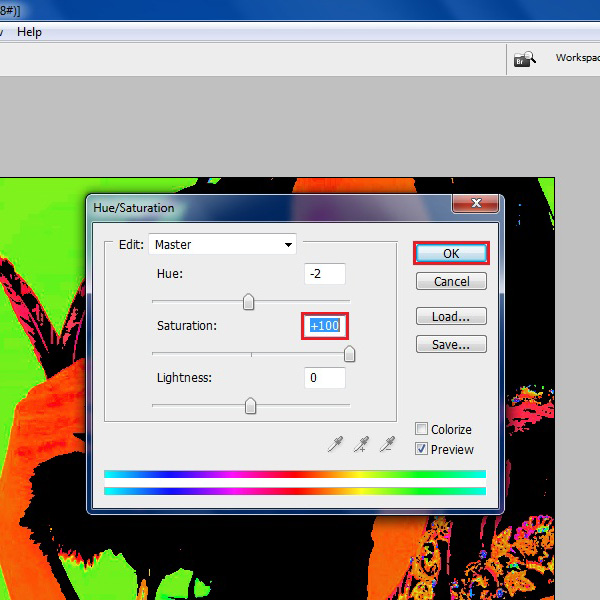
Step # 10 – Change the Saturation
In the “Hue / Saturation” options panel, increase the saturation to “100%” and click on the “OK” button to apply these settings on the image. Now the Pop Art effect should apply successfully on the image.
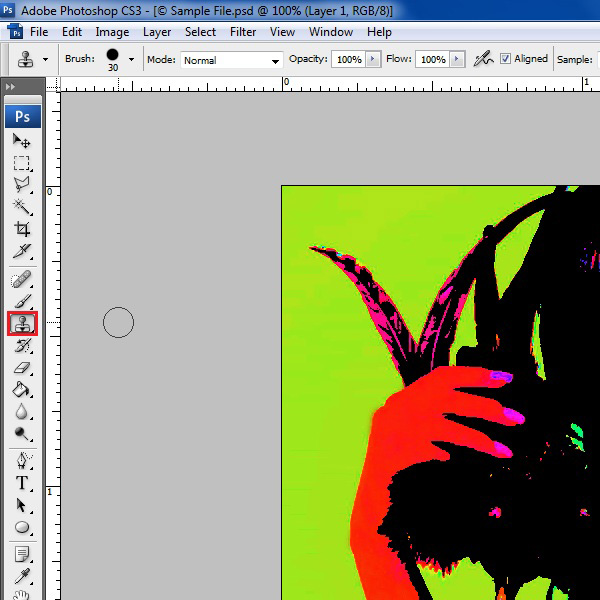
Step # 11 – Use a Clone Stamp Tool
Now change the Blending mode of this layer to “Saturation”. If you want to further improve the quality, you can also use a “Clone Stamp” Tool from the menu to adjust the colors.
 Home
Home