Today photo manipulation applications have become the most important tool in digital photography. By using these applications, you can easily transform a picture into a piece of art. You can make a sketch out of your portraits, apply different tones or create various effects. You can also take help from graphic tutorials to learn new techniques and methods of designing. In this tutorial you will learn to convert a portrait into a simple hand drawn sketch in a few steps.
Step # 1 – Go to the File Menu
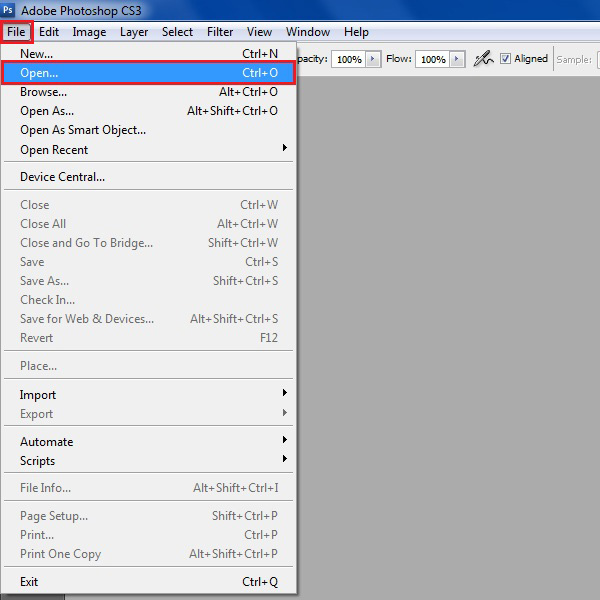
In the first step, launch Adobe Photoshop and click on the “File” menu which is located at the top left corner of the window. Now click on the “Open” option to open an image.
Step # 2 – Select an Image
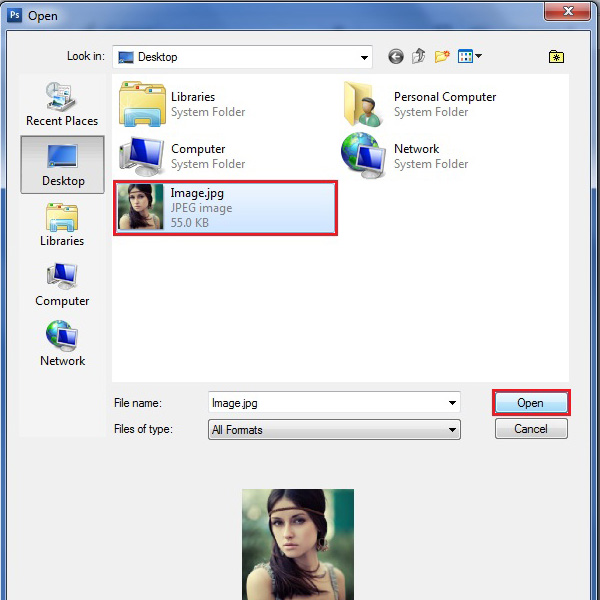
Now in the browsing window, select the image which you want to convert into a sketch. After selecting the image, click on the “Open” button to open it on the Photoshop work space.
Step # 3 – Duplicate the Layer
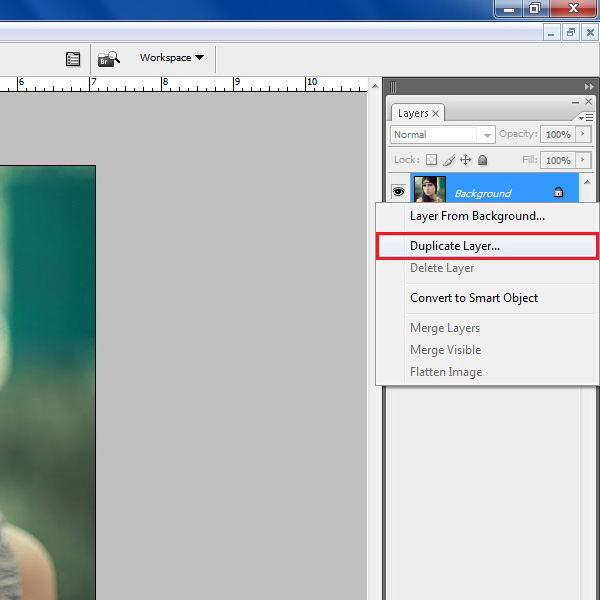
Right click on the image name in the layer’s panel which is available in the right corner of the screen. Select the “Duplicate layer” option from the menu to create a copy of the layer.
Step # 4 – Change Layer’s Name
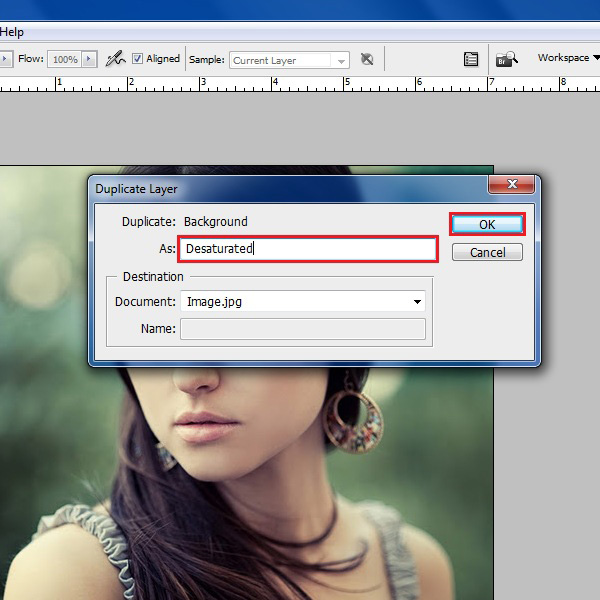
Rename the new layer to “Desaturated”. It is recommended to use such names of specific layers to define certain effects more clearly. Click on the “OK” button to proceed.
Step # 5 – Desaturate the Image
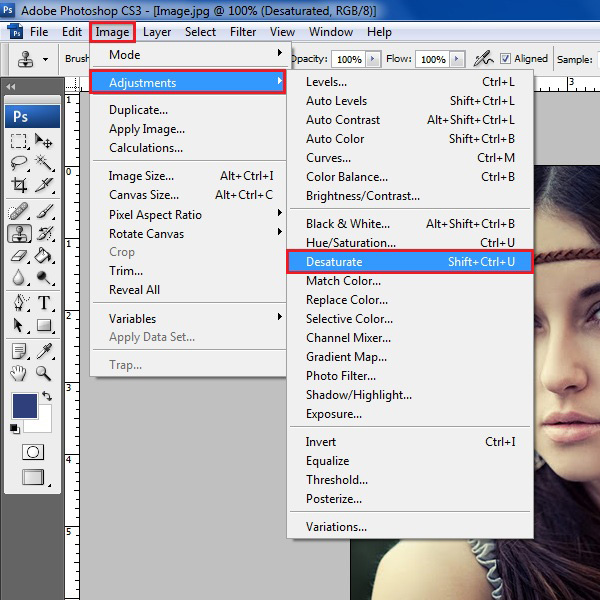
Now go to the “Image” menu and select the “Adjustments” option from the list. Now click on the “Desaturate” option from the menu to desaturate the image.
Step # 6 – Duplicate the Layer
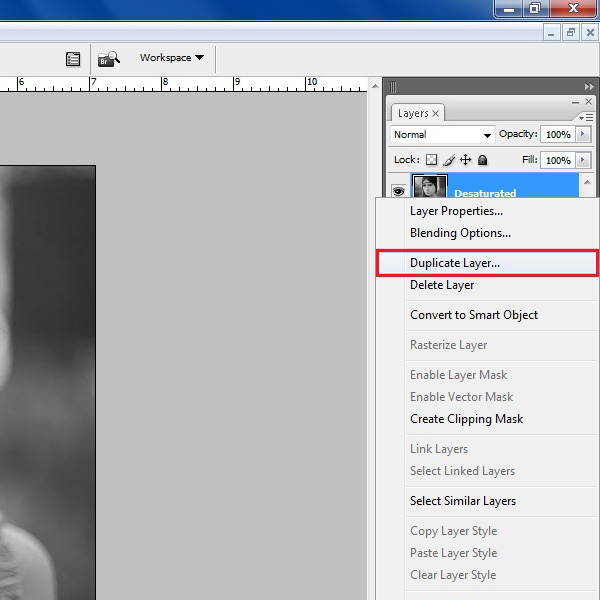
Once the image is desaturated, right click on its name on the layer’s panel. Select the “Duplicate Layer” option from the menu to create another copy of this image.
Step # 7 – Change Layer’s Name
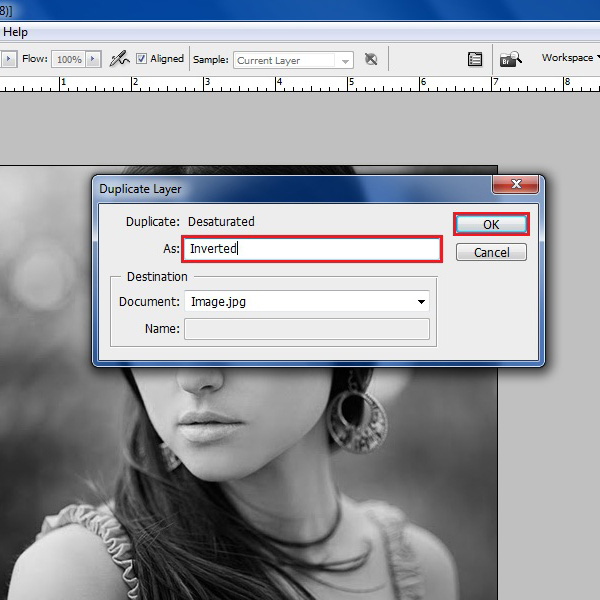
Enter the name of the duplicate layer to “Inverted” and click on the “OK” button to proceed.
Step # 8 – Invert the Image
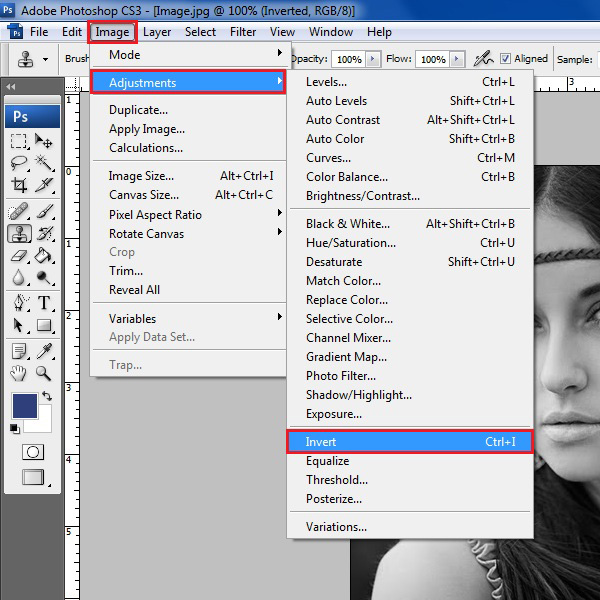
In this layer, go to the “Image” menu and select the “Adjustments” option from the list. Now select the “Invert” option from the menu.
Step # 9 – Change its Blending Mode
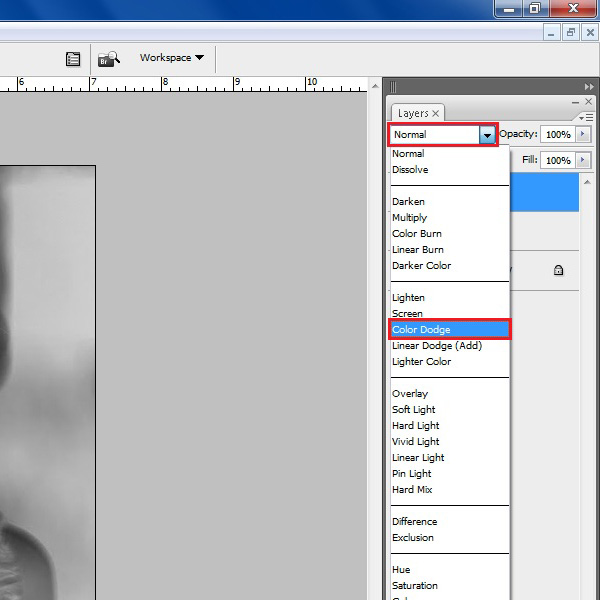
Once the image is inverted, click on the Blending option and change the layer’s blending mode to “Color Dodge” from the drop down menu.
Step # 10 – Apply a Gaussian Blur
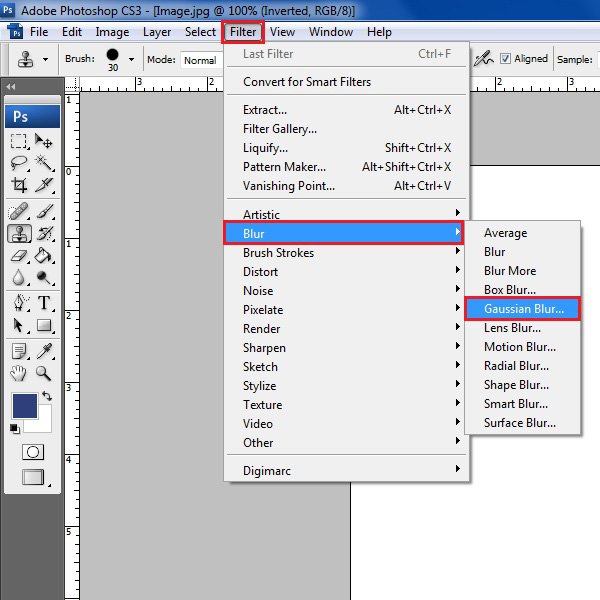
Now move over to the “Filter” menu and select the “Blur” filter from the list. Click on the “Gaussian” blur filter from the menu.
Step # 11 – Adjust the Blur Radius
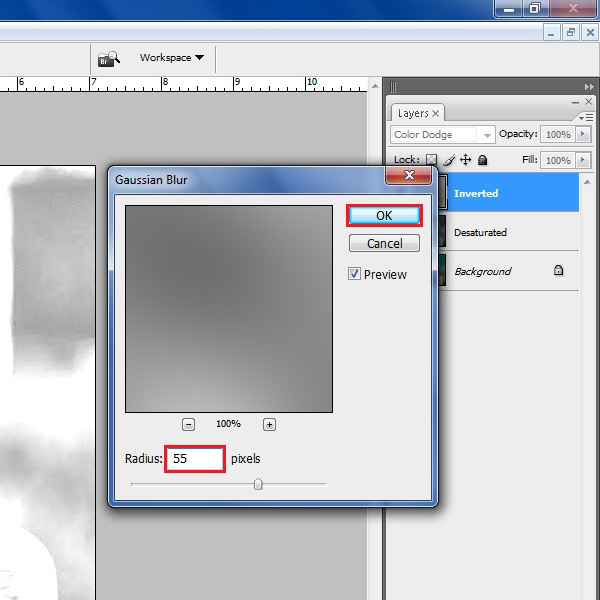
A new window will open in front of your screen in which you can see the Gaussian Blur options and settings. Choose the “Radius” to “55 pixels” and click on the “OK” button to apply the filter on the image.
Step # 12 – Merge all Layers in a New Layer
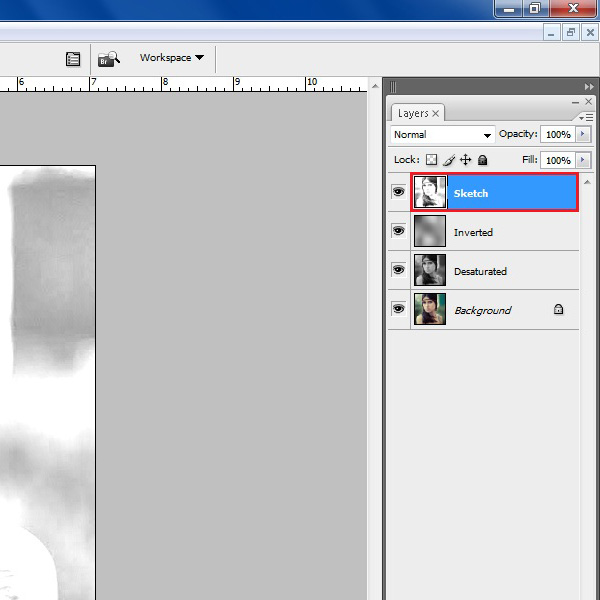
Now you have to merge all the effects in a single layer. In order to merge them, press “CTRL + SHIFT + ALT + E” keys on the keyboard. This will create a new layer in which all effects are merged together. Change the name of this layer to “Sketch”.
Step # 13 – Add a new Layer
Insert a new layer by clicking on the “Create New Layer” button which is located on the bottom left corner of the screen. After inserting it, change its name to “White background”.
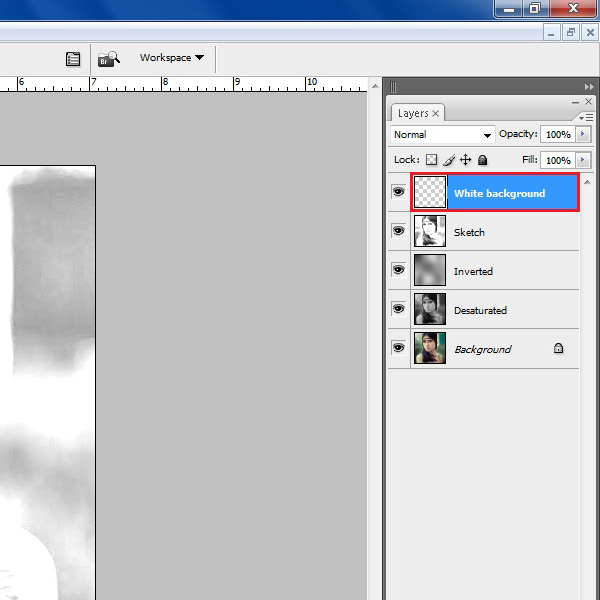
Step # 14 – Fill the Layer
Click on the “Paint Bucket” tool from the menu and select the “White” color. Use the paint bucket tool to apply the white color on this newly created layer.
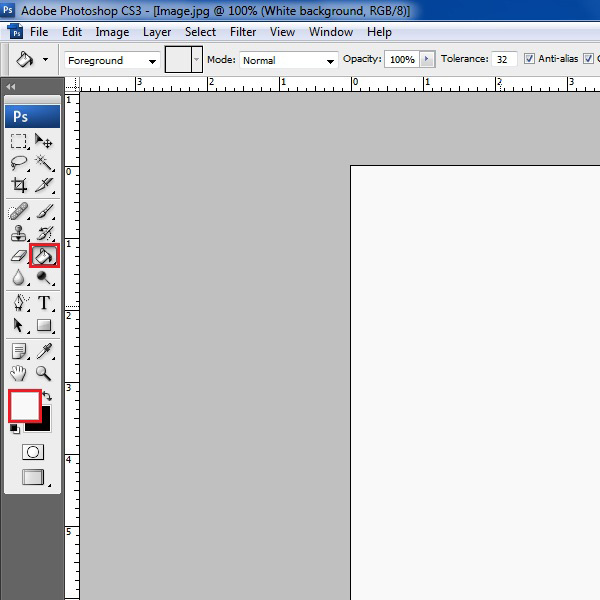
Step # 15 – Apply Final Effects
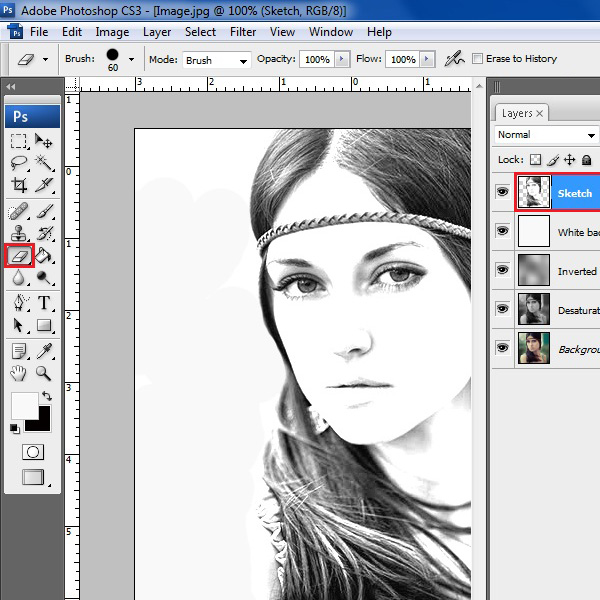
Now click on the “Sketch” layer and move it on top of the “White background” layer. Select the “Eraser” tool from the menu and remove the grey patches around the image.
Once all the steps are successfully followed, the image will look like a sketch as it is shown in the screenshot below.
 Home
Home