Learning how to photoshop red eye correction is a valuable skill as red eye is a common problem for when taking portrait photographs.
Step # 1 – Selecting the Red Eye Tool
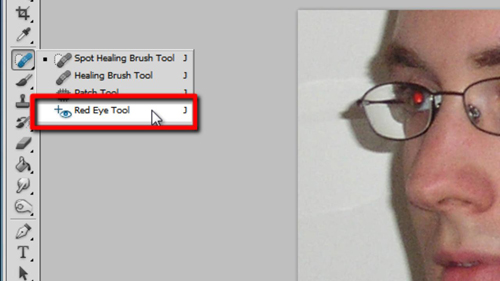
Photoshop CS5 makes it very easy to remove red eye from any photographs. They have introduced a specific tool just for this purpose. Open the photograph with the red eye that you want to correct and locate the icon in the toolbar on the left that looks like a plaster. Click and hold on this icon and in the menu that appears move the mouse over the “Red Eye Tool” option and release the click.

Step # 2 – Using the Red Eye Tool
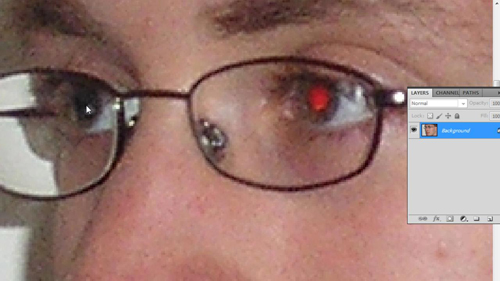
Now that you have selected the tool it is easy to use it. Zoom in on the eyes so that you are clearly able to see where the center of the red circle is. Now, move the cross of the red eye tool onto the center of the circle and click. The effect should be instant and the red eye will be successfully removed. Do this again for the second eye and then zoom out to make sure that you have got a good result – as you can see here, we have. That is the simple process for learning how to photoshop red eye correction.

 Home
Home