In this video tutorial we will show you how to overlay someone’s head on to another body with Adobe Photoshop.
In order to overlay someone’s head on to another body with Adobe Photoshop you have to launch the program. Go to the “File” menu and choose “Open” option. In the appeared window select the images you want to edit holding the “Ctrl” key on the keyboard, then press “Open”. Switch to the one from the images, then double click on the “Lock” icon in the “Layers” palette to unlock the layer.
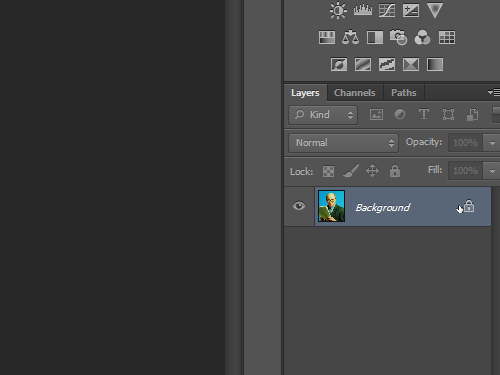
In the pop up window click “OK” to confirm this action.
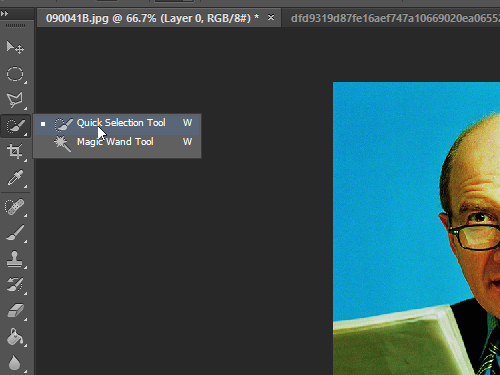
Choose the “Quick Selection Tool” in the toolbar of the program and select the area that you need, then press “Delete” on the keyboard to remove it.
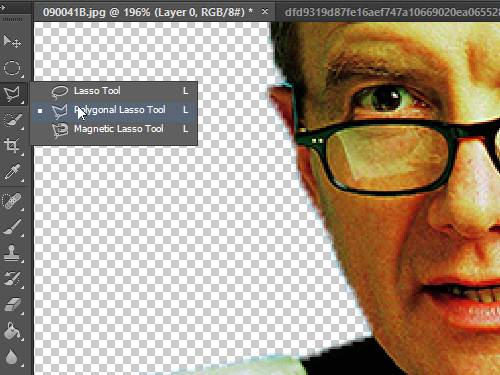
Apply this actions to another area, then choose the “Zoom Tool” and zoom in the image. Choose the “Polygonal Lasso Tool” and select the head, then press key combination “Ctrl+C” to copy the selected head to the clipboard.
Switch to the another image and insert the head in the image area using the keyboard shortcut “Ctrl+V”. Switch to the “Move Tool” and place the head where you need, then go to the “Edit” menu and choose the “Free Transform” option from the drop down menu.
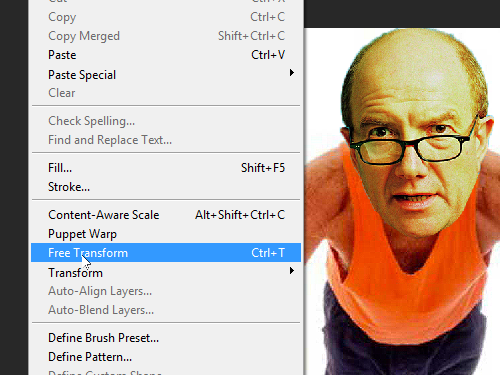
Drag the corner point of the image and move holding the left mouse button to resize it. Place the head as you need and double click on it to apply the transformation. Switch to the another layer in the “Layers” palette, then choose the “Clone Stamp” in the toolbar. Click on the layer, holding “Alt” key to select the sample of the texture and hide all image areas outside the head. Switch to the layer that contains the head, then open the “Image” menu and choose “Adjustments”.
In the submenu choose the “Curves” option.
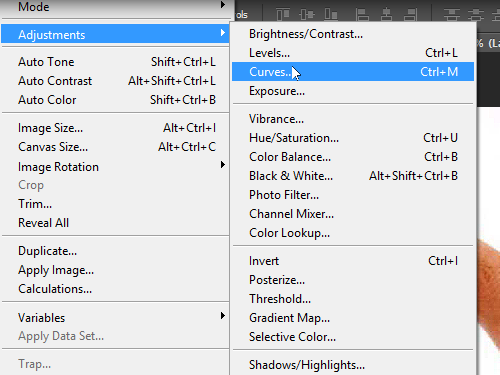
In the appeared window adjust the image channels as you need, then press “OK”.
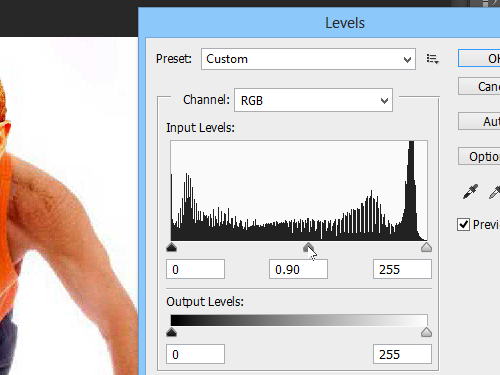
Go to the “Image” menu, choose “Adjustments”, then choose “Levels”. In the appeared window correct the image brightness with the slider, then press “OK”. Click on the “Lock transparent pixels” icon in the “Layers” palette and clear all artifacts from the head with “Clone Stamp”.
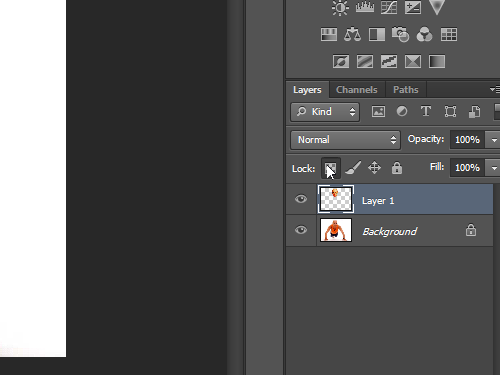
Now the head has been successfully overlayed on to another body with Adobe Photoshop.
 Home
Home