In this tutorial, we will be showing you how to add texture in Photoshop.
If you had been using Photoshop CS5 for a long time you will be a little confused as to where the ‘Texture’ Filter vanished. All of the filters in the Photoshop CS6 version are present in the ‘Filter Gallery’.
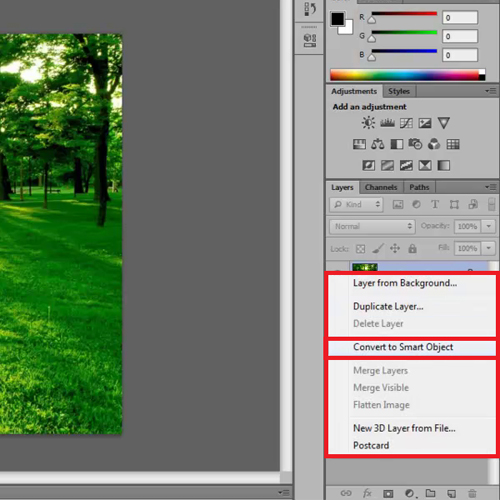
Step # 1 – Convert layer to ‘Smart Object’
To add texture to this image, first convert the layer to a ‘Smart Object Layer’ by right clicking on the it and selecting the ‘Convert to Smart Object’ option.
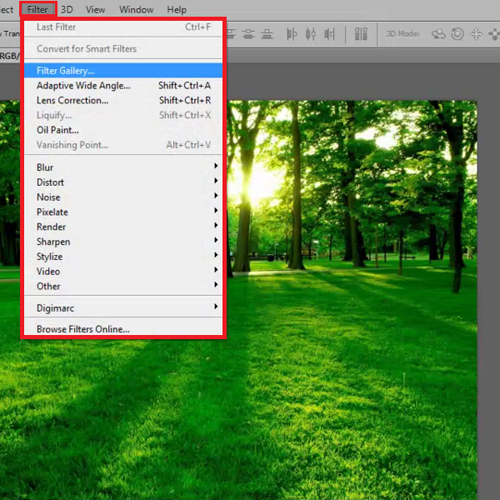
Step # 2 – Select the ‘Filter Gallery’ option
Then go to the ‘Filter Menu’ at the top of the page and click on the ‘Filter Gallery’ option.
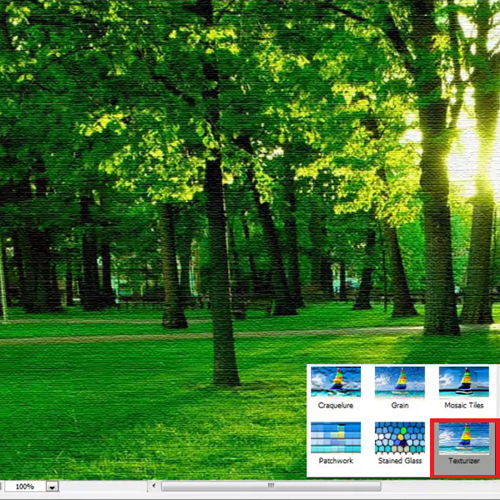
Step # 3 – Choose from the ‘Texture’ options
Once you click on ‘Texture’ you will be given six preset textures that you can choose from. Select the one you wish to apply.
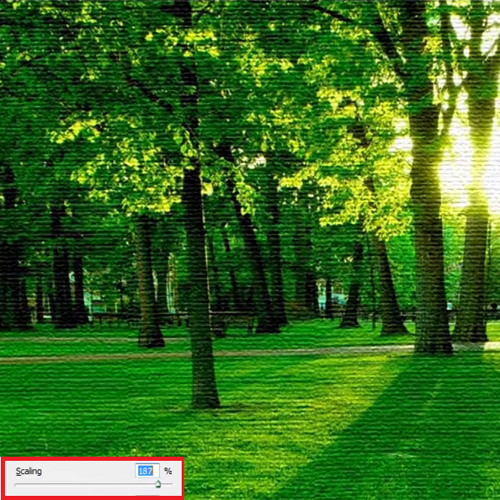
Step # 4 – Alter the ‘Scaling’ Value
From the ‘Texture’ options select ‘Texturizer’. If you increase or decrease the scaling you are actually increasing or decreasing the size of the lines of the texture in Photoshop CS6.
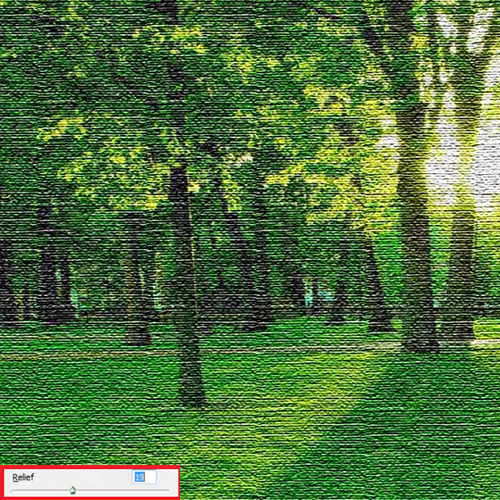
Step # 5 – Alter the ‘Relief’ value
The ‘Relief’ slider handles the depth of the texture. So if you increase it, you will be increasing the depth of the texture which is normally not preferable so keep it at a minimum value.
Step # 6 – Alter the light source
The light source has been set to ‘Top’ by default. You can go ahead and change it to ‘Bottom Left’. Once you have selected it press ‘Ok’.
And that is how to add texture to an image in Photoshop CS6.
