Sepia effect is one of the most fascinating effect in photographs. Photos in Sepia gives you the vintage effect. By using Adobe Photoshop, you can give effects to your photos through various editing tools. Follow the following step by step guide to learn how to apply Sepia effect on selected parts of the picture in Photoshop.
Step # 1 – Go to the File Menu
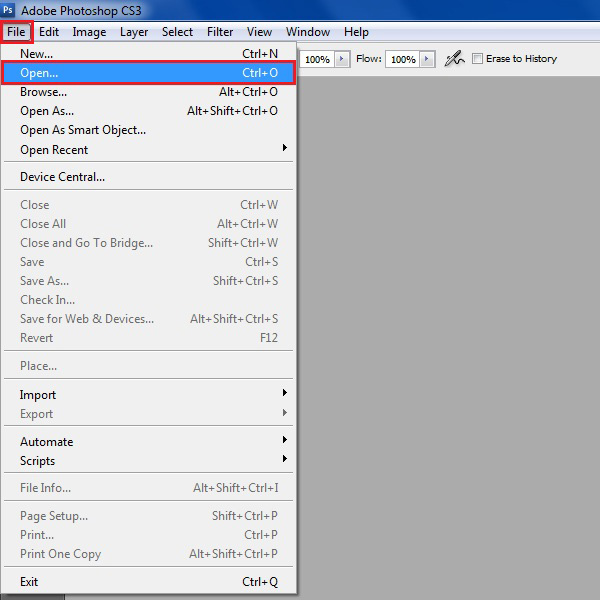
Open Adobe Photoshop and move your cursor to the “File” menu which is located at the top left corner of the screen. Now click the “Open” button from the list.
Step # 2 – Open an Image
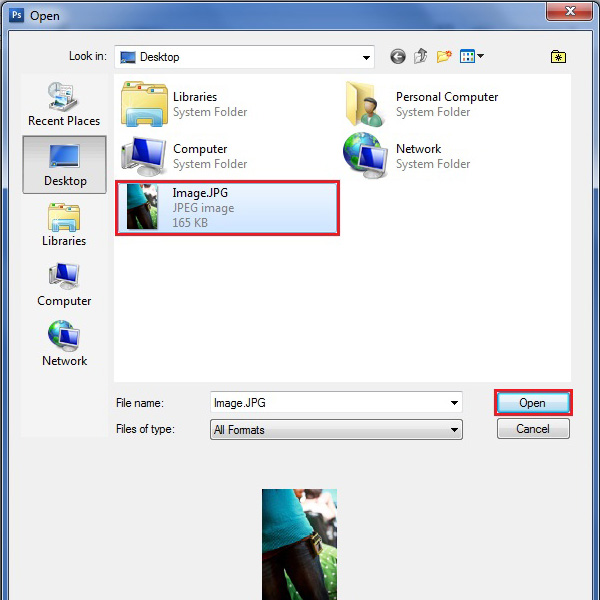
Once you open the browsing window, you can select you required image from the menu. Now click the “Open” button to load the selected image on the Photoshop work space.
Step # 3 – Make the Selection
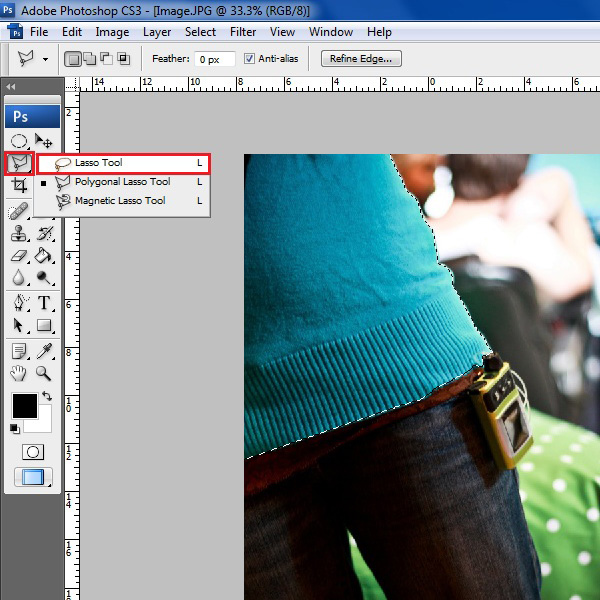
Select the “Lasso” tool from the menu which is available on the left corner of the screen. Now select the required part of the image which you do not want to change. You can use multiple selection tools from the menu depending on the type of area you want to select.
Step # 4 – Inverse the Selection
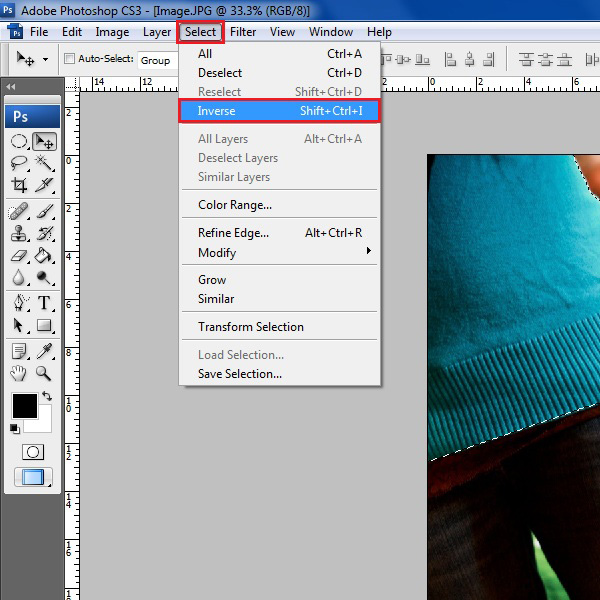
Now go to the “Select” menu which is available on the top left corner of the Photoshop window and click on the “Inverse” option from the list. This option will reverse the selection mode and select the whole picture except the originally selected area of the image.
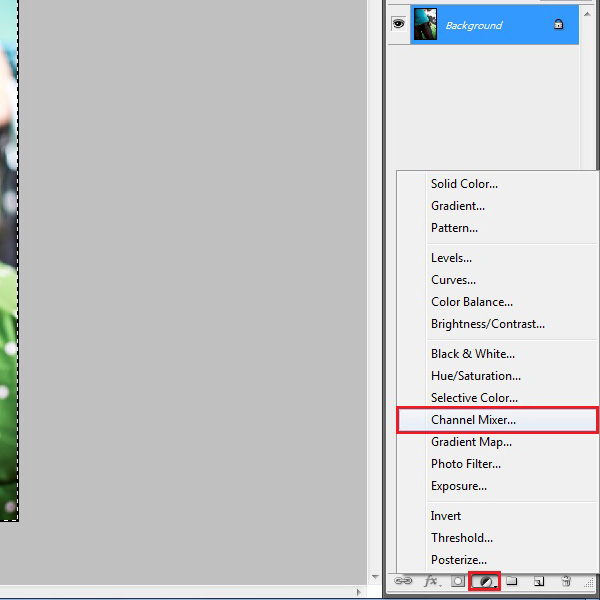
Step # 5 – Open the Channel Mixer
Once the image is selected, click on the “Adjustment layer” button which is located at the bottom right corner of the screen. Now select the “Channel Mixer” option from the menu.
Step # 6 – Change the Amount of Colors
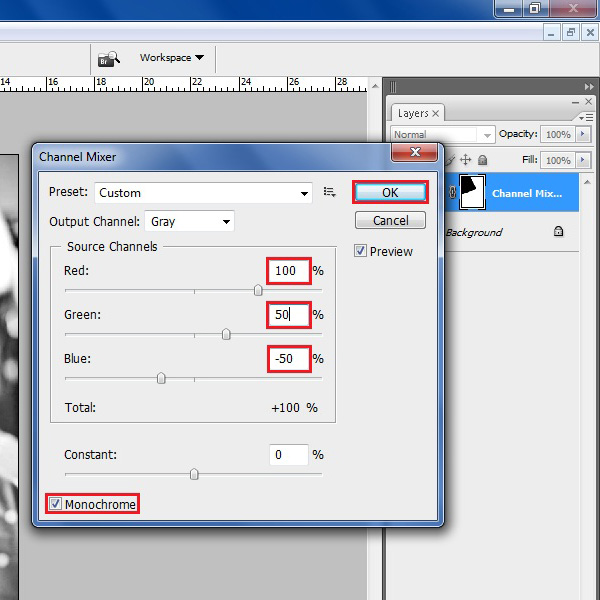
A new window will open in front of your screen which is labeled as the “Channel Mixer”. Now enable the “Monochromic” option which is available at the bottom of the window and change the amount of “Red” to “100%”, “Green” to “50%” and “Blue” to “-50%”. Click on the “OK” button to apply these changes on the image.
Step # 7 – Open the Color Balance Panel
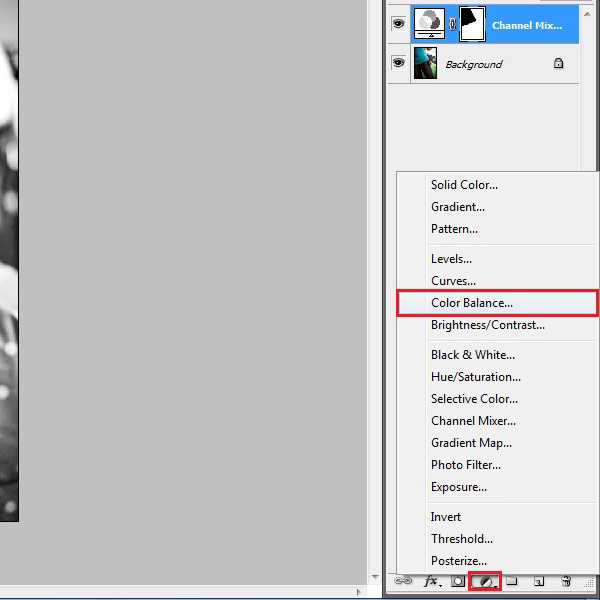
After adjusting the basic colors, click again on the “Adjustment Layer” button. Now select the “Color Balance” option from the menu to open the panel for adjusting advanced colors.
Step # 8 – Adjustment of the Advance Colors
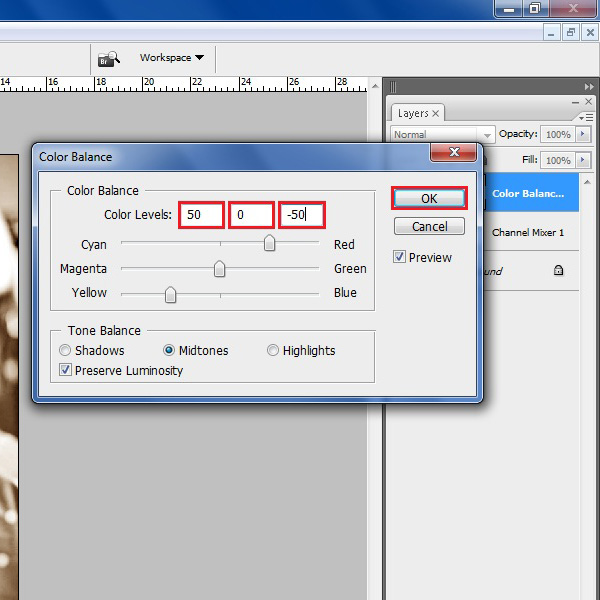
A new window will open in front of your screen which is labeled as the “Color Balance” panel. In this panel, adjust the slider of “Cyan-Red” to “50”, “Magenta-Green” to “0” and “Yellow-Blue” to “-50”. After completing this, click on the “OK” button to apply the sepia effect on the image.
 Home
Home