Adobe Photoshop is one of the best applications for the purpose of editing images. You can modify or adjust images by using variety of Photoshop tools and features. There are also many Photoshop effects and filters available through which you can distinctly change any image. Here in this tutorial you will learn how to blend two images in Photoshop.
Step # 1 – Go to the File Menu
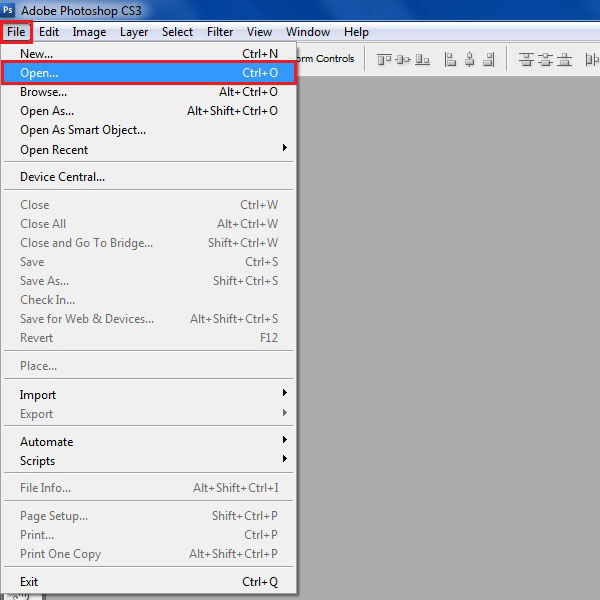
Open Adobe Photoshop and go to the “File” menu, located at the top left corner of the screen. Click on it and select the “Open” option from the list.
Step # 2 – Select the Monitor’s Image
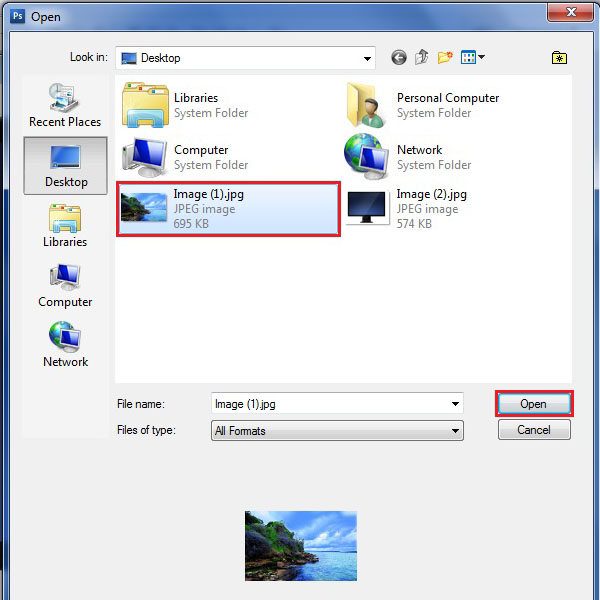
When the browsing window opens, select the image of an LCD Monitor and click on the “Open” button to load this image on the Photoshop working panel.

Step # 3 – Go to File Menu
Click on the “File” menu again and select the “Open” option to now load a different image.

Step # 4 – Select a Scenery Image
In the browsing window, search for an image which would blend well with the LCD Monitor image selected earlier. Here we select an image of a beautiful scenery and click on the “Open” button to load it.
Step # 5 – Drag the Scenery on the LCD Monitor
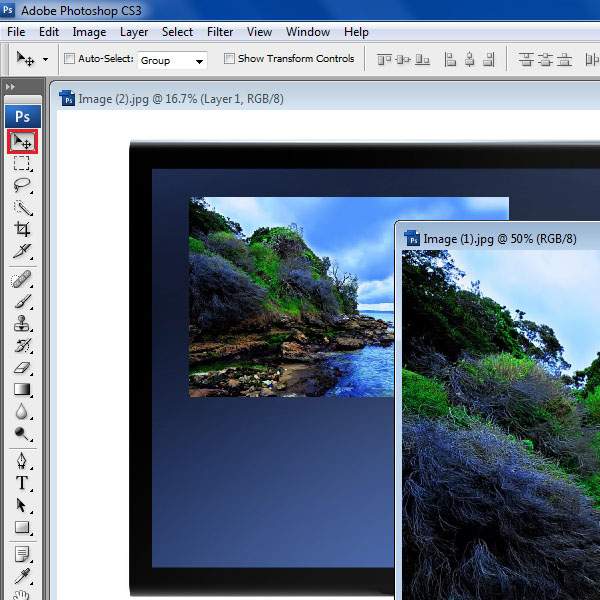
Once both images are opened, click on the scenery and drag it over the image of the LCD monitor screen. You may now close the scenery window.
Step # 6 – Resize the Scenery Image
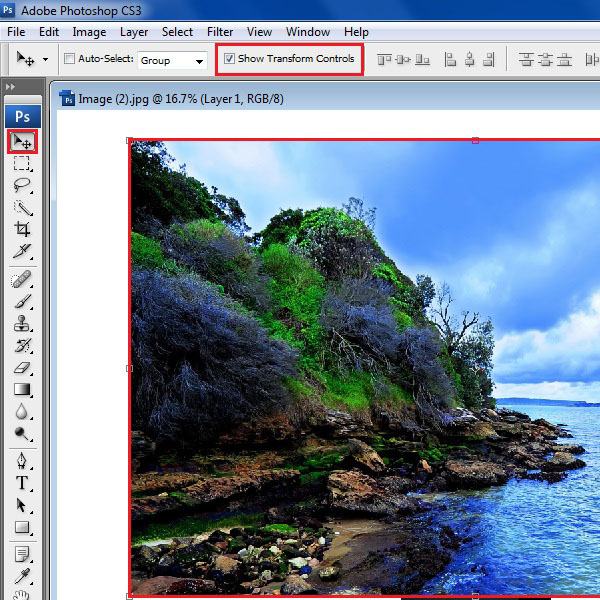
Now as you have both images on a same file with different layers, select the “Move” tool from the menu on the left corner of the window. Enable the “Transform” option and resize the scenery image so that it covers the edges of the LCD screen.
Step # 7 – Disable the Scenery Image
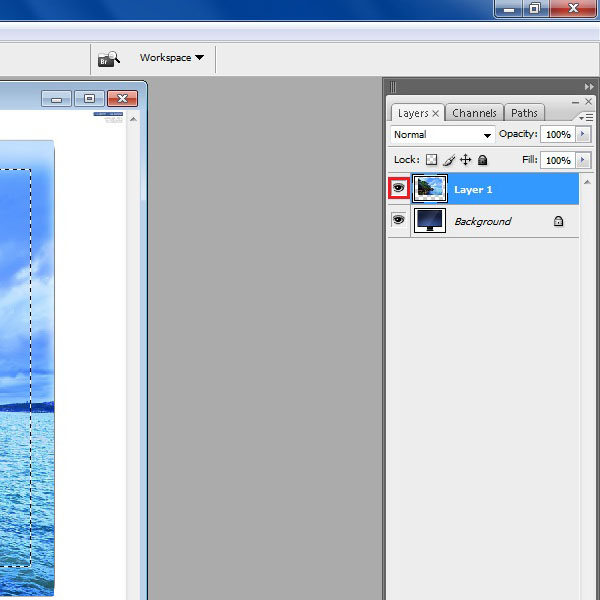
Once the image is resized, click on the visibility icon of the scenery layer and disable it. This will allow you to work easily on the LCD Monitor’s layer.

Step # 8 – Select the Monitor Screen
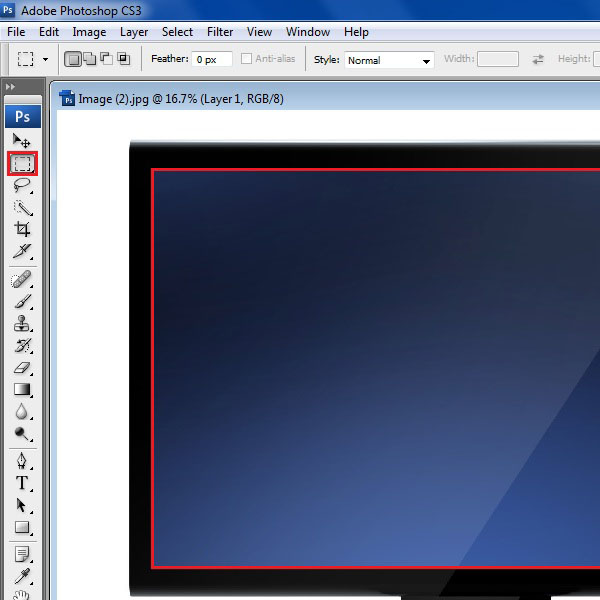
Once the scenery layer is disabled, click the “Rectangular Marquee” tool form the menu and select the LCD monitor screen area carefully.
Step # 9 – Enable the Scenery Layer
Once the screen area is selected, click again on the visibility icon of the scenery layer and enable it. Now you can see that the selection marking will appear over the scenery image.
Step # 10 – Inverse the Selection
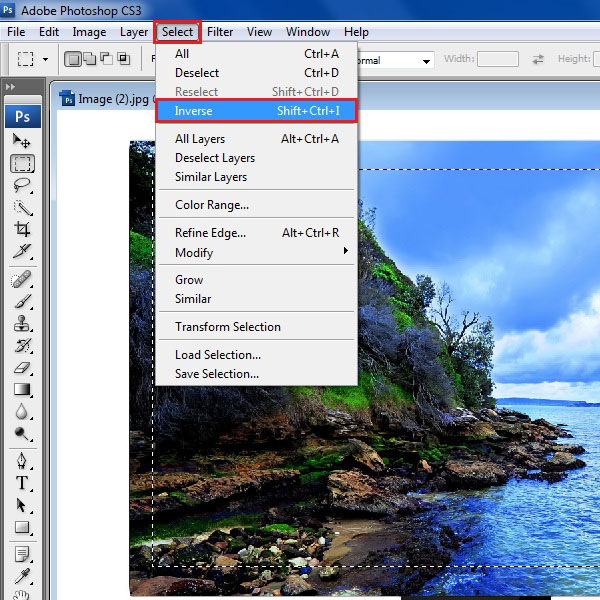
Now move over to the “Select” menu on top of the window. Click on the “Inverse” option from the list to inverse the selection. This will select the corners of the scenery image which are outside of the LCD screen area.
Step # 11 – Remove the Edges
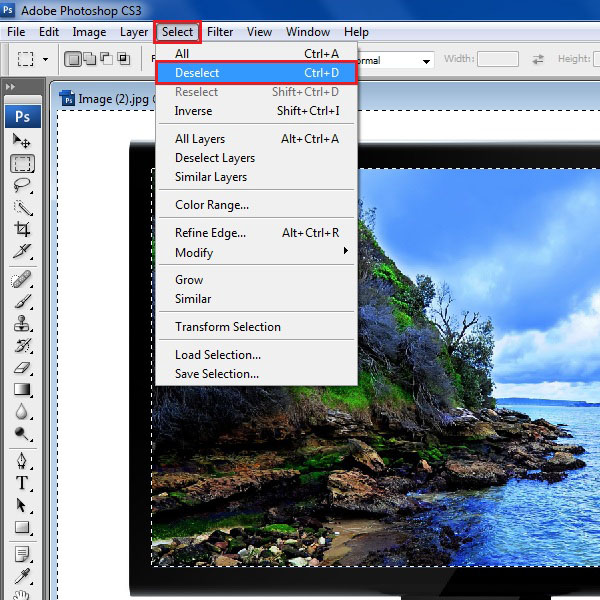
Once the corners of the scenery image are selected, press the “Delete” button from the keyboard to remove them. Now go to the “Select” menu on top of the window and click on the “Deselect” option to remove the selection markings and clear the image.
Step # 12 – Apply the Overlay Blending
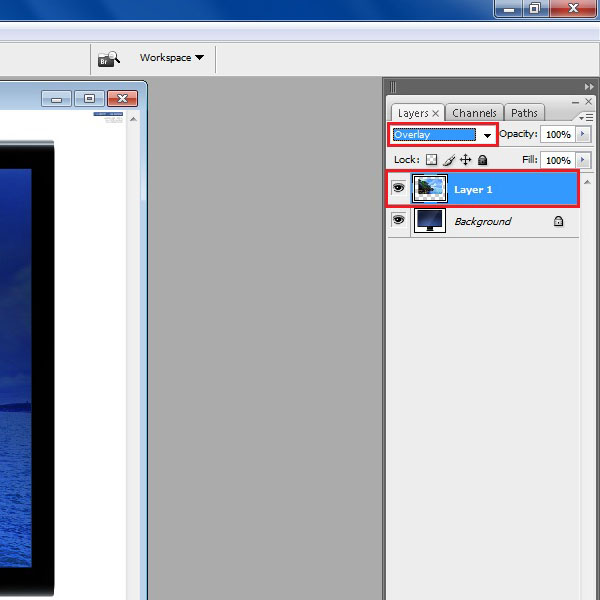
In the final step, select the scenery layer and move over to the “Blending Mode” which is available on top of the layers panel. Select the “Overlay” mode from the list and apply it.
 Home
Home