A Lighting Effect is one of the most attractive effects in digital photography. It has the ability to completely change the dimension of an image and make it eye-catching. We can also use various colors as well to add a colored lighting effect on your images. In this tutorial you will learn to create a lighting glow effects in Photoshop by using a very simple technique.
Step # 1 – Go to the File Menu
In the first step, go to the “File” menu which is located at the top left corner of the screen. Click on it and select the “Open” option from the menu.
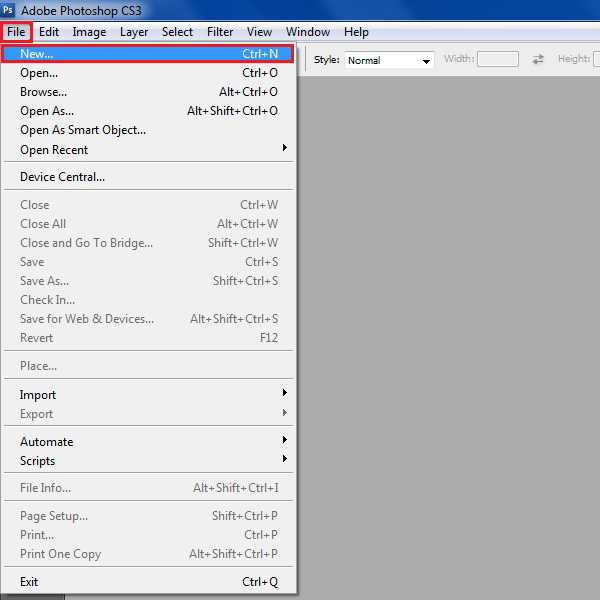
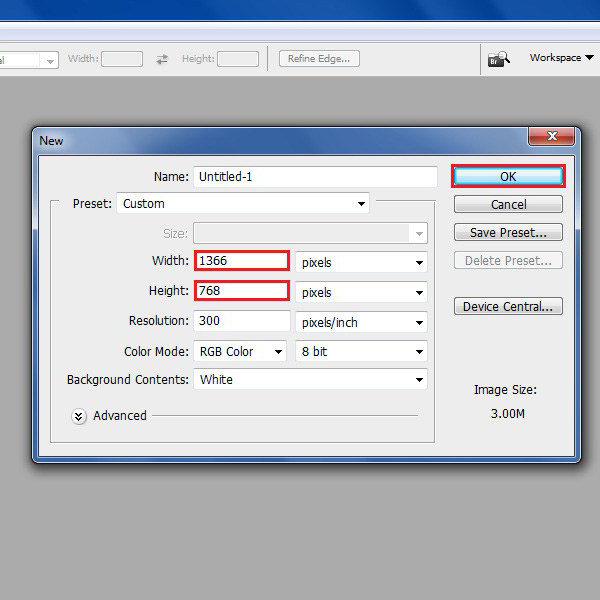
Step # 2 – Open a New Document
Choose the document’s width as “1366 pixels” and height as “768 pixels”. Now click on the “OK” button to proceed.
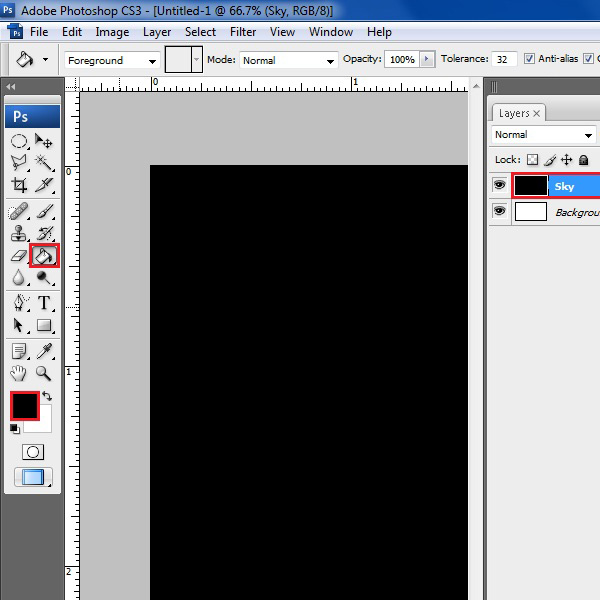
Step # 3 – Create a Sky Layer
Now make a duplicate of the background layer and change its name to “Sky”. Use the “Paint Bucket” tool from the menu to fill this layer with “Black” color.
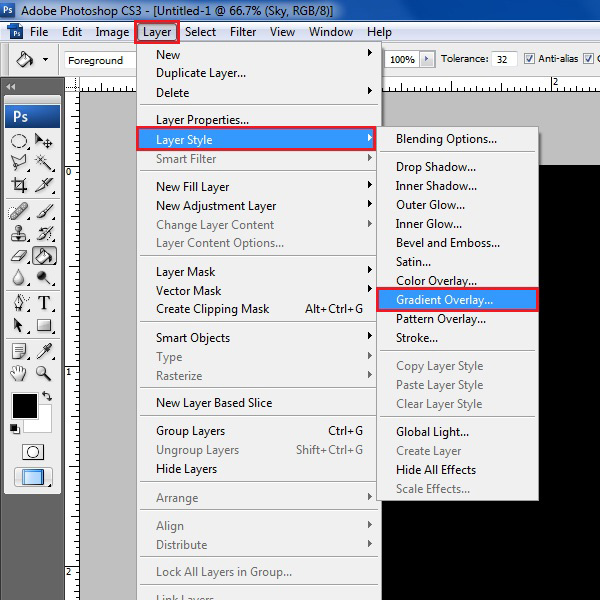
Step # 4 – Open the Gradient Overlay Panel
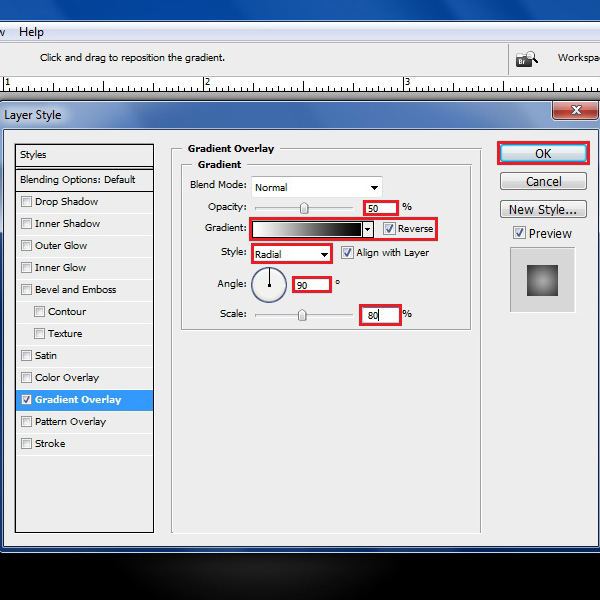
Go to the “Layer” menu and select the “Layer Style” option from the list. Now click on the “Gradient Overlay” option from the menu to open it.
Step # 5 – Adjust the Gradient Settings
In this window, decrease the “Opacity” to “50%” and select the “Reverse” option of the “Gradient” to make it “White and Black”. Now choose a “Radial” style with “90 degrees” of the “Angle” and change the “Scale” option to “80%”.
Apply these settings by clicking on the “OK” button.
Step # 6 – Create a Colors Layer
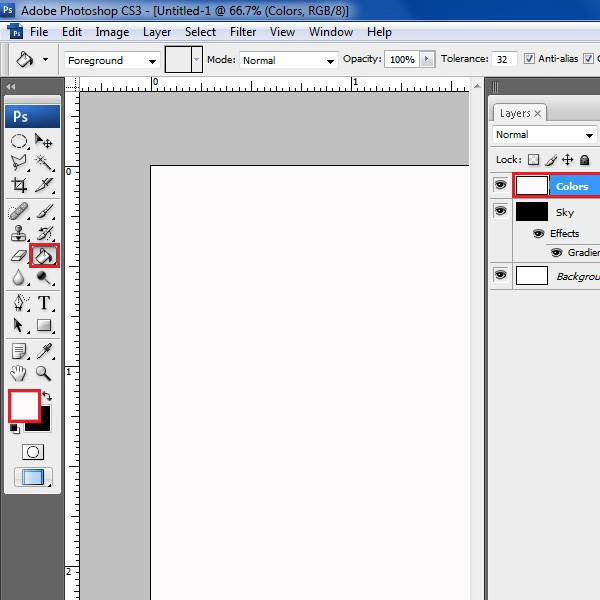
Now add a new layer and rename it to “Colors”. Select the “Paint Bucket” tool from the menu and apply a “White” color on this layer.
Step # 7 – Apply a Lighting Effects Filter
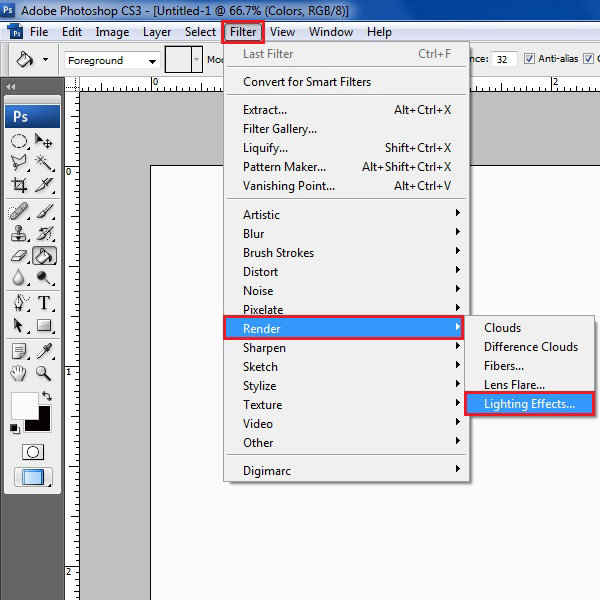
Now go to the “Filter” menu and select the “Render” option from the list. Click on the “Lighting Effects” filter from the menu to apply it on the image.
Step # 8 – Adjust Lighting Effects Settings
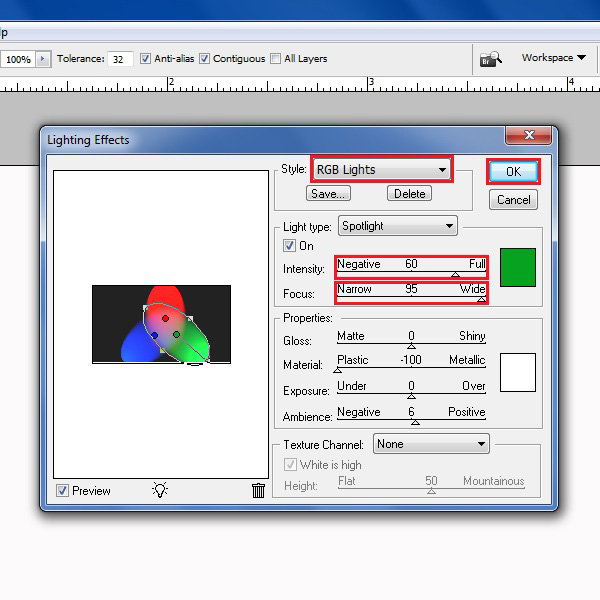
A new window will appear in front of your screen in which you can see various options and settings of the Lighting Filter. Choose the “Style” option to “RGB Lights” mode and select the “Intensity” option to “Negative 60”. Now change the “Focus” option to “Narrow 95”.
Leave rest of the options as it is and click on the “OK” button to apply the filter on the layer.
Step # 9 – Apply a Gaussian Blur
Now go to the “Filter” menu and select the “Blur” option from the list. Click on the “Gaussian Blur” filter from the menu to apply it on the layer.
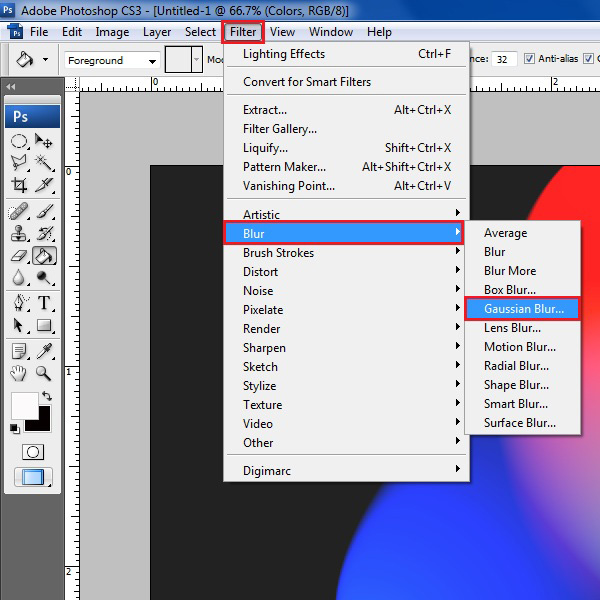
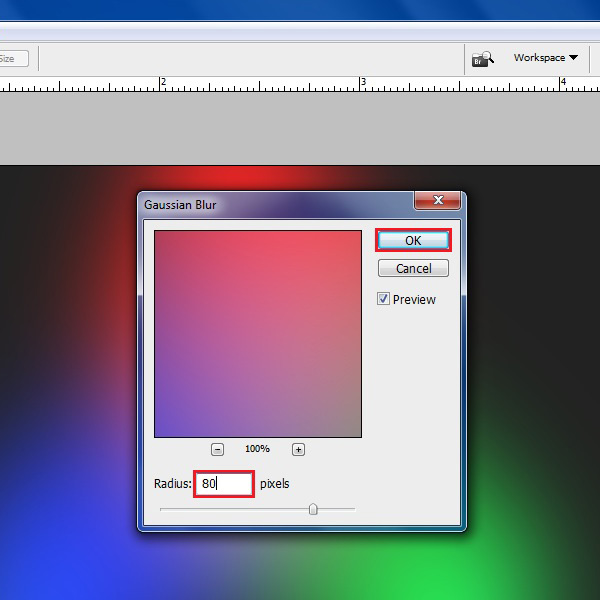
Step # 10 – Choose the Blur Settings
In the Gaussian Blur settings panel, choose the “Radius” to “80 pixels” and click on the “OK” button to apply this filter.
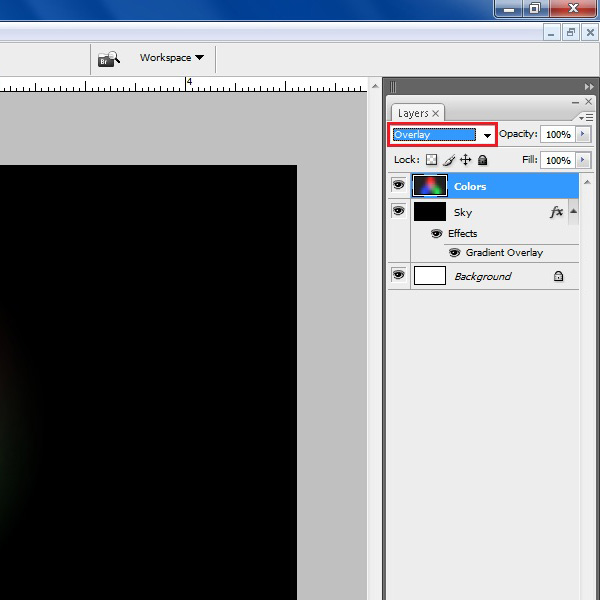
Step # 11 – Change the Blending Mode
Now change the blending mode of this layer to “Overlay” from the blending menu.
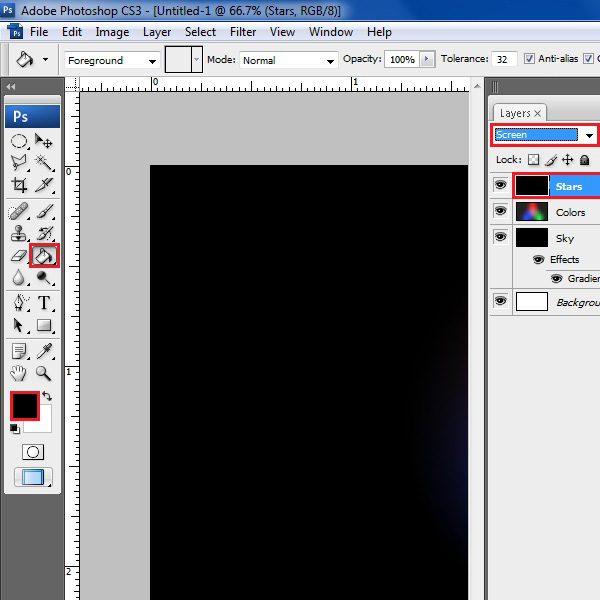
Step # 12 – Create a Stars Layer
Add a new layer and change its name to “Stars”. Now fill this layer with “Black” color by using the “Paint Bucket” tool from the menu. Change the blending mode of this layer to “Screen”.
Step # 13 – Apply a Noise Filter
Now go to the “Filter” menu and select the “Noise” option from the list. Click on the “Add Noise” filter from the menu to apply it.
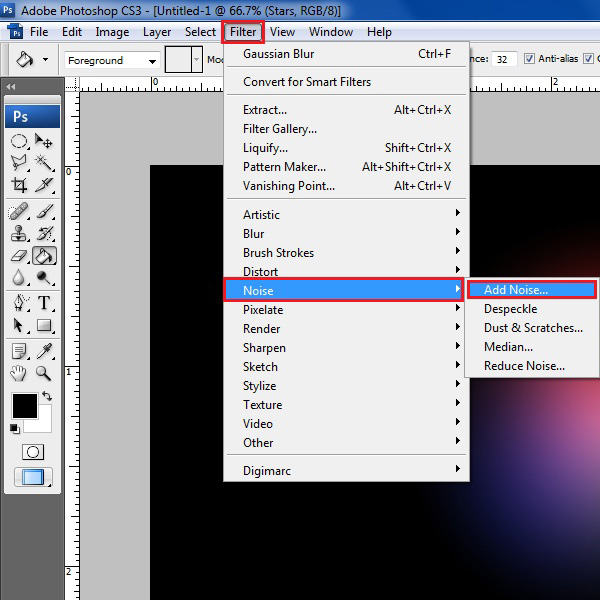
Step # 14 – Adjusting the Noise Amount
In this window, change the “Amount” to “10%” and select both “Gaussian” and “Monochromatic” options. Click on the “OK” button to apply these settings.
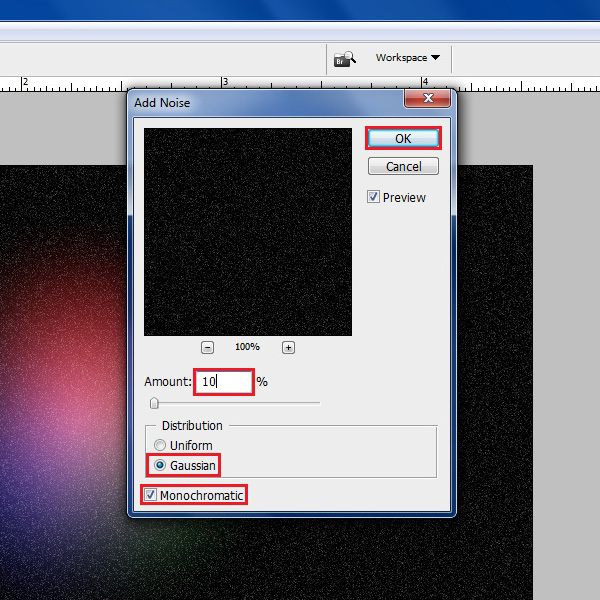
Step # 15 – Go to the Level Settings
Now go to the “Image” menu and select the “Adjustments” option from the list. Select the “Levels” option from the menu and click on it to open.
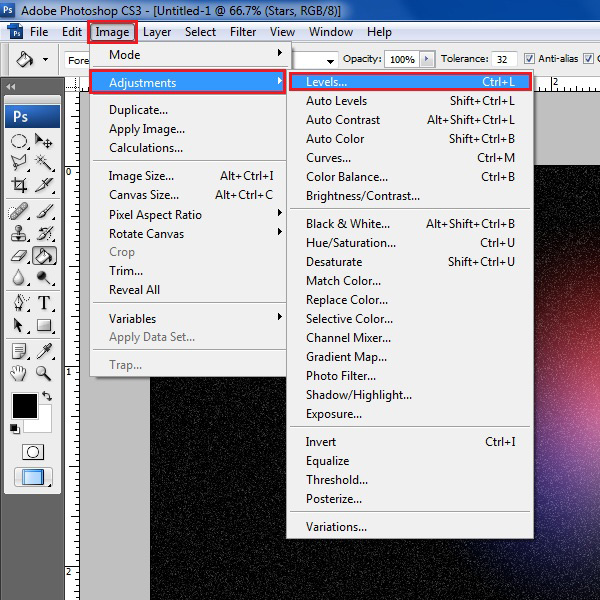
Step # 16 – Adjust its Levels
In this window, enter “65”, “1.00” and “100” values in the Level’s panel and click on the “OK” button to apply it.
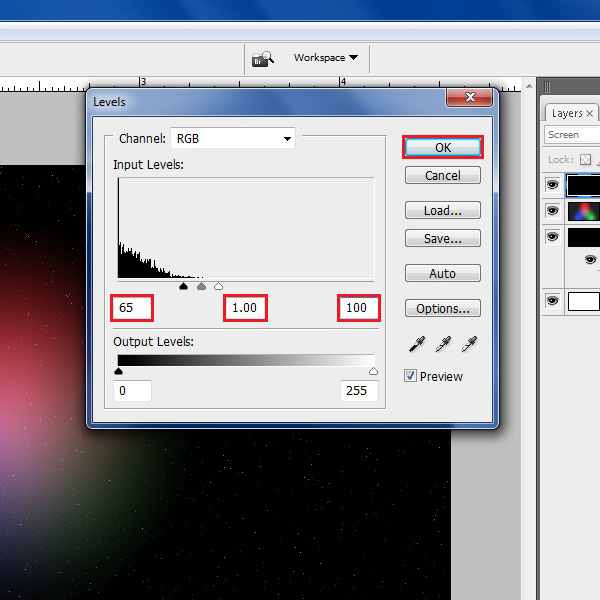
Step # 17 – Apply a Clouds Filter
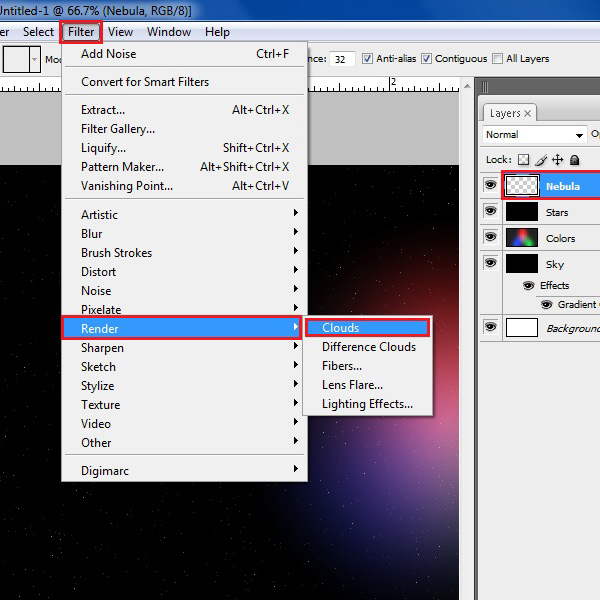
Add a new layer and change its name to “Nebula”. Now go to the “Filter” menu and select the “Render” option from the list. Click on the “Clouds” filter to apply it on the layer.
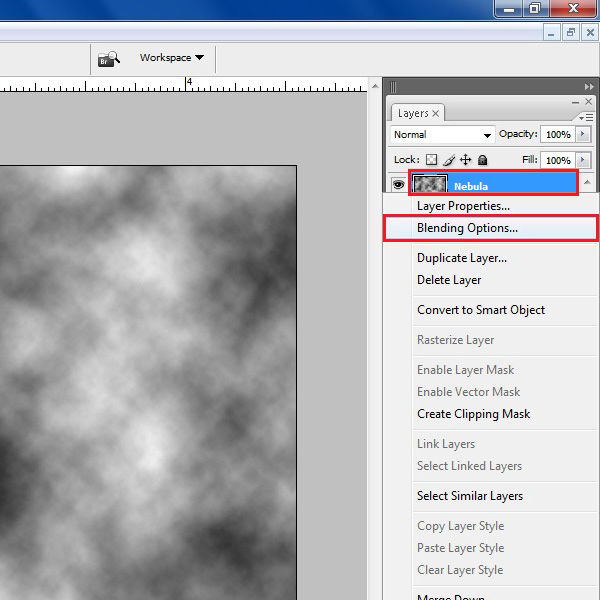
Step # 18 – Open the Blending Options
Go to the layer’s panel and right click on the layer name. Select the “Blending Options” from the menu to make further changes.
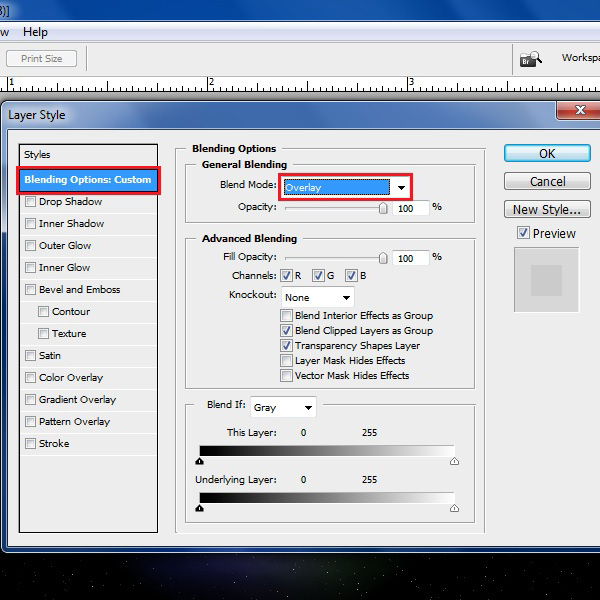
Step # 19 – Adjust the Blending Mode
In the Blending options window, change the blending mode to “Overlay” from the menu.
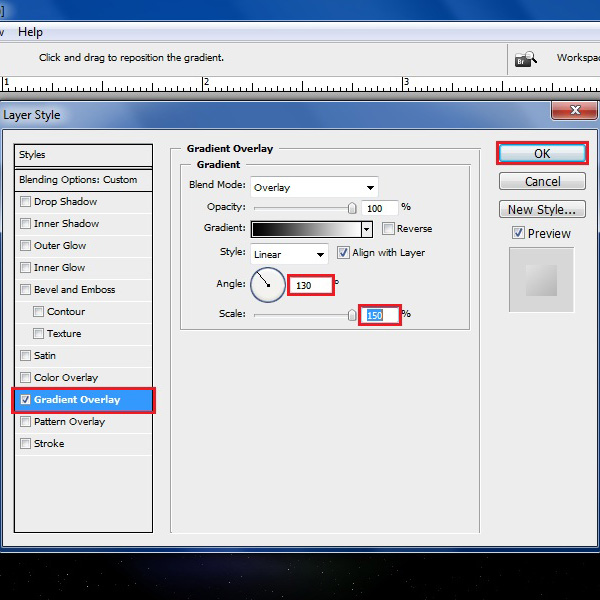
Step # 20 – Adjust the Gradient Mode
Go to the “Gradient Overlay” tab and change its blending mode to “Overlay” as well. Set the “Angle” to “130 degrees” and “Scale” to “150%”. Now click on the “OK” button to apply these settings.
Step # 21 – Create a Flash Layer
Now add a new layer and change its name to “Flash”. Select this new layer and move it on top of the “Sky” layer. Use the “Paint Bucket” tool from the menu to fill it with “Black” color.
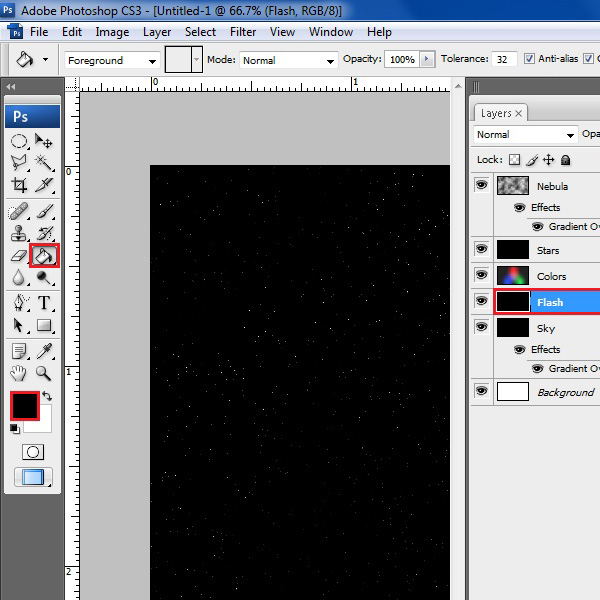
Step # 22 – Apply a Lens Flare Filter
Now go to the “Filter” menu and select the “Render” option from the list. Click on the “Lens Flare” filter to apply it on the layer.
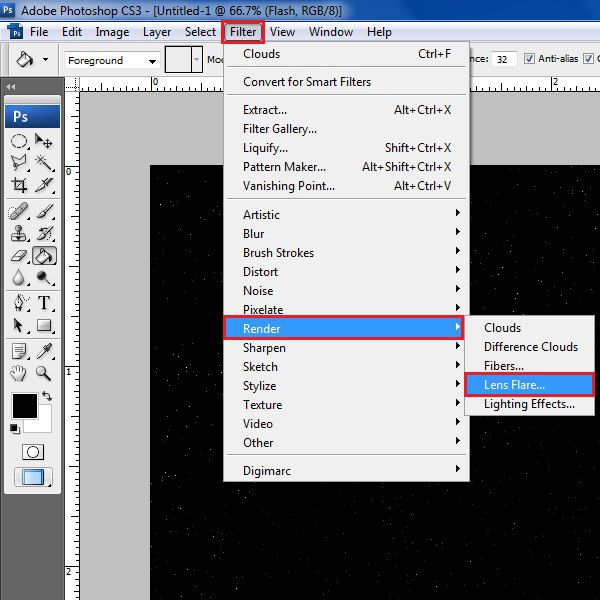
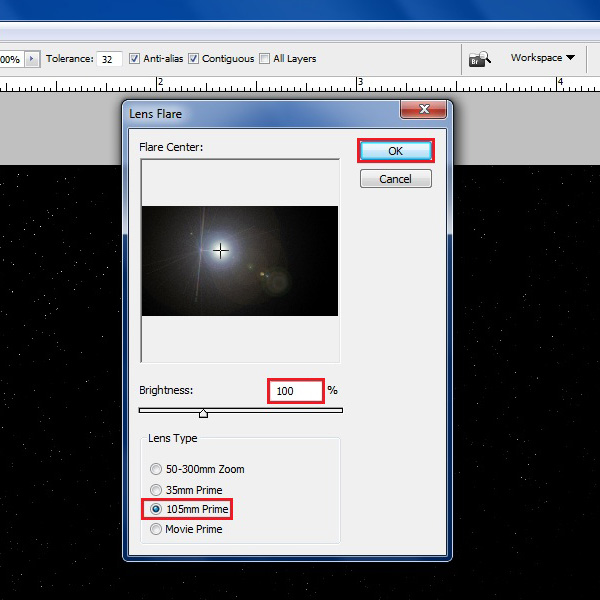
Step # 23 – Adjust the Lens Flare Settings
In this window, change the “Brightness” to “100%” and select the “105mm Prime” option. Now click on the “OK” button to apply this filter on the layer.
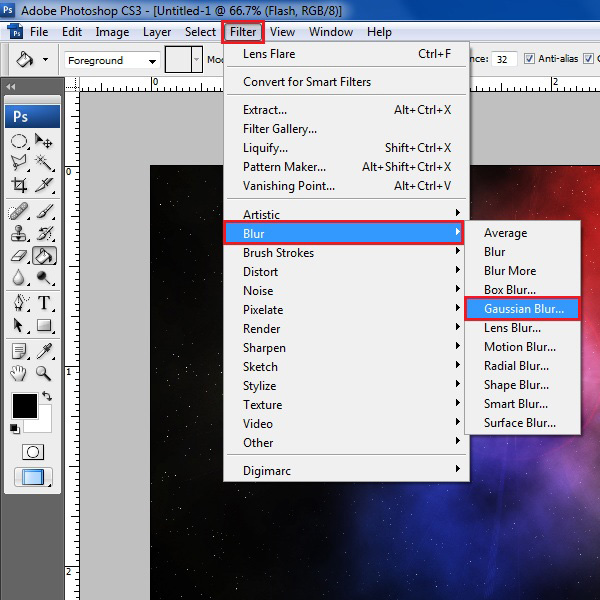
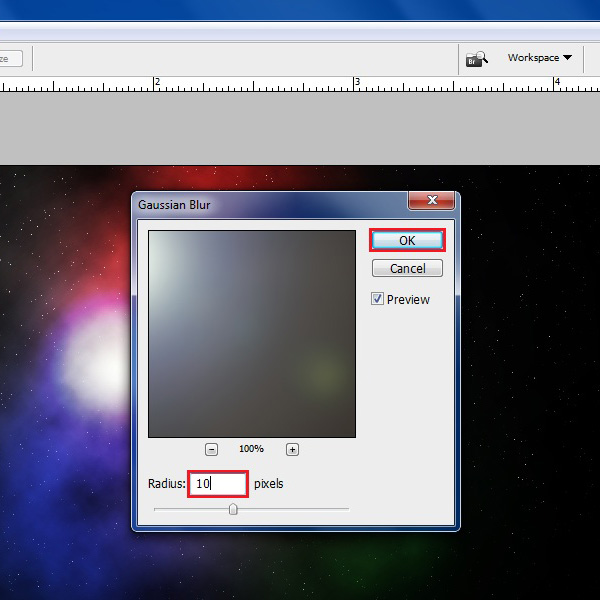
Step # 24 – Apply a Gaussian Blur
Now go to the “Filter” menu and select the “Blur” option from the list. Click on the “Gaussian Blur” filter to apply it on the layer.
Step # 25 – Adjust the Radius
In this window, change “Radius” option to “10 pixels” and click on the “OK” button to apply these settings.
 Home
Home