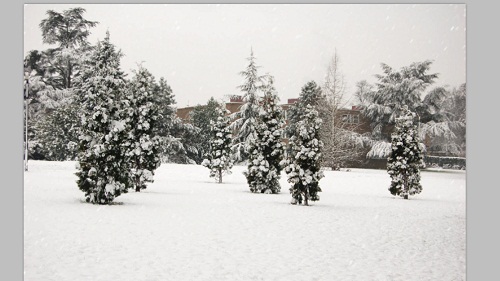
Adding a snow effect to a winter scene can really add something to a photograph. This tutorial will show you show to simulate snow in photoshop.
Step # 1 – Adding a Black Layer
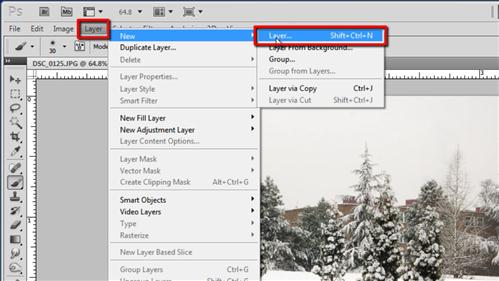
Start Photoshop and make sure that you have your winter scene photograph open. Create a new adjustment layer by clicking “Layer”, “New”, then “Layer” and clicking “OK” in the window that appears. Now press “Shift” and “Backspace” on the keyboard at the same time and in the fill window that appears select “Black” from the dropdown menu and click “OK”.
Step # 2 – Adding Noise
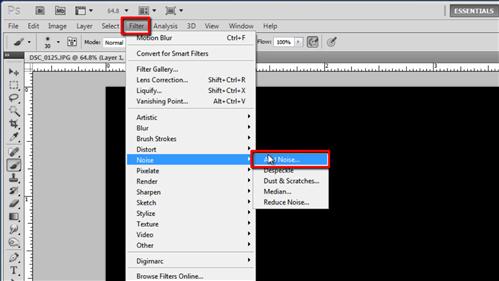
Now click “Filter” in the main menu, navigate to “Noise” and click “Add Noise”. In the window set the amount to “200%”, make sure “Gaussian” is selected and that “Monochromatic” is checked. Click “OK”.
Step # 3 – Adding Blur and Adjusting Levels
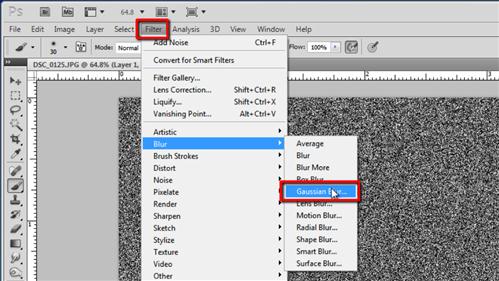
In the main menu click “Filter”, then “Blur”, then “Gaussian Blur”. Set a radius of “2 pixels” and click “OK”. Click “Image” in the menu, navigate to “Adjustments” and click “Levels”. You will see three numbers below the graph, enter (from left to right) “127”, “0.74” and “169”. Click “OK”.
Step # 4 – Making the Snow Visible
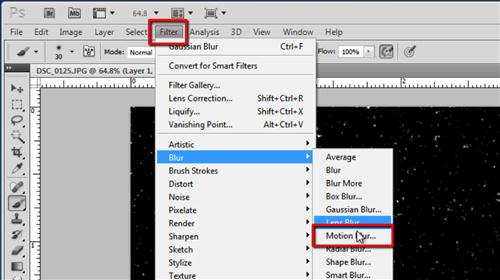
Click “Filter”, go to “Blur”, then click “Motion Blur”. This will simulate the movement of the snow as if there were a little wind. In the “Angle” box enter “53” and in “Distance” enter “10”. Click “OK”. Now, go to the “Layers” menu and in the drop down box that currently reads “Normal” select “Screen”.
Step # 5 – Adding More Snow
It might not look like there is much snow on the photograph, it will depend on how much black there is in your image. Press “Control” and “J” on the keyboard to duplicate the snow layer. Each time we do this more snow will appear, here we are pressing it several times before the snow looks really good and that is how to create snow in photoshop.
 Home
Home